Is Making Clay Sculptures Hard?
Clay sculpture is the art of molding and shaping clay to create three-dimensional works of art. The process involves gathering clay and sculpting tools, preparing the clay, sculpting shapes and forms, adding textures and details, drying the finished piece, and finally coloring and finishing the sculpture. While challenging at times, creating clay sculptures can be an extremely rewarding and satisfying art form.
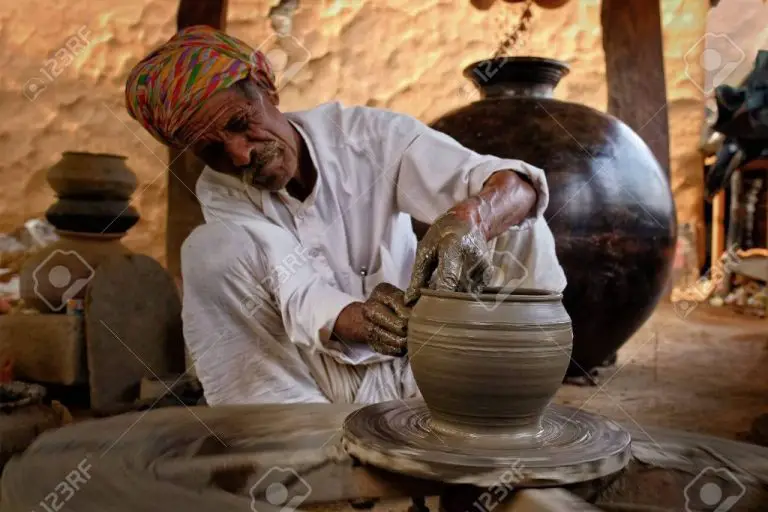
Sculpting with clay allows tremendous creative freedom and artistic expression. Clay is highly responsive to touch and can be molded into nearly any shape imaginable. Sculptors can create realistic human forms, abstract shapes, animals, fantasy creatures, functional pottery and more out of this versatile material.
However, working with clay and creating durable sculptures does require patience, practice and specialized techniques. Factors like the flexibility, porosity and composition of the clay must be taken into account. As we will explore in this article, there are tips and tricks for working with clay at each stage of the sculpting process, from your initial sketch through firing and finishing. With persistence and experimentation, clay can become an accessible and gratifying artistic medium.
Gathering Materials
When getting started with clay sculpture, you’ll need to gather the right materials. The type of clay you choose and the tools you use will impact the finished product.
Types of Clay
There are several types of clay you can use for sculpting:
- Polymer clay – This type of clay is plastic-based and cures in a home oven. It comes in a variety of colors and brands like Sculpey or Fimo.
- Air-dry clay – This clay dries and hardens once exposed to air. It doesn’t require baking but takes 1-7 days to fully cure.
- Pottery clay – Also known as firing clay, this type requires a pottery kiln to fully cure and harden through high heat firing.
The type you choose will depend on your access to a kiln, desired finished durability, and preferences for working with the clay. Polymer clays don’t require a kiln but produce lightweight sculptures. For more heavy-duty sculptures, pottery clays produce the most durable result.
Tools
Basic tools you’ll need include:
- Clay sculpting knife – for cutting, slicing, and smoothing the clay
- Clay shapers and loop tools – to shape, blend, and smooth clay
- Rolling pin – for rolling clay flat and at an even thickness
- Cutting wires – to cut clay or slice off sections
- Texturing tools – like modeling tools, rubber stamps, or found objects to imprint textures
Specialized sculpting tools can help create more intricate details but aren’t required for beginners. Start with the basics and build up your toolkit over time.
Where to Find Materials
Clay and sculpting tools can be found at most arts and craft stores, either in the store itself or online. Some specialty online retailers like Sculpy or PolymerClayExpress offer a wide selection of polymer clays, tools, textbooks, and tutorials if you want more options.
For pottery clays that require firing, look for local ceramic supply stores or university arts departments that have kilns available. Take firing requirements into consideration before purchasing this type of clay.
Preparing the Clay
Properly preparing clay is an essential first step before sculpting begins. Kneading and wedging are key techniques used to ready clay for sculpting. Kneading involves pressing, folding, and pushing the clay repeatedly to mix it thoroughly and eliminate air bubbles. This helps make the clay soft, uniform, and malleable. Wedging is a process where a lump of clay is cut in half, rotated, and smashed back together over and over. This also mixes the clay while elongating air bubbles to remove them.
Getting the right moisture consistency is also important when preparing clay. Clay straight from the package can be too wet or too stiff. Wet clay is sticky and challenging to sculpt finely detailed shapes. Stiff clay can crack easily when worked. The ideal consistency is like firm dough – soft but not sticky. Adding water or letting clay dry slightly can help achieve the perfect consistency. Prepared clay should be smooth, pliable, and free of cracks or air pockets before sculpting starts.
Sculpting Techniques
There are several major sculpting techniques used in clay that allow artists to shape it into creative forms. Each technique has its own advantages and is better suited to certain applications.
Pinch sculpting involves taking a ball of clay and using the fingers and thumbs to pull, pinch, and shape the clay into the desired form. Pinching is excellent for making small-scale sculptures, organic shapes like animals or figures, and for adding detail. It provides a high degree of control and direct contact with the clay. Pinching tends to leave a rough surface texture.
Coil building involves rolling clay into long coils or ropes and then stacking and bonding the coils together to build up a sculpture. Coils are great for making taller, upright forms and vessels. Coiling enables sculptural forms with hollow interiors. It can be time-consuming but allows flexibility.
Slab construction uses flat planes and sheets of clay which can be cut into shapes and joined together. This is ideal for making free-standing sculptures, boxes, masks, and flat areas of detail. The clay can be rolled into sheets using a rolling pin. Slab construction is quick but can lack organic flow of other techniques.
Knowing when to apply pinching vs. coiling vs. slab construction takes practice. Certain techniques lend themselves better to the type of sculpture being created. Combining techniques allows sculptors to make full use of clay’s versatility.
Creating the Sculpture
When creating a clay sculpture, artists have two main options for the structure and form – building it around an armature or sculpting a solid piece. An armature provides an internal framework that supports the weight of the clay. It can be made from wire, wood, plastic or other materials. Sculpting around an armature involves gradually adding layers of clay over the frame to build up the form. This allows for larger, more complex designs. Solid clay sculptures are formed entirely from the clay medium itself, with no inner support. This method works well for smaller, simpler forms.
When adding clay to the sculpture, smooth the pieces together firmly to adhere them and blend away any seams. Use sculpting tools to carve shapes and textures. Fingers can be used to sculpt softer details and refine forms. Pay attention to maintaining proper thickness and support as the sculpture grows to prevent collapse. Building up the clay gradually in layers gives more control over the emerging artwork. Take care not to let pieces get too thin or uneven. Create symmetry and balance within the design. Allow time for sections to firm up before adding more clay. Planning the sculpture composition from start to finish requires concentration and patience.
Textures and Details
Adding texture and detail to clay sculptures can take them from simple forms to intricate works of art. There are many techniques available to create different effects. Tools like sculpting loops, fettling knives, and various shaped sculpting tools can be used to carve, incise, and pierce the clay to create patterns, lines, and holes.
Clay shapers are useful for smoothing and shaping the clay as well as pressing into the surface to create textures like scales, fur, or feather patterns. Custom clay cutters can be used to imprint shapes into the clay. Found objects like feathers, seashells, leaves, or textured fabrics can also be pressed into the clay to transfer their unique patterns.
Incising lines with sculpting tools is an easy way to add fine details to a sculpture. Piercing the clay with holes, slits or geometric patterns creates interesting effects with shadows and highlights. Carving into the clay can create deep undercuts, folds, wrinkles and other fine details that bring the sculpture to life.
Adding well-planned textures and intricate details gives clay sculptures visual interest and depth. The textures present an opportunity to enhance the meaning or subject matter of the artwork.
Drying and Firing
One of the most important steps when making clay sculptures is properly drying the piece before firing. If the sculpture is not dried thoroughly, moisture left in the clay can cause cracks or even explosions when fired in a kiln. Here are some tips for proper drying:
Allow adequate drying time. Depending on the size and thickness of the sculpture, drying can take days or even weeks. Set the piece aside in a warm, dry area out of direct sunlight. Avoid quick-drying methods like hairdryers which dry the surface before the interior has had time to dry.
Dry evenly. Flip the sculpture over and rotate it periodically so it dries uniformly. Covering the piece with plastic or damp cloths while drying can trap moisture and should be avoided.
Check for dryness before firing. There should be no wet or cool spots. Sculptures should sound hollow when tapped gently. Test pieces can determine if the sculpture is ready for firing.
Use an appropriate kiln. Kilns designed for ceramics, like electric or gas kilns, are best for firing clay sculptures. Home ovens should be avoided. The kiln should allow precise control over firing temperatures and cycles.
Follow the firing schedule. Increase temperatures gradually, up to the maturing point of the clay, then allow cooling afterwards. Firing too quickly can cause cracks or explosions. The optimal firing schedule depends on the type of clay used.
With proper, gradual drying and controlled firing, clay sculptures can make it through these critical steps crack-free and ready for finishing. Mastering drying and firing takes practice, but will allow clay artists to safely complete their creative vision.
Coloring and Finishing
Adding color and finish to a clay sculpture can enhance its visual appeal and protect the surface. There are various coloring methods to choose from:
Paints
Acrylic and oil-based paints work well on clay. Acrylics dry faster but oils provide a richer, glossy finish. Use paints meant for ceramics as they adhere better to clay’s porous surface. Apply paint in thin layers and allow drying between coats.
Glazes
Glazes are mixtures of minerals and metal oxides that produce glassy finishes when fired. They come in various colors and textures like gloss, satin, or crackled. Glazes accentuate the sculpture’s form and require fewer coats than paint. However, they require a second firing.
Stains
Stains contain concentrated pigments to produce transparent finishes that reveal the clay’s surface texture. They are available in a wide color palette. Multiple layers can be applied to vary the stain’s intensity.
Protective Top Coats
Applying clear acrylic sprays or polyurethane as a final coat protects the paint/glaze underneath from minor scrapes and UV damage. These are ideal for sculptures displayed outdoors.
Choosing suitable coloring and finishing materials can enhance a sculpture’s visual qualities and durability. With various options available, one can achieve the desired look and protection for clay artworks.
Challenges and Tips for Making Clay Sculptures
Making clay sculptures comes with its own unique set of challenges. Here are some tips for avoiding the most common issues:
Avoiding Cracking and Breakage
As clay dries, it shrinks and can crack if the moisture content varies within the sculpture. To prevent cracking and breakage:
- Avoid hollow parts and voids which dry at different rates
- Dry the sculpture slowly and evenly
- Avoid overly thick or thin areas which dry at different paces
- Wrap moist clay in plastic when not sculpting to retain moisture
Storage
Proper clay storage helps maintain its ideal moisture content and workability:
- Store unused clay sealed in airtight plastic bags
- Keep the clay at room temperature away from heat sources
- Knead some water into dried-out clay to restore moisture
Practice and Patience
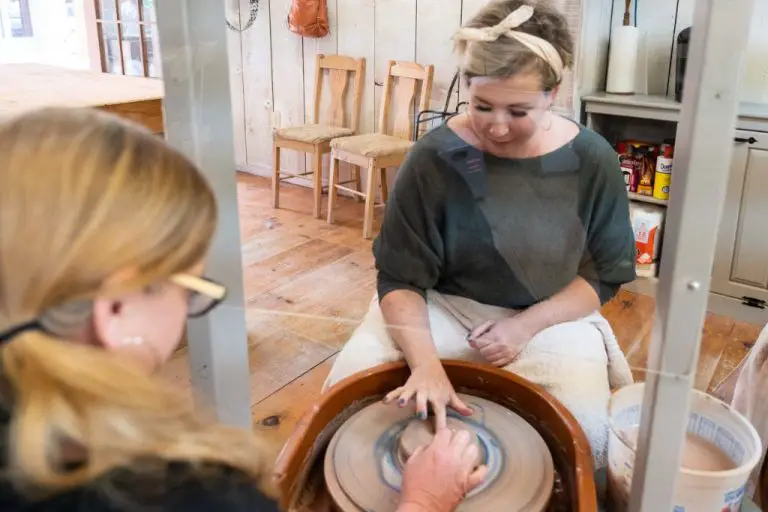
Sculpting with clay is a skill that requires ongoing practice and patience. With time and perseverance, your sculpting abilities will improve. Don’t get discouraged with initial attempts.
Conclusion
So is making clay sculptures hard? Based on the comprehensive process outlined, we can conclude that creating clay sculptures involves many steps and techniques that require practice and patience to master. However, with the right guidance and persistence, clay sculpting can become quite enjoyable and rewarding.
Recap the key challenges covered – working with a temperamental material, learning sculpting methods, achieving intricate details, mastering the drying and firing process. Yet highlight the great satisfaction in creating something with your own two hands. The sense of accomplishment when your vision comes to life. The calming, therapeutic effect of working with clay.
The complexity provides a creatively stimulating outlet. Each attempt makes you better. There are always new skills to hone. If you feel inspired to try sculpting, start simply. Take a class or follow online tutorials. Experiment and allow yourself to make mistakes. Stay patient and persistent. Let the process be the reward.