Expert Clay Sculpting Tips For The Advanced Artist
Choosing the Right Clay
Sculptors have a wide variety of clays to choose from, each with their own strengths and limitations. When selecting a clay, consider factors like the desired finish, ease of use, baking requirements, and more.
Oil-based clays like plasticine are great for quick, flexible sculpting and animation, as they don’t dry out. However, oil clays require specialized care and can’t be hardened, limiting the types of finished pieces. Source
In contrast, water-based clays allow for more detailed, long-lasting sculpts. Air-dry clays simply harden through evaporation, while polymer and ceramic clays require baking to fully cure and stabilize the material. Baking also provides opportunities to add color and sealants. Each water-based clay has pros and cons – polymer clays like Sculpey are easy to work with but can be brittle, while ceramic clays allow for realistic details but are prone to cracking and need higher baking temperatures. Source
When choosing a clay, evaluate the sculpting techniques required, cost, baking time, hardness, texture, and other characteristics that suit your project goals and skill level.
Essential Sculpting Tools
Having the right sculpting tools is crucial for advanced clay artists to achieve their desired effects. Some essential tools include:
Wire armatures and frames allow you to create support structures for complex sculptures and figures. An aluminum wire frame provides stability and an attachment point for adding clay. Consider using different gauges of wire depending on the strength and flexibility you need.
Loop, ribbon, and paddle sculpting tools help shape and refine the clay. Ribbon tools made of wood, metal or plastic can carve fine details and textures. Loop tools smooth curves, while paddle tools flatten surfaces. Look for sets like these essential sculpting tools that provide a variety of edges and shapes.
Clay shapers and carving knives give advanced control for detail work. Flexible silicone shapers mold soft clay and reach tight spaces. Carving knives sharpened to various points cut precise shapes. Use clay shapers to refine forms and textures, reserving knives for removing clay and cutting crisp edges.
Setting Up Your Workspace
The studio space and how it is set up is crucial for efficient and enjoyable sculpting. Proper lighting, ventilation, cleanliness, and organization will enable you to focus on the creative process. Here are some tips for setting up a functional workspace:
Lighting is key for sculpting. Make sure your main work area has excellent overhead lighting that minimizes shadows. Natural light can supplement artificial lighting, but avoid direct sunlight which can dry the clay too quickly.[1] Also have a movable spotlight to illuminate specific areas as you work.
Proper ventilation is important when working with clay and glazes. Install an exhaust fan or air filtration system to remove dust and fumes. Open windows when possible for fresh air flow. Position equipment like kilns away from main work areas.
Keep your sculpting surfaces clean and protected. Use drop cloths, plastic covers, or scraps of canvas to cover tables, floors and shelves. This keeps dust and debris contained. After each session, wipe down surfaces and sweep floors.
Stay organized! Have a specific place for every tool, material and supply. Keep tools in neatly labeled drawers, shelves or stands. Store clay on racks up off the floor. Maintain organized workspace to maximize efficiency.
Sculpting Techniques
One of the keys to creating advanced clay sculptures is mastering sculpting techniques that allow you to securely join clay pieces and add realistic textures. Using proper armatures, slipping and scoring, and texturing tools can take your sculptures to the next level.
An armature provides essential internal support for a sculpture. It can be made from wire, wood, plastic, or other materials. Bend and shape the armature to define the basic form before adding clay over it. The armature enables extending limbs, overhangs, and complex poses that would otherwise collapse under their own weight. Refer to this source for tips on using armatures effectively.
To join two pieces of clay, first score or roughen the surface by cross-hatching it with a knife or toothbrush. Apply ceramic slip (liquefied clay) to the scored areas on both pieces. Press the pieces together firmly to bond them. The slip fills in pores and the scored grooves act as a grip. Let dry fully before continuing to sculpt. Slip and scoring creates strong, seamless joints.
Use a variety of texturing tools and techniques to add realistic details. Make patterns by pressing in objects like lace, burlap, or plastic nets. Imprint textures using sculpting tools, coils, toothbrushes, sponges, crumpled foil, etc. Refer to this Domestika article for more texturing techniques to try.
Achieving Realism
One of the hallmarks of an advanced sculptor is the ability to create highly realistic figures and portraits. Realism requires a deep understanding of human anatomy and proportion. Studying reference photos can help you accurately capture the contours and shapes of the human form (https://www.sculptureatelier.com/blog/how-to-sculpt-the-figure).
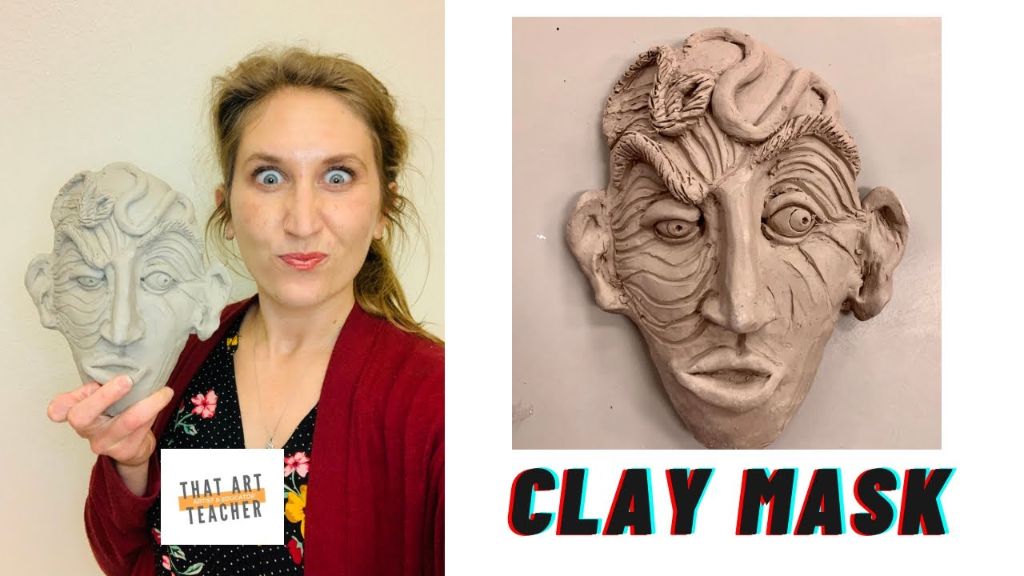
When sculpting figures, pay close attention to anatomical details like the ribs, spine, hands, and feet. Adding subtle muscle definition and tension will make your sculpture come alive. Take care when sculpting faces to precisely render eyes, noses, mouths, and other facial features.
In addition to anatomy, realism requires excellent fine motor control. Use clay shapers and specialized sculpting tools to add fine details and textures to the skin and hair. Work slowly and deliberately to smooth curves and build up layered detail.
With practice and dedication to honing your artistic eye and technical skills, your realistic figures will impart a lifelike essence that captivates viewers.
Working at Scale
When sculpting large pieces, proper support is essential to prevent cracking and collapse as the clay dries. For substantial armatures, Clay Sculpture Techniques recommends using thick wire, rebar, wood, foam, or other sturdy materials. Small-scale pieces can be supported with scrunched up newspaper, pieces of sponge, or sticks with clay applied to each end.
Building up your sculpture gradually in sections allows you to check for and eliminate air pockets that could crack. If your piece is so large that you can’t reasonably avoid air bubbles, A Beginner’s Guide to Sculpting in Clay suggests drilling small holes to release trapped air before baking. You can fill these after with a bit of watered-down clay slip.
When sculpting large pieces, maintain even thickness where possible and avoid overly thin protruding sections that risk snapping off. Consider making porous sections removable so the interior can continue drying after the sculpture is complete. With proper planning and care, you can successfully sculpt monumental works in clay.
Drying and Curing
Proper drying and curing are essential steps when working with clay. Rushing the drying process can lead to cracking, warping, or explode in the kiln. Here are some tips for safely drying your clay sculpture:
Allow adequate drying time. The drying process can take several days to weeks depending on the size and thickness of your sculpture. Let it dry slowly at room temperature out of direct sunlight. Turn the sculpture periodically so it dries evenly.
For solid sculptures, drying can take over a week. For large or thick pieces, drying can take several weeks. Be patient and allow the moisture to fully evaporate before bisque firing.
Use a kiln for firing. Never put wet clay directly into a kiln – it must be fully dry first. Use kiln-safe materials only. Program the kiln to heat up and cool down gradually to prevent cracks and explosions.
Bisque fire before glazing. Bisque firing further hardens the clay before applying glaze. Follow the clay manufacturer’s recommended bisque temperature.
Glaze fire after applying glaze. Use the recommended glaze firing temperature and allow proper cool down time. The higher glaze temperature will melt the glaze onto the bisque clay surface.
With patience and proper drying and firing techniques, you can achieve beautiful long-lasting results with your clay sculptures. For more tips, refer to this guide on properly drying pottery clay at home: How To Dry Pottery Clay: Process, Tips and Techniques
Adding Color
One way to add color to clay sculptures is by using paints and glazes. There are several types of paints that work well on clay including acrylic paints, oil-based paints, and specialized glazes made for ceramics and pottery.
Acrylic paints are water-based and easy to apply to biscuit fired clay. They allow artists to add color between firing cycles. Oil-based paints are also used since they stick to the clay surface well. Some specialized glazes made for ceramics include Mason stains which help create vibrant colors when fired.
Paint can be brushed onto the surface for solid coverage. Artists use soft brush tips to avoid leaving brush strokes. Airbrushing paint onto the surface results in a fine mist of color. Spraying glazes and paints requires some skill to avoid uneven coverage.
For custom glaze colors, mixing is required. An artist chooses a clear glaze for the base and adds in ceramic stains, oxides or underglazes to create the desired hue. Testing on sample pieces is recommended to achieve the right color saturation and effects. The ingredients and firing temperature impact the final glazed color.(Source)
Finishing and Protecting
Once your sculpture is fully dry, you’ll want to spend time perfecting the surface and adding a protective layer. Start by sanding with fine grit sandpaper to smooth out any imperfections. Rub lightly over the entire piece in small circles. Next, buff the sculpture with a microfiber cloth to create an ultrasmooth finish.
To protect your finished sculpture, apply a sealant or varnish. Water-based options like acrylic sealer work well for air dry clays. Use quick drying sprays or brush on multiple thin coats for best results. Allow each coat to fully dry before adding the next. A matte or satin varnish will retain the natural look of the clay. Gloss finishes add shine but may also highlight imperfections.
For proper display, secure your sculpture to a base or stand designed for the weight. Avoid setting directly on glass or wood surfaces which can cause sticking over time. Weighted stands, clear acrylic risers, and specialized sculpture stands all work well. For extra protection, add felt pads to any points of contact.
Advancing Your Sculpting Skills
As an advanced sculptor, it’s important to continue challenging yourself and expanding your skills. Trying new subject matter and techniques outside your comfort zone can help improve your artistic abilities. Consider sculpting a new subject like a complicated figure study or abstract sculpture to refine your sculpting techniques. Workshops and classes are another great option to advance your skills. Local art centers, museums, and colleges often offer intensive workshops with professional sculptors where you can learn specialized techniques like stone carving or metal casting (source). Joining a local artist co-op or sculpture group can also provide opportunities to exhibit your work, participate in critiques, and get inspired by fellow artists.
Entering art competitions is a great way to challenge yourself as an advanced sculptor. Having your work judged can help identify areas to improve. Competitions like the National Sculpture Society awards provide cash prizes and recognition of artistic excellence. Just the process of creating work for a competition deadline can help take your sculpting to the next level. Consider partnering with other sculptors for two- or three-person exhibitions. Collaborating on a body of work allows you to learn from others and make connections in the art world. Continuously learning new techniques and pushing the boundaries of your sculpture will help you advance as an artist.

