Unleashing Your Creativity: Advanced Clay Sculpting Tips
Clay sculpting is the art of molding and shaping clay to create three-dimensional works of art. Working with clay provides a tactile, hands-on medium for unleashing creativity and bringing ideas to life. Sculpting with clay has many benefits, including promoting self-expression, building confidence and problem-solving skills, fine-tuning dexterity, and improving cognition (Clay art work promotes creativity. It helps promote self-confidence, encourages self-expression, and develops problem-solving skills.[Source 1]). The creative possibilities are endless when sculpting with clay, whether crafting abstract shapes, realistic figures, functional pottery, or detailed miniatures. This guide will provide advanced tips to take your clay sculpting abilities to the next level.
From choosing the right clay and essential tools, to techniques for adding intricate textures, paints, and glazes, this guide covers key skills for sculpting creative clay masterpieces. You’ll learn professional techniques for constructing sturdy armatures, joining clay components, sculpting ultra-realistic textures, carving fine details, and perfecting finishing touches. With the advanced pointers in this guide, you can unleash your full creative potential and discover new possibilities working in this dynamic medium.
Choose the Right Clay
There are several types of clay that are commonly used for sculpting, each with their own unique properties and characteristics. Choosing the right type of clay is one of the most important decisions when starting a new sculpture. The clay you select will determine the level of detail you can achieve, how strong and durable the finished piece will be, and what finishes are possible.
Here are some of the most popular clays for sculpting and their key traits:
Oil-based clays like plastilina are great for sculpting fine details and textures. They stay workable without drying out, but finished pieces are not durable. Best for sketching and concept work. See more at: [url removed]
Polymer clays like Sculpey and Fimo can be molded when soft, then hardened by baking. They allow very smooth, detailed sculpts and bright finishes. However, they are brittle when thin. Good for jewelry, miniatures and small sculptures. [url removed]
Earthenware clays are water-based pottery clays that can be sculpted when wet, then fired in a kiln to harden and strengthen. They are very versatile and great for medium to large scale sculptures. Though heavy and prone to cracking when dry. See: [url removed]
For beginners looking to practice sculpting fundamentals, plastilina or polymer clays are good choices. For large sculptures, earthenware clays are preferable. Consider the size of your planned sculpture, the level of detail needed, and whether the finished piece must be durable when selecting a clay.
Essential Tools
Sculpting clay requires a variety of specialized tools to shape, texture, and detail your creations. Some essential sculpting tools include:
Wire Tools: Wires like armatures allow you to create support structures and skeletons for sculptures. Wire loops and clay shapers with wire tips are great for smoothing details and getting into tight areas (https://diamondcoretools.com/collections/clay-carvers).
Cutters: Various cutters like ribbon cutters, loop tools, and veiners can slice, cut, and add line details to clay surfaces (https://www.amazon.com/clay-sculpting-tools/s?k=clay+sculpting+tools).
Sculpting Sticks: These wooden and metal sticks taper to different points and edges, allowing you to define details and textures.
Sponges: Sea sponges create porous, textured patterns when pressed into clay. Foam sponges can smooth seams and soften surface textures.
Having the right basic sculpting tools allows you to fully shape, mold, carve, refine, and detail your clay creations.
Armatures and Structures
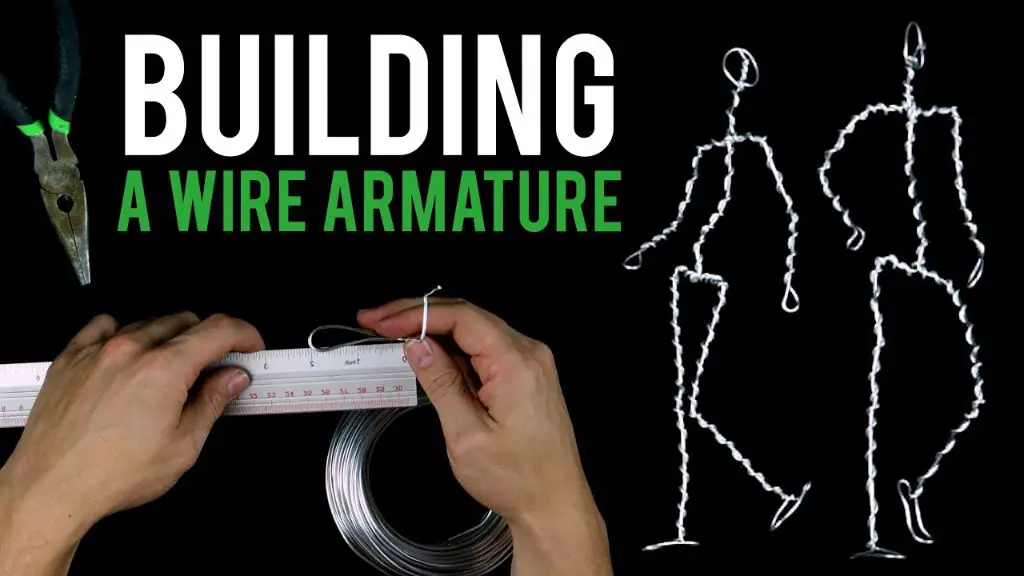
An armature provides structure and support for clay sculptures. Having a solid armature allows for more ambitious projects with dynamic poses, complex shapes, and overhangs. The armature acts like a skeleton that the clay is built upon.
When making an armature, it’s important to consider the final size and pose. The armature should be proportional and strong enough to support the weight of the clay without collapsing or bending. Use sturdy, thick wires and wrap joints tightly. Spend time shaping the core form before adding finer details.
Some options for armature materials include wire, aluminum wire, plumber’s tape, tin foil, and wood. The most common choice is wire, such as 16-18 gauge galvanized steel wire. Heavier gauges like 12 or 14 can be used for larger sculptures. Add foil for bulking up thicker areas. For best results, use pliers to tightly wrap joints with thinner wire.
To maximize strength, reference anatomy books and images to properly shape the body framework. Focus on the major forms like the torso, rib cage, hip sockets, and limb joints first. Gradually build up the finer forms of the body on top of the main armature structure. Refer to references and evaluate the piece from all angles as you work to ensure proper proportions.
Premade posable armatures can also save time when starting a new sculpture. Companies like TruForm offer anatomically correct armatures for different animals that can be adjusted to various poses. These provide a solid base structure for clay.
No matter the choice of materials, a sturdy armature enables sculpting more ambitious forms. Take the time to build a strong supportive structure before adding clay.
Textures and Surface Effects
Textures are an important element in clay sculpting that can greatly enhance the visual interest and realism of a piece. There are many techniques sculptors can use to create different textures on the surface of clay:
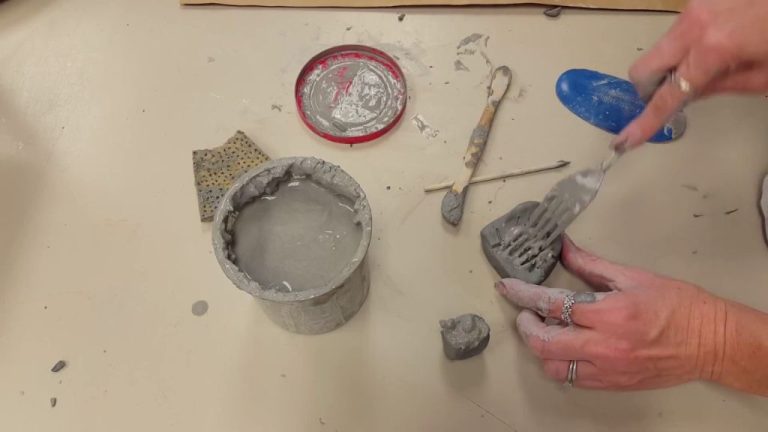
Scoring involves dragging a tool like a knife, fork, or toothpick across the clay’s surface to create lines and grooves. Scoring can mimic the look of wrinkles, stitches, scales, feathers, fur, wood grain, etc. Adjust the depth and spacing of scored lines to vary the texture.
Slip trailing is done by trailing liquid clay slip onto the surface and letting it dry in place. The raised slip takes on a cracked, pebbly appearance when dry. Vary the thickness and pattern of trailing to create natural looks like stone and bark [1].
Pressing objects into the clay imprints their texture onto the surface. Try pressing in natural items like leaves, seeds, sticks, fabrics, corrugated cardboard, etc. Can also use manmade tools like cookie cutters, rubber stamps, mesh, stencils, etc.
Well-executed textures make a sculpture look more lifelike and interesting. They enhance the form by defining contours and details. Textures also add visual variety across the sculpture’s surface. Mastering texture techniques expands a sculptor’s creative capabilities.
Cutting and Carving Techniques
One of the most common clay sculpting techniques is cutting and carving. This allows you to remove clay to create shape, form, and details in your sculpture. There are a few main methods for cutting and carving clay:
Cutting – Using a knife or clay cutting tool, you can slice into the clay to cut away pieces. Make sure your tools are sharp to get clean cuts. Cut perpendicular to the surface for the best results.
Scraping – Scrapers allow you to peel away layers of clay and refine edges and surfaces. Hold the scraper flat against the area you want to remove clay from and scrape in smooth, even strokes.
Etching – An etching tool has a v-shaped metal tip that lets you draw lines and patterns into the clay surface by dragging the tip through the clay. This is great for adding textures, details, and defining features.
When carving and cutting, go slowly and carefully plan out your cuts before removing clay. Having ceramic clay cutting tools like loops, ribs, and wire tools can help as well. Avoid cutting too deep or removing too much clay in one area, as this can cause structural issues. If mistakes happen, additional clay can be added and smoothed over problem areas. Taking your time is crucial for control and creating the sculpted features you envision.
Joining and Constructing
When sculpting with clay, joining separate pieces together is an essential skill. There are a few key methods for joining clay securely:
Slip and scoring – Applying “slip” (liquid clay) to the surfaces to be joined, and “scoring” (scratching) the surfaces, creates better adhesion by allowing the liquid to penetrate into the scratched grooves. Let the slip set slightly before joining (Source).
Dowels – Insert wood or metal dowels into holes in both pieces of clay to act as an armature for joining. The dowels provide internal support and stability (Source).
Glue – Specialty glues like epoxy clay can be used sparingly to adhere clay. Avoid too much glue as it can crack during baking.
For structural integrity when joining large or heavy clay pieces, build an internal armature for support. Use wire, wood, mesh, and other materials to create an inner framework. Plan attachment points and support structures before assembling the final sculpture.
Finishing and Detailing
The finishing and detailing stage is critical for taking your sculpture to the next level. At this point, you have the main forms and structure built, but refining the fine details will make a world of difference in achieving a professional result. Some of the key finishing techniques to focus on include:
Sanding – Use progressively finer grit sandpaper to smooth out any imperfections and create a uniform surface texture. Start with a coarse grit like 120 and work up to 600 or higher. Be careful not to over-sand or you may lose intricate details. Sand in small circular motions.
Burnishing – Rub the clay surface with a hard tool like a spoon, craft knife handle or burnishing stone. This compresses and polishes the clay for an ultra smooth finish. Try lightly lubricating the tool with mineral oil or water for best results.
Polishing – Use a buffing wheel or microfiber cloth to polish the sanded and burnished clay. This brings out the shine and luster. You can use a polishing compound like jeweler’s rouge for an extra glossy look.
When adding refined details, take your time and work methodically. Use clay sculpting tools, toothpicks, needles and skewers to etch fine lines, add texture, or create intricate patterns. Consider sealing porous areas like feathering with a thin layer of liquid polymer clay before baking.
Try varying the finishing techniques in different areas – highly polish raised surfaces while keeping recessed areas more matte, or heavily texture the clothing while the face remains smooth. This creates visual interest for a professional finish. With practice and patience, you can achieve remarkable realism and artistic effects through careful detailing and finesse.
Source: https://www.instructables.com/Finishing-and-Detailing-a-Sculpey-Polymer-Clay-Scu/
Baking and Firing
Proper baking and firing are essential steps when working with clay sculptures. The baking and firing process solidifies the clay through oxidation and transforms it into a strong, finished ceramic material. There are a few key things to keep in mind:
Bisque Firing – The first firing process is called bisque firing. This is done at a relatively low temperature, usually around 1100°F to 2100°F. Bisque firing slowly heats up and bakes the clay, releasing any moisture and making it ceramic. The timing depends on the size and thickness of the sculpture, but can take 6-12 hours.
Glaze Firing – After bisque firing, a glaze can be applied for color and effects. The sculpture is then fired again at a higher temperature around 2100°F to 2300°F to melt and adhere the glaze. Glaze firing usually takes 4-6 hours. The glaze gives the sculpture an impermeable, glass-like surface.
Cooling – After both bisque and glaze firings, the kiln must be cooled slowly over 6-24 hours. Never open the kiln until it has fully cooled to avoid cracking the sculpture. Patience is required for proper cooling.
Kilns – Electric kilns are recommended for firing clay sculptures. The temperature can be precisely controlled. Make sure the kiln is large enough to accommodate sculptures. Programmable controllers make firing easy.
With the proper baking and firing, clay sculptures can become strong, finished artworks. Pay close attention to timing and temperatures when working with ceramics. Firing clay transforms it into a whole new material.
Source: https://www.instructables.com/Ceramic-Sculpture-for-the-Absolute-Beginner-Firing/
Conclusion
Advanced clay sculpting requires practice and patience to master. The techniques discussed – from choosing the right sculpting clay and tools, creating armatures, adding textures, carving details, constructing forms, and properly firing finished pieces – all contribute to unleashing creativity through this medium.
Readers hoping to further enhance their clay sculpting abilities can experiment with combining various techniques, pushing proportions in extreme or inventive ways, and drawing inspiration from diverse sources. Consider sketching ideas, studying sculptural styles, collecting interesting found objects to use in assemblages, and working large scale or with unconventional shapes and formats. The possibilities in clay sculpture are endless for the creative mind.
With diligence and an openness to explore new approaches, sculptors can continue growing their skills. Pay attention to the entire process from conception to completion, being mindful of each step. Artistry develops gradually through practice. Have patience with yourself, but also challenge what you think you can achieve. Keep seeking fresh ways to unleash your creativity through this dynamic, tactile, and captivating medium.