How Are Ceramic Food Plates Made From Clay?
Gathering the Clay
The creation of ceramic food plates starts with gathering the right type of clay. The most common clays used are kaolin, ball clay, and feldspar. Kaolin clay is white in color and provides plasticity and strength. Ball clay helps with plasticity and bonding while feldspar acts as a flux to lower the melting temperature.
These clays are mined from various locations around the world. Kaolin clay is found abundantly in deposits across the Southern United States while ball clay deposits are concentrated in the UK and other areas of Europe. Feldspar is readily available in many parts of the world.
The amount of clay needed per plate depends on the size and thickness desired. For a standard 10 inch dinner plate that is approximately 0.75 inches thick when finished, around 3-4 lbs of wet clay may be required per plate. The specific ratios of each clay type can be adjusted to achieve the optimal properties during shaping, drying, and firing.
Preparing the Clay
After mining or extracting the clay, it needs to go through a purification process to remove impurities and get it to the optimal consistency for working with. Raw clay directly from the earth contains small rocks, grit, sand, mica, roots and other organic matter. The process starts by slaking down the clay with water to make a slip. This slip is poured through screens to filter out particles. It is then left to settle in vats so the impurities sink to the bottom. The purified clay slip from the top is then drained off into fresh vats.
To improve the physical properties of the clay, pre-mixed clays are often blended with other natural materials before further processing. For ceramic plates, the clay may be mixed with feldspar to increase its firing temperature range, as well as kaolin or ball clay to improve elasticity. The ratios and types of additives depend on the type of clay used and the target characteristics for the final plates. For example, more kaolin makes the mixture more plastic but lowers the firing temperature.
After the additives are thoroughly mixed in, the clay slip is further processed to achieve the optimal consistency. Methods like filter pressing or vacuum processing continue to remove excess water content from the slip. The ultimate goal is to achieve a smooth, homogenous mixture that has the right level of plasticity and strength for shaping into plates while minimizing shrinkage and cracking during drying and firing.
Shaping the Plates
Once the clay has been properly prepared, it is ready to be shaped into plates. There are a few common techniques used for shaping ceramic plates:
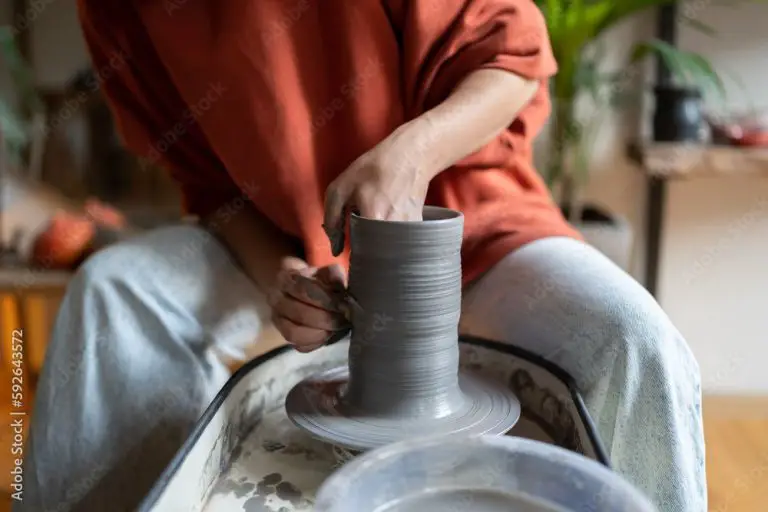
Using a pottery wheel – This involves centering a lump of clay on a rotating pottery wheel. The potter then uses their hands and various tools to shape the spinning clay into a flat circular plate shape. This takes skill and practice but allows the potter to create uniform plates with thin, even walls.
Using molds – Plaster molds can be used to form the clay into the desired plate shapes. The clay is pressed into the mold cavity and allowed to dry until sturdy enough to be removed intact. Using molds creates consistency and allows more detailed shapes, but lacks the handmade imperfections of wheel-thrown pieces.
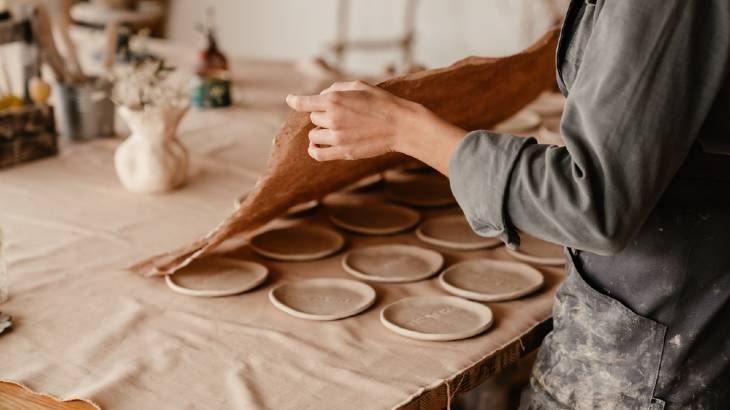
Smoothing and finishing the shaped clay – Once shaped, the clay plates are smoothed using metal scrapers and specialized tools. The rims are finished into the desired profile shape – either square, beveled, scalloped etc. Clay can be added to any thin spots and seams can be blended. The goal is to achieve a smooth, uniform plate ready for the drying and firing process.
Drying the Clay
After the plates have been shaped, they must be thoroughly dried before firing. There are two main methods for drying the shaped clay plates:
Letting Plates Air Dry
One method is to let the plates air dry at room temperature. The plates are placed on drying shelves and left for 1-2 weeks. The moisture slowly evaporates from the clay. Air drying takes longer but results in a more even distribution of moisture content throughout the plate.
Using a Kiln at Low Temp
Another method is to use a kiln at a low temperature, around 150-200°F, to dry the plates. The plates are loaded into the kiln and “baked” at this low temp for 8-12 hours. The heat from the kiln accelerates the drying process. Kiln drying ensures plates are dried properly and evenly throughout.
First Firing of the Clay Plates
Once the shaped clay plates have dried sufficiently, they are ready for the first firing in the kiln. This firing, known as bisque firing, brings the temperature up to between 1000-1100°F. Bisque firing serves the important purpose of removing any remaining water from the clay.
During the firing process, the clay plates are placed carefully inside the kiln and the temperature is steadily increased. Slow heating is necessary to allow any remaining moisture to evaporate safely and prevent cracking or bloating. As the temperature rises, chemical changes begin to take place in the clay that alter its physical makeup.
Around 100°C, the last traces of water leave the clay. By 500°C, any remaining organic matter burns away. At around 600°C, quartz conversions start to occur, which make the clay denser and less porous. The high bisque temperatures result in a hard, durable ceramic material ready for glazing and decoration.
Once the peak temperature has been maintained for the desired time, the kiln is cooled slowly and evenly. The bisque fired clay plates emerge hardened, but still porous enough to absorb the glazes and colors that will be applied next.
Glazing
Glazes are applied to the pottery to create a glass-like coating that is decorative, waterproof, and protective. There are several types of glazes used on ceramic plates:
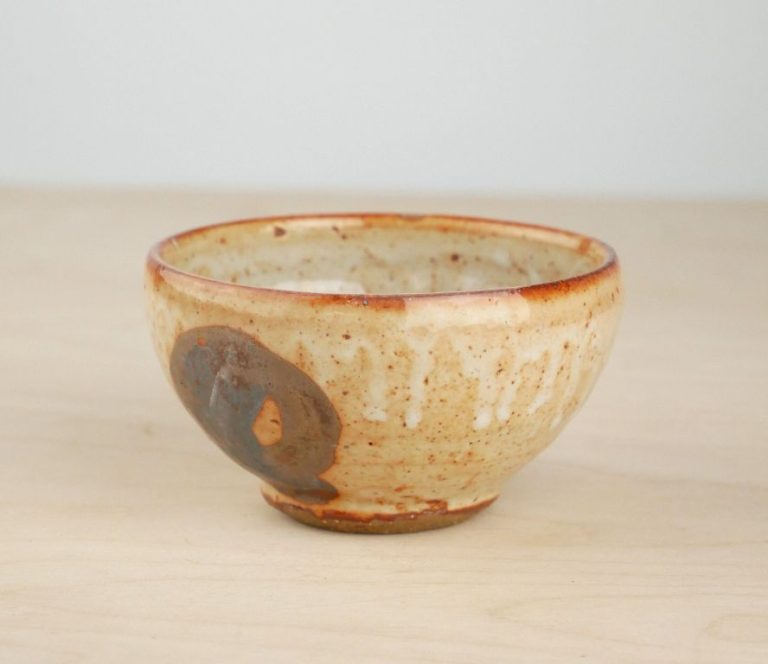
Clear glazes: These are transparent and provide a glossy finish while allowing the clay’s natural color to show through. They enhance the appearance while still being functional.
Colored glazes: Opaque glazes come in endless colors and effects. They can be a single color or have speckles, cracks, metallic looks, and more. Colored glazes completely cover the clay body beneath.
Matte glazes: These have a non-reflective, satin finish. Matte glazes provide an elegant, soft appearance compared to high-gloss finishes.
There are three main techniques used to apply glazes onto the ceramic plates:
Dipping: The bisqueware plates are dipped into a container filled with liquid glaze. The glaze coats the piece evenly and any excess is allowed to drip off.
Spraying: Glazes can be sprayed onto the plates using a pressurized spray gun or booth. This also provides even coverage over the entire piece.
Brushing: Using a soft brush, glazes are painted directly onto the bisqueware. Brushing allows for decorative patterns, details, and control over glaze thickness.
The glazing process adds beauty, protection, and functionality to the finished ceramic plates.
Final Firing
The final firing is the last stage of the ceramic plate production process. After the plates have been shaped, dried, and glazed, they are ready for the final firing.
In the final firing, the plates are loaded into a large high-temperature kiln capable of reaching over 2,000°F. The temperature is steadily increased over the course of many hours until it reaches around 2,200°F.
At these extreme temperatures inside the kiln, the glaze melts and fuses to the clay body beneath it. The high heat hardens the clay and ceramics, increasing their strength. Chemical reactions occur between the glaze ingredients that give the glaze its final color and appearance.
Firing at such high temperatures also removes any moisture left in the clay plate. The entire plate becomes vitrified, meaning the clay and glaze bond together to become a single glass-like material. This process gives the completed ceramic plates their rigidity, durability, and water resistance.
Timing and temperature control are critical during the glaze firing stage. The kiln temperature must be raised and lowered precisely according to a firing schedule. Skilled kiln operators monitor the internal kiln temperatures and make any needed adjustments.
After 10-20 hours in the kiln, the firing is complete. The finished ceramic plates emerge fully hardened with the glaze surface melted smooth and glossy. The plates are left to slowly cool in the kiln before being removed for inspection and packaging.
Quality Inspection
Once the plates have gone through the final firing, they must pass a stringent quality inspection before being approved for packaging and shipping. Trained inspectors will examine each plate closely for any cracks, flaws, or defects that could compromise the integrity or durability of the plate. Tiny hairline surface cracks are often acceptable, but any deeper cracks or chips that penetrate through the glaze are cause for rejection.
Inspectors will also test the strength and durability of a sample of plates from each batch. They may bend the plates slightly or drop them from a short height onto a hard surface to ensure they do not crack or break under normal use. Plates that pass this durability testing without damage are then cleared for sale and distribution. Rigorous quality control ensures that only the highest quality ceramic plates make it into the hands of customers.
Packaging and Shipping
Once the plates have gone through quality inspection, they are ready for packaging and shipping. The packaging process is crucial because ceramic plates are fragile and can easily break if not properly protected.
Each plate is first carefully wrapped in protective paper or bubble wrap to cushion it and prevent scratching. Several wrapped plates are then packed together in a sturdy cardboard box filled with packing peanuts, foam, or crumpled paper to keep the items from jostling against each other during shipment.
For large wholesale orders, multiple boxes of plates are loaded onto wooden pallets. The pallets keep the boxes stable and evenly stacked during transit. They are also easily moved by forklifts and pallet jacks. Straps or stretch wrap are secured around the palletized boxes to hold everything in place.
Proper packaging and palletizing ensures the finished ceramic plates arrive at their destination free of cracks or chips. It protects the fragile wares from damage during the shipping process.
Further Processing
After being fired, inspected, and packaged, ceramic plates often undergo additional processing before being sold. This further processing can include decorating the plates with decals, hand-painting designs, or other methods of adding color and graphics. The most common decorating technique is to apply decals which are special waterslide images that adhere to the glazed surface of the plate when heat is applied. More intricate designs can be hand-painted directly onto the plates after glazing. Gold leaf accents are another option for adding decoration and details.
Plates may also be cut into various shapes during further processing. Standard circular dinner plates can be cut into square, rectangular, oval, or more unique shapes according to need. Pieces can be cut out of the rims to create scalloped or wave edged plates. Cutting is done with specialized ceramic cutting tools and requires skill and precision to avoid breaking the finished plate.
Adding decorative elements and cutting plates into unique shapes allows manufacturers to offer a wider range of styles and customization options. Further processing helps make each ceramic plate a unique work of art.