How Do I Learn To Make Pots?
Pottery making has a long and rich history spanning thousands of years across many cultures. Some of the earliest evidence of pottery use dates back over 20,000 years ago to cultures in East Asia and the Near East (The Evolution of Pottery From Ancient Times to Modern Day). Pottery allowed early humans to store and transport food, water, and other materials. Over time, pottery techniques evolved to include decorative glazing and intricate designs. While pottery was historically made by hand using simple tools, today there are many methods for both handbuilding and throwing pots on a wheel. From functional wares to beautiful works of art, pottery remains an important and creative craft around the world.
Types of Pottery
There are three main types of pottery that are commonly recognized: earthenware, porcelain, and stoneware. These categories are based on the temperatures at which they are fired, the materials used, and their properties and characteristics.
Earthenware is fired at relatively lower temperatures, typically between 1500-2200°F. It is lightweight and porous, and can be glazed or left unglazed. Earthenware is one of the earliest types of pottery made, dating back over 10,000 years. Common types of earthenware include terra cotta and redware. https://deneenpottery.com/pottery/
Stoneware is fired at high temperatures between 2200-2400°F, making it dense and non-porous. It can be glazed or left unglazed. The high firing temperature makes stoneware durable and water resistant. Stoneware has been produced for over 2000 years and was originally made in China. Modern stoneware includes ovenware like casserole dishes. https://en.wikipedia.org/wiki/Pottery
Porcelain is fired at the highest temperatures, between 2300-2600°F. It is extremely dense and vitrified, making it strong, hard and fully non-porous. Porcelain is white and translucent if not glazed or decorated. It was first made in China around 600-900 CE. Porcelain is often used to make tableware, art, and delicate household items.
Needed Supplies
Some of the basic supplies needed to start making pots include:
Clay: The most essential supply for pottery is clay. There are many different types of pottery clays, including earthenware, stoneware, and porcelain. Choose a clay based on your desired finished pieces. Porcelain and stoneware clays are best for items like tableware, while earthenware works for more decorative pieces.
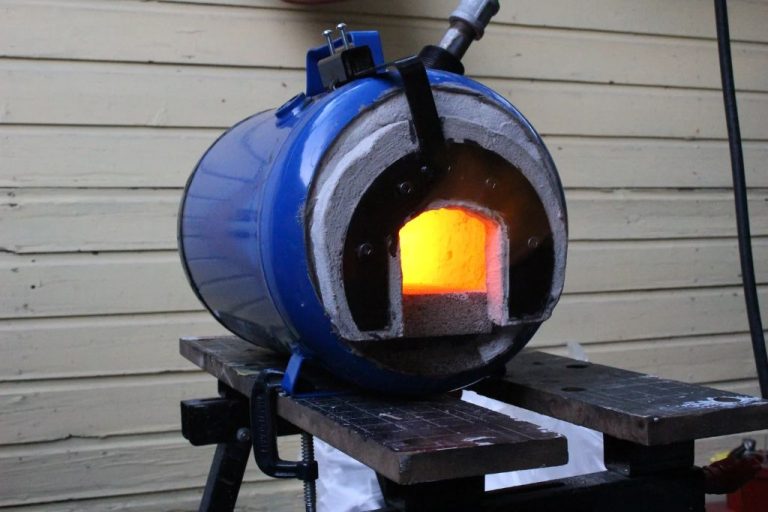
Kiln: A kiln is necessary for firing clay and hardening finished pottery pieces. Kilns reach extremely high temperatures to vitrify the clay. Options include electric, gas, and wood-fired kilns. Consider size and features based on your needs and budget.
Pottery wheel: A potter’s wheel allows you to centered and shape clay symmetrically. Wheels may be powered or kick wheels. Having a wheel greatly expands what you can create with clay.
Tools: Basic pottery tools include ribs for smoothing, loop tools for detailing, cutting wires, modeling tools like wooden ribs and metal scrapers, and pots for water. As you progress, you may want more specialized tools.
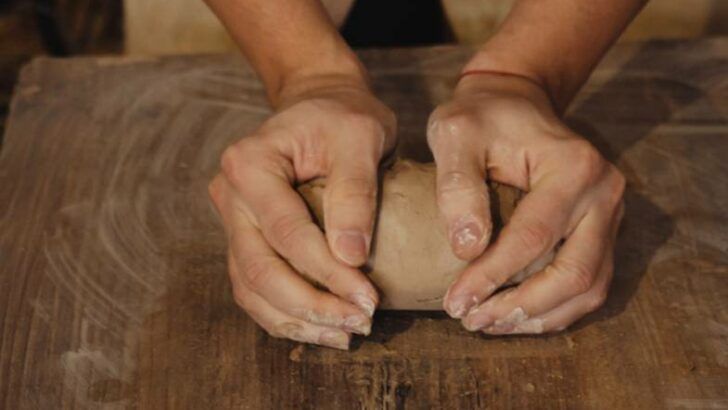
Clay Preparation
Properly preparing clay is an essential first step before beginning any pottery project. Clay preparation involves wedging, kneading, and slaking the clay to achieve an optimal consistency that is moist but not sticky. How to Prepare Clay for Pottery explains that wedging is repeatedly cutting and slamming a lump of clay down onto a flat surface to remove air bubbles and evenly distribute moisture. Kneading involves pressing, folding, and pushing the clay for several minutes to achieve a uniform consistency. Slaking means mixing the clay with small amounts of water over time until it develops a smooth, plastic-like texture that is flexible but not sticky.
According to How to Prepare Clay for Pottery, it’s best to prepare clay in small batches to prevent it from drying out. Allow the wedged or kneaded clay to rest in a sealed bag so the moisture equalizes completely before using it to shape pots or sculptures. Take the time to properly prepare clay in advance for best results in your pottery projects.
Shaping Methods
There are three main methods for shaping pottery – wheel throwing, handbuilding, and using molds. Of these, wheel throwing and handbuilding are the most common for beginners to start with (Step 6 Pottery Techniques Pulling and Shaping the Pot).
Wheel throwing involves using a pottery wheel to shape clay into symmetrical forms like bowls, vases, and plates. It requires practice to center the clay on the wheel and pull it up into an even wall thickness. Throwing allows creating uniform pieces and exploring variations through altering the clay height, width, textures, and more (Handbuilding Pottery 101: Hand Building Techniques & Projects).
Handbuilding relies on techniques like pinching, coiling, and slab building to manually shape clay without a wheel. Pinch pots are made by squeezing the clay into shape. Coiling builds up the form by stacking and smoothing coils or ropes of clay. Slab building uses flat clay sheets joined together. Handbuilding enables making freestyle shapes like sculptures, boxes, and reliefs.
Using molds provides consistency and allows replicating a shape. The clay is pressed into pre-made molds and then removed to set. Molds can be used for complex shapes not easily thrown on the wheel. However, wheel throwing and handbuilding allow more creativity in forming original shapes.
Decorating & Glazing
Glazes, slips, and decorative techniques like engraving and stamping can add interesting visual elements to finished pottery. Glazes are glass-like coatings applied to bisqueware and fired in a kiln to melt and fuse to the clay body. They come in endless colors and textures to create different visual effects. Common glaze types include transparent, opaque, matte, glossy, crystalline, and more. According to An Introduction to Decorating and Glazing Pottery, layering multiple compatible glazes can produce surprising interactions and vivid patterns.
Slips are fluid clay suspensions with specific properties like color and texture. They are painted onto leather-hard clay before bisque firing. Slips can be used alone as a surface finish or under a glaze. Popular slip decorating techniques include trailing, feathering, and mishima. Stamping clay with linocuts, rubber stamps, or found objects can quickly imprint patterned textures. Engraving leather-hard or bisqueware clay with metal tools, from simple lines to intricate designs, exposes the unglazed clay color beneath colored slips and glazes.
According to Decorating and Glazing Pottery Books, carefully planning decorative effects and testing combinations through sample tiles helps potters achieve their desired results. With the right glazes, slips, and techniques, potters can add beautiful and personalized touches to their finished work.
Drying & Firing
Properly drying and firing clay is critical for creating durable pottery. Here are some key steps in the drying and firing process:
Bisque Firing: After shaping raw clay, pottery must be slowly dried to remove any moisture. Pieces should dry for at least 1-2 weeks before bisque firing. Firing too soon can cause cracks or explosions. Bisque firing further hardens the clay body through heat. Kilns are usually ramped up to around 1800-2200°F. After bisque firing, pots are ready for glazing and decoration. Proper drying time is crucial for successful bisque firing.
Glaze Firing: After bisque pots have been decorated with glazes and underglazes, they undergo a second firing to melt and fuse the glazes to the clay body. Glaze firings are around 1900-2300°F. The glaze melting point determines the target temperature. Again, proper drying between bisque and glaze firing is important to prevent glaze flaws.
Raku Firing: Raku is a specialized firing technique originating in Japan. Pots are first bisque fired, then quickly glaze fired at a lower temperature around 1500-1800°F. Pots are then removed from the kiln while red hot and placed in containers with combustible materials to produce unique crackled glaze effects. Raku pottery has a distinctive handmade appearance.Raku’s unpredictable results make it popular among some potters.
Following proper procedures for drying and firing is essential for potters to successfully complete their creations. Patience is required, as rushing the process can destroy many hours of hard work.
Studio Setup
Setting up a functional pottery studio at home requires planning out the space and equipment. The ideal home studio has enough room for a potter’s wheel, work tables, storage, and wall space for drying finished pieces 1. Proper ventilation is also critical to deal with dust, fumes, and humidity from clay drying. Fans or even installing dust collection systems can help ventilate the studio 2.
When designing the layout, allow enough space around equipment for movement and workflow. Position the wheel near windows for light and ventilation. Have sturdy worktables for clay preparation, decorating, and glazing set up conveniently. Shelving along walls provides storage for tools, glazes, unfinished and finished pieces. A sink is useful for clean up. Natural light is ideal, but ensure adequate overhead lighting at work areas.
Basic equipment includes a potter’s wheel, kiln, clay tools, slab rollers or extruders. Consider the size and type of pieces you want to make, as small hobby kilns may only allow firing smaller items. Invest in quality equipment suitable for frequent use.
Developing Skills
Developing pottery skills takes dedicated practice and learning the fundamentals. Taking classes is one of the best ways to advance your skills under the guidance of an experienced instructor. Local studios like Fresyes Studio offer introductory wheel throwing and hand building classes to teach techniques in a hands-on environment.
Reading books and online tutorials can provide a wealth of information on methods and fundamentals. The book Mastering the Potter’s Wheel by Ben Carter provides step-by-step instructions and troubleshooting for throwing pots. YouTube channels like Hutteball Pottery have extensive video tutorials breaking down throwing and decorating techniques.
However, real skill development comes from regular practice. Expect to throw many failed or imperfect pieces starting out. But overtime and with persistence, you will hone muscle memory and skills. Stay motivated by keeping some of your best pieces and aim to gradually improve.
Business Considerations
If you want to turn your pottery hobby into a business, there are several important factors to consider when it comes to marketing, selling, and pricing your work.
First, you’ll need to identify your target audience and market. Research the types of pottery that sell well in your area, as well as price points. Consider selling locally through art shows, craft fairs, and galleries that attract your target buyers. You can also sell online through your own website, Etsy, and other marketplaces. Effective marketing through social media, email newsletters, and other channels can help attract customers.
When pricing your pottery, make sure to factor in all your costs including materials, studio expenses, labor time, and shipping. Price high enough to make a profit, but competitively for your market. Compare your work to other local potters with similar styles and experience levels. You can also consider increasing prices as you build your reputation and following over time.
As recommended by this slideshow, pottery can be a profitable business in India if you start small by making items from waste clay and firing at local kilns, then slowly invest in equipment as your business grows. Marketing through local exhibitions and retailers is key. Plan budgets, manage finances closely, and be flexible to adapt as you learn more about operating a pottery business.