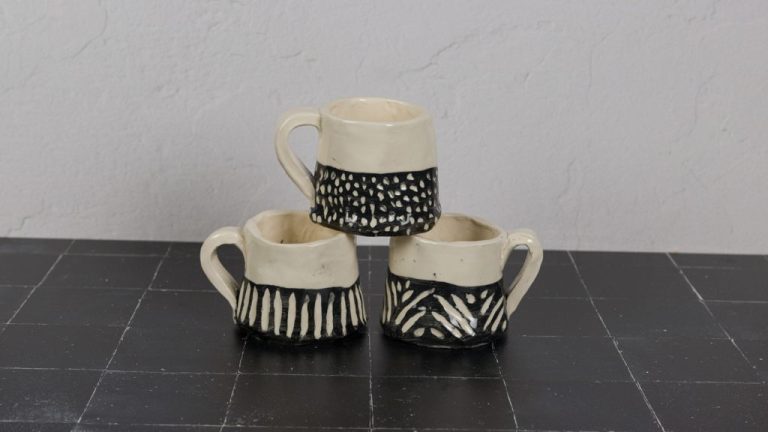
How Do You Glaze Ceramic At Home?
Ceramic glazing is the process of applying a glass-like coating to bisqueware pottery and ceramics. Glazes serve both decorative and functional purposes. They add color, shine, and texture to finished ceramic pieces. Glazes also make the ceramic item non-porous, allowing it to hold liquids without leaking. The glaze melts during high temperature firing and bonds to the ceramic clay body surface to form a smooth, durable glass coating.
Glazing enables nearly endless creative decorating possibilities with colors, textures, and finishing effects. It transforms plain bisqueware into a beautiful ceramic artwork. The glazing process involves carefully preparing and applying the glaze, letting it dry, and then firing at high temperatures in a kiln so the glaze vitrifies as glass on the clay surface. With some basic supplies and techniques, ceramic items can be glazed successfully at home.
Supplies Needed
There are several supplies you’ll need on hand before glazing your ceramic pieces at home:
Glazes – You’ll need to purchase or make your own glaze recipes consisting of natural ingredients like silica, feldspar, kaolin, and metal oxides which provide color. Store-bought glazes labeled non-toxic work as well.
Paint brushes – A variety of paint brush sizes and shapes will allow you to apply glaze designs. Foam brushes also work well.
Sponges – Sponges help create mottled or textured glaze effects. Natural sea sponges and man-made sponges both work.
Containers for glaze – You’ll need small containers or bowls to hold glaze as you work. Glazed ceramic bowls or plasticware work well.
Gloves and apron – Wearing gloves prevents glaze from getting on your skin. An apron protects your clothing from splatters.
Preparing the Ceramic
Before applying any glaze to the ceramic piece, it’s important to properly prepare the surface. Start by giving the piece a thorough cleaning to remove any dust or debris. Use a soft cloth or brush and warm, soapy water. Be gentle when cleaning as you don’t want to remove any detail from the surface. Rinse well and allow to fully air dry. Make sure there is no moisture left before moving to the glazing stage.
For unglazed ceramics, you may also wish to lightly sand the bisqueware surface. This helps the glaze adhere properly. Use a fine grit sandpaper and focus on any rough patches. Avoid over-sanding as this can remove too much detail. Once sanded, clean the surface once more to remove any ceramic dust. Allow to fully dry again before glazing.
Choosing a Glaze
There are several factors to consider when selecting a glaze for your ceramic project:
Color – Glazes come in endless colors like blues, greens, browns, and more. Consider the color you want your final piece to be. Mixing glazes can also create new colors.
Finish – Some glazes have glossy finishes while others are more matte. The ingredients and firing process impact the final surface.
Firing Temperature – Glazes must match the firing temperature of the clay body, either low fire or high fire. Using the wrong temperature glaze can cause under-firing or over-firing.
Lead-Free vs Leaded – Leaded glazes often have more vibrant colors but require extra safety precautions. Lead-free glazes are safer but have a more limited color range. Many potters use both.
Mixing Glazes – Layering separate glazes on a piece can create unique effects. However, some glaze ingredients can interact negatively, so test compatibility.
Consider testing different glazes on test tiles before applying them to your final piece. This helps achieve your desired color and finish.
Preparing the Glaze
Before applying glaze to the ceramic piece, it is important to properly prepare the glaze. This involves mixing, thinning, and straining the glaze to achieve the right consistency for application. According to The Little Pot Company, glaze is typically sold as a dry powder that must be mixed with water. Use a ratio of approximately 1 part dry glaze to 2-3 parts water. The exact ratio will depend on the specific glaze and instructions.
Mix the glaze thoroughly to fully dissolve any lumps and achieve an even consistency. Then strain the liquid glaze through a fine mesh sieve or paint strainer to remove any remaining particles. This helps ensure the glaze flows smoothly during application. Add small amounts of water to thin the glaze as needed – a creamy, yogurt-like consistency is ideal. Test the glaze on a tile before applying to the ceramic piece. Adjust the thickness as needed for the desired effect.
Applying the Glaze
There are several techniques for applying glaze to ceramic pieces. Some of the most common methods include:
Brushing – Using a brush to apply glaze allows you to coat the piece evenly and get into detailed areas. Choose a soft bristle brush and dip into the glaze, then brush onto the bisqueware piece in smooth, overlapping strokes. Brushing works well for broad surfaces.
Dipping – Dipping involves submerging the bisqueware piece into a container of glaze. This fully coats the piece quickly and evenly. Hold the piece by the bottom or a handle and lower it in at an angle, rotate to coat all sides, then lift out vertically to let excess drip off. Dipping is good for items with simple shapes.
Pouring – For pouring, hold the ceramic piece over a bucket or bowl of glaze and gently pour glaze over the top and sides. Tilt and turn the piece to distribute the glaze. This gives a fluid, drippy effect. Use sparingly over specific areas or coat fully for an overall look.
Sponging – Apply glaze to a natural sea sponge, then dab onto the bisqueware piece in a random, mottled pattern. Sponging creates an organic, layered look. Use a soft sponge and reapply glaze as needed for full coverage.
Achieving Desired Effects
One of the great things about glazing ceramics at home is that you can achieve a variety of artistic effects with some simple techniques:
Using resist – You can “resist” the glaze from certain areas by applying wax or latex resist products before glazing. The glaze will slide right off of these areas, creating a decorative effect. Using masking tape or contact paper before glazing can produce a similar resist effect.
Layering glazes – Applying multiple glazes on top of each other in layers can produce interesting interactions between the glazes and colors. Start with your base glaze color, allow to dry, then apply a second contrasting glaze on top in patterns or designs.
Wax resist – Drawing into the glazed surface with an oil pastel, candle, or crayon before firing can produce simple wax resist line designs as the wax resists the glaze during firing. The wax burns off in the kiln, leaving just your design.
Glaze trailing – Letting dripping lines and pools of glaze form naturally can make abstract effects. Hold the piece on its side or upside down and let the glaze run.
Textured glazes – Mixing texture materials like sand or sawdust into glazes before applying can give the surface more visual interest after firing.
By playing around with layering, trailing, resists, and texturing, you can discover all kinds of cool decorative glaze techniques when firing at home.
Allow to Dry
After the glaze has been applied, you’ll need to allow adequate time for the ceramic piece to dry completely before firing. The drying time will depend on the thickness and porosity of the clay body, the thickness of the glaze layer, and ambient temperature and humidity.
As a general guideline, allow bisque ware to dry 24-48 hours before firing. For raw clay, drying time may take several days to a week or more if the pieces are large and thick. Ensure the ceramic is drying evenly – if some areas dry faster than others, cracking may occur.
There are a few ways to help ensure even drying:
- Apply glaze in thin, uniform coats.
- Allow drying on a rack so air can circulate all around the piece.
- Periodically rotate or flip pieces while drying.
- Control humidity and airflow in the drying area.
Test dryness by touching the surface – when it no longer feels cool to the touch, the glaze layer is likely dry. Keep a close eye on drying pieces to avoid issues like dripping or running glaze.
Firing the Glaze
The final step in the glazing process is firing the ceramic piece in a kiln. There are several types of kilns used for firing glazed ceramics including electric, gas, raku, and wood-fired kilns. Each kiln type requires specific firing schedules and safety precautions.
Electric kilns are the most common for home ceramic studios. It’s important to follow the manufacturer’s instructions for the first firing or “bisque firing” of a new electric kiln. A slow ramp up to a maximum temperature around cone 08 is recommended to fully cure the interior bricks and elements (How To Test Fire A New Kiln). For glaze firing, most electric kilns have controllers that allow programming a firing schedule. A common schedule is to increase temperature at 200-300 degrees F per hour up to the maturing temperature of the glaze, hold for 15-20 minutes, then allow to cool slowly back to room temperature.
Gas and wood-fired kilns allow more variation in firing but can be more difficult to control. Specific ventilation requirements must be met for gas kilns. Wood-fired kilns require constant monitoring and addition of fuel during the firing. Raku kilns are small, gas-fired kilns that allow removal of pots at red heat for special effects. No matter the kiln type, proper protective equipment like respirators and fire-proof clothing should be worn.
To prevent glazed pieces from fusing together, stilts or spaced ceramic pieces may be used (Stilt (ceramics)). Once cooled, the glazed ceramic is ready for final cleaning, polishing, or display.
Finished Results
After firing, the glazed ceramic will need to be thoroughly cleaned before it is ready to use or display. Here are some tips for finishing glazed ceramic pieces:
Washing – Use warm water and a soft sponge or cloth to gently wash away any ash or firing residue left on the surface of the glaze. Avoid abrasive scrubbing as this can scratch the glaze. Make sure to get into any crevices to remove debris.
Removing Firing Residue – For stubborn firing residue, let the ceramic soak in warm water for 10-15 minutes. This should loosen the residue for easier removal. You can also use a soft toothbrush to gently scrub off any remaining debris.
Sealing – It’s recommended to seal glazed ceramic that will come in contact with food or drink. Use a food-safe sealant and follow the product instructions for best results. Sealing prevents staining and makes cleaning easier.
Displaying – Be careful of placing hot objects on glazed ceramic as this can cause crazing. Use felt pads under any ceramic pieces to prevent scratching. Position pieces away from direct sunlight which can cause colors to fade over time.
With proper washing and some finishing touches, your glazed ceramic creations will be ready to use and enjoy for years to come.


