How Do You Make A Fox Out Of Clay?
Gather Your Materials
To make a fox sculpture out of clay, you’ll need the following supplies:
- Air-dry clay (2-3 blocks depending on desired size of sculpture)
- Clay sculpting tools like loop tools, rib tools, carving knives, etc.
- Rolling pin
- Craft knife
- Acrylic or tempera paints & brushes for painting
- Optional: googly eyes, beads, fabric scraps, or other items to decorate
Make sure you have a working surface that can get messy, as working with clay can get a bit messy. Cover your work area with newspaper, wax paper, or a disposable tablecloth.
Gather all your tools and materials beforehand so they are on hand when needed for each step of the sculpting process.

Prepare the Clay
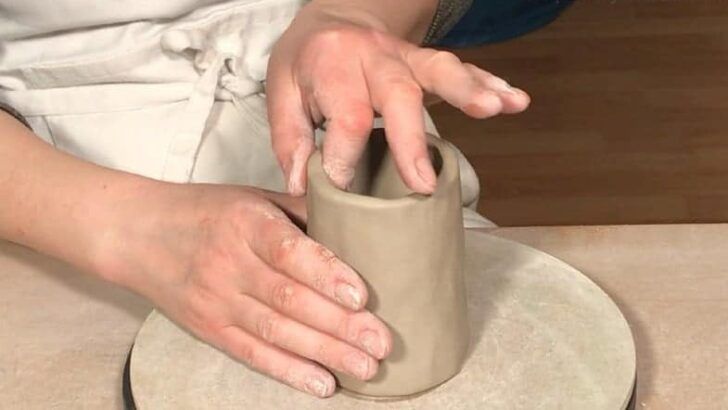
Before sculpting your fox, it’s important to properly prepare the clay to make it soft and pliable for shaping. Start by kneading the clay thoroughly. Kneading helps warm up the clay by creating friction and makes it more malleable.
To knead, press into the clay firmly with the palms of your hands and fingers, then fold the clay over itself. Continue kneading for several minutes until the clay is smooth, soft, and pliable. If the clay is cold, the warmth of your hands while kneading will bring it to an ideal temperature and consistency for sculpting.
After kneading, use a rolling pin to roll out the clay to your desired thickness. Rolling helps further warm and soften the clay. Roll the clay out on a flat, smooth surface lightly dusted with cornstarch or clay sculpting powder. Roll gently but firmly, applying even pressure. Get the clay approximately 1⁄4 to 1⁄2 inch thick for fox sculpting. Source
The clay is now ready for sculpting your fox! It should be soft, pliable, and the perfect consistency for shaping without sticking too much to your fingers and tools. Properly preparing the clay is an important first step to ensure your sculpture holds its shape once formed.
Shape the Head
Begin by forming an oval shape for the fox’s head using your hands. This will be the base upon which you build the rest of the facial features. Press gently but firmly to create a rounded, smooth surface.
Next, use your sculpting tools to indent the eyes. Make two almond shaped depressions on the front of the oval, spaced evenly apart. Sculpt the nuances of the eyes such as the pupils and eyelids for added detail.
For the nose, press your tool into the clay snout to make a triangular shaped nose. Refine the edges so they are clean lines. You can make nostrils by making two small oval indents if desired.
The mouth can be created by making a slightly curved line below the nose. Make indents along this line for definition of the lips and teeth if wanted. Finally, shape the ears against the sides of the head using your tools. Make folded, triangle-like ears for a realistic look.
Take your time gradually refining the facial features to achieve an anatomically accurate fox head sculpture. Rotate the head frequently to ensure symmetry and proportionality.
Shape the Body
Once you have created the head, you’ll want to form the body. Start by taking a pear-sized piece of clay and rolling it into an oval or egg shape. This will be the main part of the fox’s body.
Gently flatten one end of the pear shape to create the chest and neck area where the head will attach. Then begin tapering the other end to form the hips and rear of the fox. Use your fingers, clay shaping tools, or acrylic rods to refine the shape.
The goal is to have a rounded upper body that flows into a tapered lower body, similar to a pear. This creates a natural and realistic body shape for the fox sculpture. You may need to add or pinch away clay until you have the balance you want.
Next, use various sculpting tools to indent and shape the legs, paws, and tail. Make four indentations around the upper body for each leg. Then use a knife or carving tool to define the paws and shape the feet. For the tail, roll out a snake-like piece of clay and attach it to the rear, shaping as desired.
Work slowly and carefully as you form the appendages. Check proportions as you work to ensure the legs and tail are the appropriate sizes relative to the body. Refine the textures and anatomy to give your fox personality and life.
Refine the Sculpture
Once you have the basic shapes formed, it’s time to refine your sculpture and add finer details. Use various sculpting tools like loop tools, ribs, and wooden tools to smooth out shapes and add texture.
Focus on refining the shapes of the head, body, legs, and tail. Add subtle contours and blend together different parts for a seamless look. You can also use the loop tools to indent the eyes and nose area, creating more definition.
To sculpt the fur, make small, tight coils with a rib tool pressing into the clay perpendicular to the body. This will create grooves to resemble fur. Work in small sections and vary the texture and pattern as you go. Refer to photo references of fox fur for a realistic look.
You may also want to add finer details like whiskers. Carefully press thin pieces of clay into the muzzle area to create slender whiskers. Bend them slightly for added realism. Be careful not to overwork the sculpture when refining it, as the clay can become distorted.
Take time on this step to refine the shapes and textures. Your patience will pay off in creating a more polished finished sculpture. For more clay sculpting tips, see this article on basic clay techniques (https://ceramicartsnetwork.org/daily/article/A-Couple-of-Cool-Clay-Sculpture-Techniques).
Let It Dry
After sculpting and shaping your fox, it’s important to let it dry completely before painting or finishing the piece. Air dry clay requires 24-48 hours to fully cure and harden through evaporation.
Find an out-of-the-way spot where you can let your sculpture sit undisturbed as it dries. Make sure it is in a well-ventilated area so moisture can fully evaporate from the clay. Avoid excess heat or direct sunlight which could cause cracking or warping. You may want to place your fox on a drying rack or stand so air can circulate all around it.
Test for dryness by touching the thickest parts of the sculpture. There should be no indentations or soft spots left. If needed, allow additional drying time until the clay has fully hardened. Rushing the painting stage can cause chipping or peeling. Patience is key for quality results!
Once your fox feels solid, rigid, and smooth to the touch, it is ready for the painting process. Avoiding under-drying will help the paint fully adhere and make your creation durable for display. With proper drying, your sculpture will last for many years to come.
Prepare for Painting
Before you start painting your air dry clay sculpture, you’ll want to make sure the surface is properly prepared. Lightly sand any rough areas using a fine grit sandpaper. This will smooth out any imperfections. Be gentle as you don’t want to sand away too much of your sculpture. Just focus on problem spots that feel rough to the touch.
After sanding, wipe away any dust using a dry cloth or paper towel. Make sure to get into all the crevices to remove any debris. You want a clean surface before painting so the paint adheres properly. Any leftover dust could prevent the paint from bonding to the clay.
Now your air dry clay sculpture is ready for paint! Proper surface preparation helps ensure your paint job turns out smooth and vibrant.
Paint Your Sculpture
Start by applying a base coat of paint that matches the color of your fox’s fur. Acrylic paints like FolkArt Terra Cotta Acrylics work well on polymer clay. Use a large brush to cover the entire sculpture evenly.
Once the base coat has dried, add darker brown acrylic paints for depth and definition. Work in thin layers, allowing each layer to dry before adding the next. Use darker paints to accentuate the ears, legs, tail and muzzle of the fox.
Finally, paint on the details like eyes, nose and mouth. Black paint works well for the eyes and nose. Consider adding a touch of white to paint the teeth and accentuate the eye reflections. Allow the paint to dry fully before applying a protective sealant.
Finish with Details
Adding fun accents like googly eyes or faux fur can bring your clay fox sculpture to life. Consider gluing on wiggle eyes, a fuzzy tail made from yarn, or other decorative elements. Get creative and customize your fox with unique personality. You can also add patterns, textures, or designs by imprinting the clay with stamps, carving marks, or painting on unique features.
Once your fox sculpture is complete, you may want to seal and protect it with a spray acrylic sealer. An acrylic spray will help harden the sculpture and add a glossy finish. It will also prevent the clay from absorbing moisture and protect your creation from damage. Apply multiple thin coats of acrylic sealer, allowing each coat to fully dry before adding the next. This will help ensure a smooth, even finish.
Display Your Clay Fox
Now that you have finished sculpting and painting your fox, you will want to properly display it to show off your handiwork. Clay sculptures are delicate, so take care in choosing a display spot where the fox will not get knocked over or damaged.
A great way to display your clay fox is on a shelf or desk where it can be prominently seen. Be sure to place it away from high traffic areas where it could get bumped. Angle the fox slightly towards the front of the shelf so guests can admire it from the front and sides.
Clay sculptures also make heartfelt handmade gifts. Consider giving your clay fox to a loved one as a keepsake. Place the fox in tissue paper inside a gift box to protect it before gifting. Include a note sharing the meaning behind your artistic creation.
No matter how you choose to show off your finished fox, take pride in your clay sculpting skills. Let your handmade fox become a conversation piece that brings joy and inspiration to all who see it.


