How Do You Make A Simple Pinch Pot?
A pinch pot is one of the most basic forms of pottery, dating back thousands of years. Pinch pots have been created across many cultures since ancient times. Examples have been found from ancient Egypt, Greece, Rome, China, Japan, and amongst Native American tribes.
Pinch pots are handbuilt using a simple technique that involves pinching and shaping clay with your fingers and thumbs, without the use of a pottery wheel. It is one of the easiest and most accessible ways to make pottery, requiring only clay, your hands, and creativity.
The earliest known pinch pots were made during the prehistoric Jōmon period in Japan, over 10,000 years ago. They were created by the Indigenous Jōmon people, who shaped small pots from ropes of clay. Pinch pots were also popular during ancient Greek and Roman times for ceremonial purposes. Their simplicity and rustic style has made them popular across many cultures and time periods.
Today, pinch pots remain a foundational technique for aspiring potters. They help beginners learn how clay moves and feels under their fingertips. Pinch pots are fun, versatile projects that unleash creativity. Their simplicity also makes them a favorite children’s craft. With just a lump of clay, your hands, and imagination, you can create your own unique pinch pot full of history and artistry.
Supplies Needed
Making a simple pinch pot only requires a few basic supplies. The most important is the clay you will use. There are two main options – polymer clay that gets hardened in the oven, or air-dry clay that hardens as it dries.
Polymer clays like Sculpey are very easy to work with and hold their shape well for pinch pots. According to this tutorial, polymer clays are great for beginners and children.
Air-dry clays take longer to dry out and harden, but don’t require baking. They may be more prone to cracking or collapsing, so take care when working the clay. A smooth, non-sticking clay brand like Cloud Dough works well.
A basic pinch pot project requires no additional tools. But having a rolling pin, cylindrical object, or acrylic roller can help shape an even base. Decorating tools like rubber stamps, texture makers, or clay shapers allow embellishing the pinch pot when desired.
Shaping the Clay
Kneading the clay is an important first step before shaping your pinch pot. Take the clay and knead it in your hands for a few minutes until it becomes soft and pliable. Work the clay to get rid of any air bubbles or dry spots. The clay should be smooth and elastic when ready for the next step.
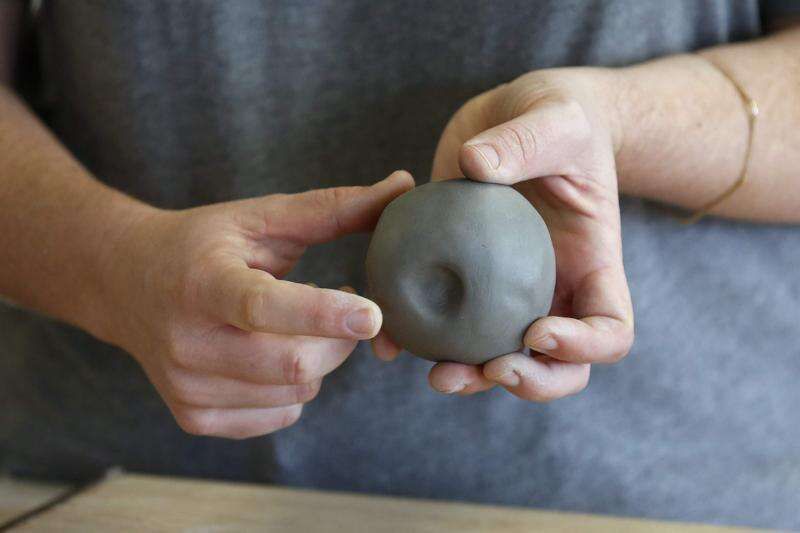
Once the clay is kneaded, form it into a smooth ball shape by rolling it between your palms. Make the ball as uniform and round as possible. Then, use your thumb to push into the center of the clay ball to form an indentation and hollow cavity. Press your thumb in to create a bowl shape, being careful not to poke all the way through the bottom. The depth of the cavity will depend on the size of pot you want to end up with. Wider and deeper pinch pots will require a larger cavity.
Pinching the Sides
Once you’ve shaped the bottom into a rounded shape, it’s time to start pinching up the sides. Pinch the clay between your thumb on the inside of the pot and your fingers on the outside. Apply even pressure as you pinch around the pot to draw the clay upwards. Slowly rotate the pot in your hand as you pinch, working all the way around to form the sides.
The pinching technique allows you to gradually shape the soft clay. Take care not to pinch too thin or apply too much pressure, or the clay may tear. Continue pinching and rotating until you form the desired shape. Most pinch pots have gently sloping, slightly rounded sides. However, you can create different shapes by pinching straighter, angled, or curving sides as desired.
As you pinch, support the shape with your other hand on the outside. Use your thumb on the inside to evenly thin the walls. Make the walls thinner near the rim for flexibility when attaching the top. The bottom will be thicker since it bears the weight (Porcelain by Antoinette, 2022).
Finishing the Rim
Once you’ve pinched and shaped the sides of your pot, it’s time to finish the rim. Use your fingers to smooth and shape the rim however you’d like. The rim can be thin, thick, flat, or rolled for different aesthetic effects.
Press gently and rub the clay between your fingers to thin and even out the rim. Be careful not to pinch too hard or the rim may become too thin and prone to cracking or breaking. Aim for an even thickness all the way around.
For a flat rim, simply press down on the top edge and smooth with your fingers until flat. For a thicker rolled rim, pinch and roll the clay outwards to create a rounded lip around the top edge. Take your time finishing the rim and shape it into your desired look.
The finishing touches on the rim complete your pinch pot! Make sure the rim is smoothed out before moving on to drying and firing your creation.
Optional: Adding Decoration
Adding decoration to a pinch pot can make it more unique and interesting. There are a couple easy ways to decorate pinch pots.
One method is to add texture by pressing designs into the clay with different tools. You can use everyday household items like forks, combs, or bottle caps. Press the tool gently into the soft clay to leave an imprint. This gives the pinch pot some visual interest and dimension.
Another decoration idea is to cut shapes and designs out of extra clay and attach them to the pinch pot. Let your creativity run wild, cut out circles, squiggles, leaves, animals, or anything you can imagine! Attach the clay shapes by slipping and scoring the edges. The clay will stick together to hold the decorations in place.
Decorating your pinch pots with texture or cutout shapes adds personality. The decoration possibilities are endless, so have fun with it and make your pinch pot unique! For more decoration ideas, see this Pinterest board.
Drying the Pinch Pot
After forming your pinch pot, it is important to let it fully air dry before firing. Clay contains water which must evaporate before firing. If there is any moisture left in the clay, the pot could crack or explode in the kiln.
Allow the pinch pot to air dry for 24-48 hours. Drying time will vary based on factors like temperature, humidity, air circulation, and thickness of the clay walls. Check for dryness by looking for lightening in color and feeling that the pot is cool and no longer damp. The clay should be hard and rigid when fully dry.
Find an out-of-the-way spot for air drying where the pot won’t be disturbed. Placing it on a rack or grid will allow air circulation all around. Avoid drying too quickly near direct sun or heat which could cause cracking.
Once the pinch pot is completely dry, it is ready to be fired in a kiln according to the clay manufacturer’s instructions. Firing will permanently set the clay shape.
Firing the Pinch Pot
The next step after the pinch pot has dried completely is to fire it in the oven to harden and finish the ceramic clay. It’s important to follow the manufacturer’s instructions for firing polymer versus air-dry clays, as they require different temperatures and times.
For polymer clays like Sculpey or Fimo, a typical oven temperature is 225-275°F for 15-30 minutes per 1/4 inch of thickness. Air-dry clays like Crayola Model Magic require lower temps around 225°F for 1-2 hours. Firing for too long or too hot can cause cracking or scorching. The clay package directions will indicate the ideal time and temperature.
Set a timer so you don’t forget the pinch pot in the oven. The clay will firm up, darken slightly, and become durable after firing. Make sure the pot is fully cooled before handling.
Adding Finish
Once your pinch pot has been fired, you can add extra decorative touches like paint or glaze to finish the piece. Using paint or glaze will give your pot an extra glossy look and add color. Acrylic paints work well for finishing pinch pots. Make sure to use paints intended for ceramics that can withstand high temperatures. Apply the paint in thin, even coats and allow it to fully dry between coats.
Another option is to apply a ceramic glaze after firing the pinch pot. Glazes come in many colors and textures, so you can customize the look. Brush the glaze on evenly and avoid over-application that can cause drips. Always follow the specific glaze instructions for best results.
If there are any unglazed areas on your pinch pot you want to leave natural, consider applying a clear acrylic sealant or varnish. This will seal the clay and help protect the surface of the pottery. Test sealants on an inconspicuous spot first before applying it all over. Apply thin, even coats and let dry fully between coats for best protection.
Displaying Pinch Pots
Pinch pots make for great homemade gifts or decorative accents around the home. Get creative with displaying your finished pinch pots!
Pinch pots can be given as gifts to friends and family for birthdays, holidays, or other special occasions. Fill them with candy, flowers, or other small trinkets to create a personalized gift. Their handmade look gives them a unique charm.
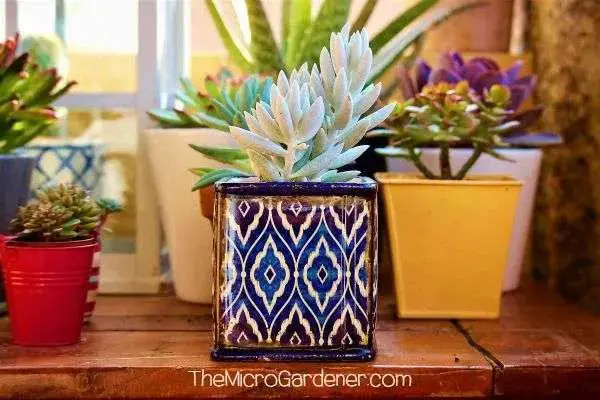
Around the house, use pinch pots as charming plant holders or pencil holders on desks. Cluster several in a bowl or tray for an eclectic look. Or line them up on a shelf as decorative accents. Their petite size makes them easy to display anywhere.
Some fun ideas for displaying pinch pots include:
- Arranging them on a tiered display for height and visual interest
- Hanging them from strings or ribbons
- Placing them on a bookshelf or console table
- Grouping them together in centerpieces or vignettes
Let your creativity run wild when presenting your finished pinch pots. They make great gifts and home accents to be proudly displayed. For inspiration, check out pinch pot display ideas on sites like Pinterest (https://www.pinterest.com/Lisaartcross78/pinch-pots/). The options are endless!