How Do You Make A Square Pyramid Out Of Clay?
A square pyramid is a three-dimensional geometric shape with a rectangular base and four triangular sides that meet at a common point. It’s a fun and satisfying clay project for both kids and adults. Making a clay pyramid allows you to practice fundamental sculpting techniques while creating an interesting decorative object. Pyramids are simple but striking shapes that make appealing ornaments, bookends, paperweights, or containers. They can be customized in many creative ways by adding textures, patterns, beads, gems, or paint.
Clay is an ideal material for crafting pyramids because it’s easy to mold and shape. Compared to materials like wood or metal, clay requires no special tools beyond your own two hands. It’s also very forgiving – if you make a mistake, you can simply mush it up and start again. The finished piece can be left to air-dry or fired in a kiln for a hardened, permanent sculpture. With a little bit of time and effort, you can turn a lump of clay into a beautiful three-dimensional pyramid.
Gather Materials
Before starting your clay pyramid project, you’ll need to gather these supplies:
-
Air-dry modeling clay – This type of clay dries hard at room temperature without needing to bake it. Look for a clay that’s easy to shape and smooth.
-
Rolling pin – Used to roll out flat, even clay for the pyramid base.
-
Ruler or measuring tape – Needed to measure out the clay and create straight edges.
-
Craft knife – Helps precisely cut the clay edges.
-
Popsicle sticks or clay sculpting tools – Allows sculpting details and smoothing clay surfaces.
-
Acrylic paints and brushes (optional) – For adding color and designs.
-
Clear acrylic sealer (optional) – Seals and protects finished clay artwork.
-
Clean workspace – Table or countertop protected by wax paper or mat.
Prepare the Clay
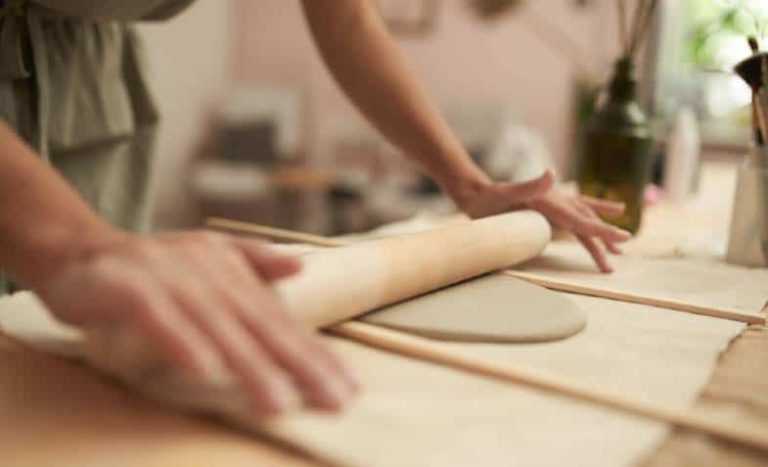
Before you can start shaping your clay, it’s important to properly prepare it so it has the right consistency for sculpting. Here are some tips for preparing polymer or air-dry clay before starting your pyramid project:
If the clay is hard right out of the package, start by kneading it with your hands to soften it up. Knead the clay continuously, pressing and folding it over on itself until it becomes smooth, pliable, and free of lumps.
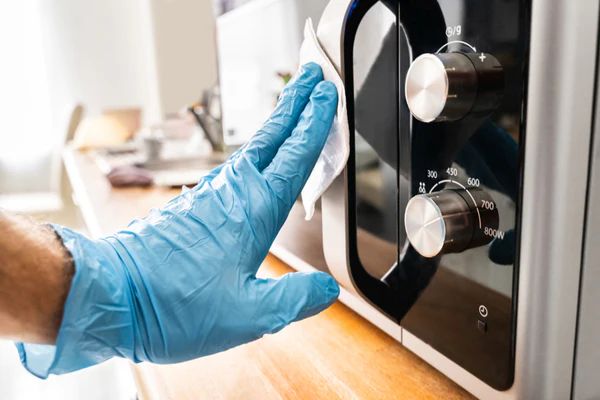
If kneading alone isn’t softening the clay, try warming it up. Either let it sit at room temperature for an hour or two, or hold it in your hands to warm it with your body heat. You can also microwave it in 10 second bursts, being careful not to overheat.
To condition sculpting clay and achieve an ideal texture, you may want to run it through a clay roller or pasta machine on the thickest setting. This will flatten and smooth out the clay evenly.
Work the clay until it is malleable enough to easily shape and smooth without cracking, but not so soft that it loses its form. The clay should be firm but supple for constructing a geometric shape like a pyramid.
Keep unused clay in an airtight container so it does not dry out. Knead softened clay again if it starts to stiffen up while working.
Shape the Base
The square base provides stability and structure for your clay pyramid. To create it:
- Roll the clay into a ball to soften it and make it more malleable
- Press the clay ball into a flat square shape about 1/2 inch thick
- Use a yardstick or ruler to measure and cut straight edges, making sure all 4 sides are equal in length
- Smooth the edges by gently running your finger along them
- Use the palm of your hand to flatten the base further, pressing firmly but taking care not to distort the square shape
- Continue smoothing and flattening the base until you have a nice even 1/4 inch thick square
The dimensions of the square base can be adjusted for the overall size you want your pyramid to be. Just keep in mind the bottom needs to be wide and stable enough to support the full structure.
Build the Sides
After the square base has been formed and allowed to dry until firm, it’s time to build up the four triangle sides that extend from each edge of the base. These four triangles will meet at a point above the center of the base, forming the pyramid shape.
To build the sides, first roll out four equal sized balls or strips of clay, one for each triangle side. The amount of clay needed will depend on how tall you want the finished pyramid to be. Just make sure you have enough clay to form four equal sized triangles.
Take one of the clay pieces and press it against one edge of the square base, forming a triangle shape. The two other corners of the triangle should meet at a point above the center of the base. Repeat with the remaining three clay pieces on each edge of the base.
As you attach each triangle side, gently blend and smooth where it meets the base. Try to get clean 90 degree angles at each corner. Once all four sides are attached, blend and smooth the corners where the triangles meet at the top. The sides should form a uniform pyramid rising from the square base.
Smooth the Sides
Once you’ve built up the four sides of the pyramid, it’s time to smooth out the clay and shape the sides. This is an important step to help give your pyramid a polished, professional look. Here are some techniques for smoothing the sides:
- Use your fingers and some water to gently smooth over any cracks, bumps or uneven areas in the clay sides. The water will help smooth and blend the clay. Don’t over-wet the clay or it may get too soggy.
- You can also use clay shaping tools like a rounded modeling tool, loop tool or rubber rib to smooth the clay. Gently run the tools along each side, pressing and blending as you go.
- Check for any major cracks or gaps and fill them in by pressing more clay into the space. Blend the new clay into the existing side.
- Once the sides look relatively smooth, go over them again with a soft paintbrush to blend and polish the clay. Brush in long, even strokes.
- Use a rolling pin on the very top edges of the sides to help flatten and define the shape. Roll gently to compress the clay.
- Continue smoothing until each side has a nice even surface without major lumps, cracks or imperfections. The sides should have relatively straight, crisp edges.
Take your time with this step to really refine the shape and appearance of your pyramid sides. Smoothing out the clay properly will help take your pyramid from a basic shape to an impressive, professional-looking artwork.
Add Decorations
There are many creative ways to decorate your clay pyramid to make it uniquely yours. Here are some ideas for adding embellishments:
Clay Tools: Use clay tools like rubber stamps, cookie cutters, or modeling tools to imprint designs into the clay. Press leaves, seashells, or other found objects into the soft clay to leave an impression. Cut shapes out of clay using cookie cutters and attach them to the pyramid with slip.
Paint: Once the clay has dried, acrylic paints work great for adding color and designs. Paint the entire outside of the pyramid or just certain sections. Use paint pens or fine brushes for adding intricate details and patterns.
Natural Materials: Incorporate natural elements like seeds, sticks, stones, sand, or dried flowers. Press them gently into the soft clay before baking or glue them on after painting. Things like mica powder add nice shimmery effects.
Mosaic Tiles: Break colorful ceramic tiles into small pieces and arrange them in patterns on the sides of the pyramid. Use tile adhesive or clear glue to affix them to the dried clay.
Get creative with the decorations and make your pyramid reflect your unique style and personality. The options are endless!
Create the Capstone
The capstone is the top piece that completes your square pyramid. To make it, take a small square piece of clay and flatten it out into a square shape using a rolling pin or your hands.
Make sure all sides of the capstone are equal in length so you have a perfect square. The length of each side should be slightly smaller than the base of your pyramid so the capstone rests on top neatly.
Once your capstone square is ready, lift your pyramid and gently press the capstone on top, right in the center. You may need to widen the opening at the top of the pyramid slightly to fit the capstone, but be gentle so you don’t distort the shape.
Firmly secure the capstone in place by smoothing the seams between it and the pyramid sides. You can use water or slip to adhere it if needed. Make sure it sits flat and even.
The capstone completes your pyramid! Now you have a square base leading up to a square top.
Let Dry Completely
After shaping and smoothing your pyramid, it is crucial to let it dry completely before painting or handling it excessively. Air drying is the easiest method. Place your pyramid in a warm, dry area out of direct sunlight and allow it to sit undisturbed for at least 24-48 hours. The drying time will vary based on factors like clay thickness, climate, and ventilation.
You’ll know your clay pyramid is ready when it is cool to the touch and has lightened in color. Tap lightly on the surfaces and edges; they should feel hard, not soft or squishy. Try standing your pyramid upright on its own without wobbling. Verify there is no moisture on the bottom. These are all signs your clay has dried thoroughly.
Rushing the drying process can lead to cracks as the interior clay continues to dry and shrink. Insufficient drying will also prevent paint from properly adhering. Have patience and allow your clay adequate time to release all moisture. The extra time will pay off with a stronger, more durable pyramid that will last for years to come.
Apply Protective Finish
Once your clay square pyramid is fully dry, it’s important to apply some type of protective finish. This will help the clay keep its shape, strengthen it, and prevent chipping or cracking over time. Here are some good options for protective finishes:
Acrylic varnish or polyurethane: These clear finishes are designed for use on clay and ceramics. They will seal and protect the clay while still allowing the natural surface to show through. Apply 2-3 thin coats with a soft brush, allowing each coat to fully dry in between. The varnish will provide a nice sheen and sturdy protection.
Decoupage glue or mod podge: These can also be used as a topcoat on dried clay. They dry clear and add a glossy, sealed finish. Brush on 1-2 thin coats, letting each fully dry before adding the next. The end result will be a smooth, durable seal.
Clear glaze or sealant: Specially formulated for clay and pottery, these provide a transparent finish while hardening and waterproofing the surface. Follow package directions for best results. Multiple coats are usually needed, drying in between each.
No matter which protective finish you choose, take care not to over-brush or make the coats too thick. Thin, even layers worked into the clay are best for maximum protection without cracking. And avoid any finish containing solvents that could interact poorly with polymer clay. Once sealed, your clay pyramid will maintain its beauty for many years to come.