How Do You Make A Stone Ring?
Stone rings have been treasured throughout history for their natural beauty and symbolic meaning. The earliest rings date back over 7,000 years ago and were often made of simple materials like bone, wood, and soft stones. By around 5300 BC, artisans began crafting rings from harder stones like jade, onyx, and quartz which required more advanced tools and techniques (The Spiritual Significance of Stone Rings Throughout History).
Creating a stone ring involves selecting an appropriate gemstone, shaping and polishing it, creating a metal band, and setting the stone. The process requires specialized tools, attention to detail, and an artistic eye. Common stones used for rings include diamonds, sapphires, emeralds, rubies, opals, turquoise, onyx, and quartz.
This guide will walk through the full process of crafting a unique stone ring, from choosing a stone to polishing and sizing the final product. With some patience and the right techniques, you can create a meaningful, handmade ring to treasure.
Selecting Stones
When making a stone ring, one of the most important decisions is selecting the right stone. There are a few key factors to consider when choosing a stone:
Hardness rating – The hardness of the stone, known as its Mohs scale rating, indicates its durability and ability to withstand daily wear. For rings, a hardness rating of 7 or higher is best, like sapphire or ruby. Softer stones like opal (5-6) can chip or scratch more easily.
Color/appearance – The color and look of the stone impacts the overall style and design of the ring. Popular stone colors include blue sapphire, red ruby, green emerald, but many other hues and patterns can create unique looks.
Symbolism – Some stones carry cultural significance or personal meaning that makes them appealing for rings. For example, diamonds symbolize enduring love, while pearls can mean purity.
Sourcing stones – Ethically sourced and conflict-free stones are ideal. Working with a reputable gem dealer ensures quality and origins. Or you can personally select stones meaningful to you, like from a special location.
When selecting a stone, prioritize hardness and preferred color/symbolism, while sourcing stones responsibly. The right gemstone will be durable, meaningful, and enhance the ring’s beauty. For more guidance, refer to: https://www.gemrockauctions.com/learn/did-you-know/top-10-best-types-of-stones-for-rings
Tools Needed
To make a stone ring, you will need some basic jewelry-making tools:
-
Jeweler’s saw – For cutting and shaping metal.
-
Files – For smoothing rough edges and shaping the metal.
-
Sandpaper – Finer grits are needed for polishing and smoothing the ring.
-
Drill – For making holes to set stones.
-
Jeweler’s mandrel – A tapered metal rod for forming rings.
-
Protective equipment – Safety glasses, dust mask, and gloves to protect yourself while working.
Shaping the Stone
Once you have selected your stones, the next step is shaping them to the desired size and shape for the ring. There are several steps involved in shaping stones:
Cutting to size – Using a gemstone cutter or diamond blade, cut your stone down to the approximate size needed for your ring band. Allow some extra material for final shaping.
Filing edges – Use a diamond file or silicone carbide sandpaper to file down the edges of the stone and round them off.
Sanding smooth – Progress through finer grits of sandpaper, starting with a coarse grit like 120 and working up to 600 or 1200 grit. This will smooth out all scratches and shape the stone.
Drilling center hole – Use a diamond core drill bit to drill a hole in the center of the stone for setting it onto the ring band. Go slowly and use water or oil as a lubricant when drilling.1
Creating the Band
The first step in creating the ring band is selecting the appropriate metal. Sterling silver, gold, and platinum are common choices. The metal gauge will determine the width and durability of the band. A thinner gauge of 18-20 is often used for delicate bands while a thicker 12-14 gauge provides more strength for an everyday ring (source).
Next, accurately measure the finger where the ring will be worn using a ring sizer. Match the finger’s diameter to a ring size chart to identify the exact size needed. Allow for a bit of extra room if the band will hold a stone. Cut the metal to the proper length for the desired size. Use a jeweler’s saw to precisely cut the metal (source).
Solder the ends of the metal together to form a continuous band. Use a jeweler’s torch with enough heat to melt the solder without overheating the metal. Quench and clean the band. Check for any gaps and resolder if needed. Use a ring mandrel and jeweler’s files to smooth and shape the band into a perfect circle.
Finally, if adding a gemstone, measure the bezel or prong setting and securely attach it to the top of the band according to the stone’s shape. The ring should now be ready for polishing and finishing.
Setting the Stone
Setting a stone securely in a metal ring requires careful attention. The stone must be protected from damage while also avoiding any chance it could fall out of the setting. There are several factors to consider when choosing the setting style:
Bezel settings fully enclose the stone in metal on all sides. This provides maximum protection and security. However, bezels can cover the edges of the stone.[1]

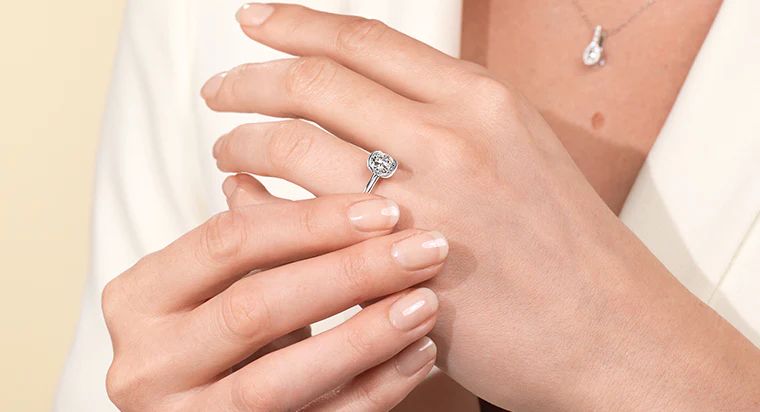
Prong settings hold the stone in place with metal claws, allowing more light into the stone. But they provide less protection against bumps or snags. Prongs must be robust enough to hold the stone securely.[1]
Channel settings position stones side-by-side, held in place by the metal on all sides. This provides good protection but can limit light entry to the sides.
To set the stone, first prepare the setting. Shape the metal prongs, bezels or channels precisely to fit the stone. Position the stone carefully and adjust the setting for an exact fit. Secure the prongs or bezel tightly around the stone. Double check that it cannot fall out. The goal is keeping the stone safe while maximizing its brilliance.
Polishing
After shaping the stone and assembling the ring, the next step is to polish it to smooth any rough edges and make the metal shine. This process helps give the finished ring a professional, refined look. According to jeweler Skippy who specializes in handmade jewelry, it’s important to “take your time and polish evenly around the ring” to smooth out any uneven spots or scratches.
Use a jewelry polishing cloth or polishing wheels charged with polishing compound to buff the metal band and sides of the stone. Apply moderate, even pressure as you polish. Over-polishing in one spot can create deeper scratches. Check for smooth edges around the entire circumference of the band and sides of the stone. For stubborn areas, use a higher grit polishing wheel followed by a final fine grit wheel.
To polish the top of the stone, use a jewelers loupe to inspect for any debris or scratches on the surface. Carefully clean with a soft brush and mild soap solution. Avoid using any abrasive polish directly on any soft gemstone surface. For hard stones like diamond that need more polishing, use a specialty diamond polishing compound.
After you achieve the desired smoothness and shine, do a final cleaning of the metal and stone with a jewelry cleaning solution. Proper polishing and cleaning helps give your finished ring maximum brilliance and eye appeal.
Sizing the Ring
Properly sizing the ring is crucial for comfort and fit. There are a few techniques you can use at home to determine ring size before setting the stone in place.
Start by measuring the intended finger using either a printable ring sizer, a strip of paper, or a string.1 To measure with paper, wrap a strip snugly around the finger, then lay it flat and measure the inside circumference with a ruler. For a string, wrap it around the finger, cut to fit, and then measure against a ruler.
Once you know the finger measurement, refer to a ring size conversion chart to determine the corresponding ring size. Standard ring sizes range from size 1 to size 17 for most rings. The band can then be shaped and sized accordingly during fabrication.
Keep in mind the band can also be resized after construction by a jeweler if needed, whether to size up or down by a half or whole size. Resizing more than 1-2 sizes risks damaging the structural integrity and aesthetics of the ring.
Completing the Ring
Once the ring has been shaped, sized, and the stone set, there are some final steps to complete the ring. According to Ring Manufacturing Process – Wedding-Rings.co.uk, these include:
Checking security – The stones and settings are double-checked to ensure they are securely in place. This step ensures the ring will withstand daily wear without risk of losing any stones.
Finishing polish – The ring undergoes a final hand polish using a buffing wheel to achieve a smooth, shiny finish. Polishing compounds are worked into the metal to brighten the ring and make it gleam.
Cleaning – The ring is thoroughly cleaned to remove any polishing compounds or dust before being packaged up. An ultrasonic cleaner may be used to clean the ring and ensure no debris is left behind.
Taking the time to properly complete these final steps results in a high quality ring that is safe to wear daily. The checking, polishing, and cleaning process helps guarantee your custom ring will last for many years to come.
Caring for Your Ring
Properly caring for your stone ring will help it last for years to come. Focus on proper storage, cleaning, and protecting the durability of the ring.
Store your ring safely when not wearing it. Keep it in a fabric lined jewelry box away from other gems and metals that could scratch it. Avoid letting it bang against other jewelry. For extra protection, place the ring in a small fabric pouch inside the jewelry box.
Regularly clean the ring to prevent buildup of dirt, oil, and grime. Soak in warm water mixed with a mild detergent or jewelry cleaner for a few minutes. Gently scrub with a soft toothbrush and rinse thoroughly. Make sure to carefully blow air into any crevices to remove debris. Avoid harsh chemicals or soaking pearls 1.
To maintain durability, remove the ring before physical activities, especially those involving use of your hands. Prevent scratching by keeping the ring in a separate compartment of your jewelry box away from other gems and metals. Avoid exposing it to chemical cleaners like bleach or chlorine. Bring it in to a jeweler periodically to check the prongs and ensure the stone is securely set.


