How Do You Make A Waterproof Sculpture?
Creating waterproof sculptures is an important consideration for artists working with materials that will be displayed outdoors or in wet environments. Properly sealing sculptures helps protect them from weathering and deterioration over time.
The primary goal in waterproofing a sculpture is preventing water from penetrating into porous materials, which can cause swelling, cracks, erosion, staining, and promoting mold or mildew growth. Therefore, careful selection of durable, non-porous mediums like metals, glass, resins, and plastics is advised.
However, many common sculpting materials like stone, concrete, wood, and clay are naturally porous. With proper preparation and application of sealants, even these materials can be waterproofed for outdoor display. Waxes, varnishes, epoxy resins, and specialty water repellents are commonly used to seal and protect sculptures.
Selecting Materials
When creating a waterproof sculpture, the type of material you select is crucial. Some of the most common materials used in sculpture are clay, stone, metal, and wood. Each has its own advantages and disadvantages when it comes to waterproofing.
Clay is naturally porous and prone to damage from water. However, when properly sealed, it can be made waterproof. The benefit of clay is that it’s highly malleable and easy to sculpt. The downside is its fragile nature.
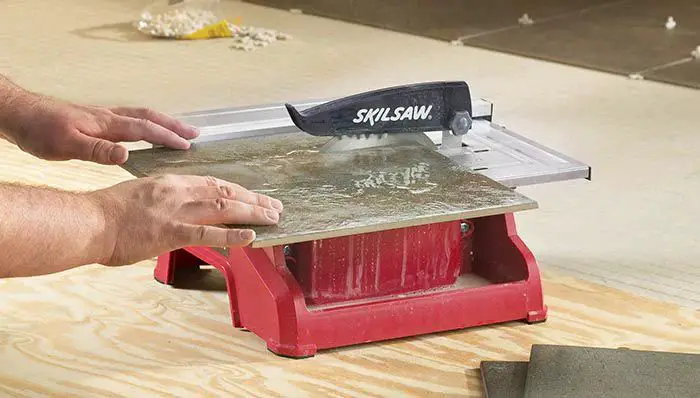
Stone like granite, marble, and soapstone is non-porous and waterproof on its own. It’s durable and retains detail well. However, stone is extremely heavy and requires special tools for sculpting.
Metals like bronze, aluminum, and stainless steel won’t absorb water. They’re lightweight compared to stone and capable of fine detail. The smooth surface of metal makes it tricky for sealants to adhere. Metals are also prone to oxidation and corrosion over time.
Wood is porous but can be waterproofed with sealants. It’s lightweight and easier to work than stone. However, wood swells and shrinks with water exposure. It requires more maintenance to keep waterproof.
Sealing Porous Materials
Porous materials like clay, stone, and wood will absorb water if left untreated. To make sculptures from these materials waterproof, you need to apply a sealant.
Start by cleaning the surface thoroughly to remove any dust or debris. Allow the piece to dry fully before sealing.
Use an appropriate sealer for the material such as linseed oil for wood, lacquer for stone, or a ceramic sealer for clay. Apply multiple coats according to the product directions, allowing each coat to dry in between.
Sealers soak into the porous surface to fill pores and prevent water absorption. But one coat is rarely enough. Porous materials require multiple layers of sealer for best waterproofing.
Apply at least 3-5 coats of sealer, sanding lightly between coats. This ensures the sealer fully penetrates and seals the surface while leveling out any drips or uneven coverage.
Be patient and allow proper drying time between coats. Rushing the process can lead to inadequate sealing and protection.
Using Non-Porous Materials
Non-porous materials like metals, plastics, and glazed ceramics can be ideal choices for waterproof sculptures because they naturally repel water without the need for additional sealants. Metals like stainless steel, aluminum, and bronze will not absorb water or be damaged by it. Plastics like polyethylene and polypropylene are water-resistant as well. Glazed ceramics have an impermeable glassy coating that prevents water absorption.
The key benefits of using non-porous materials are:
- They do not require protective sealants
- They are inherently water-resistant and impermeable
- They are durable and long-lasting outdoors
- They require less maintenance
Potential limitations to keep in mind are:
- Metals may be prone to corrosion over time
- Plastics can become brittle when exposed to sunlight
- Glazes on ceramics can chip, exposing the porous material underneath
- Non-porous materials are often heavier than porous options
- The materials may be more expensive or difficult to work with
With proper selection and maintenance, non-porous materials can be excellent choices for waterproof sculpture projects, especially those meant for outdoor display. Their innate water resistance provides lasting protection without the need for sealants.
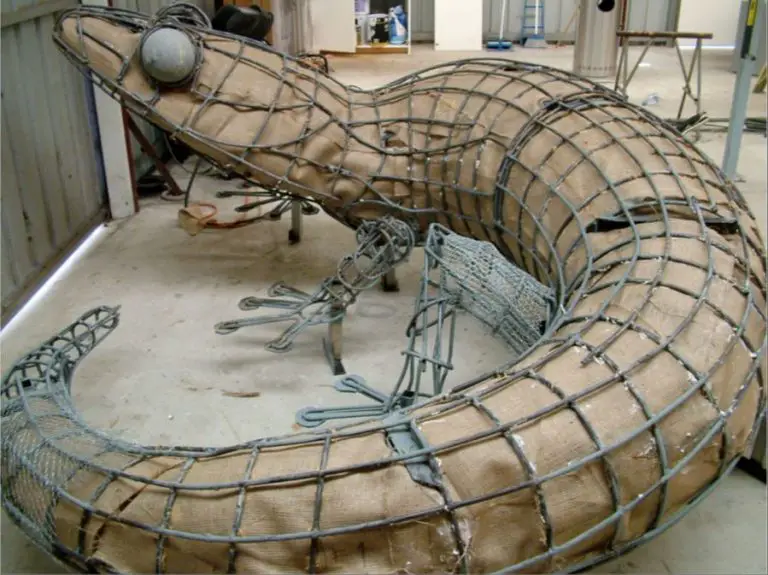
Joining Materials
Properly joining the materials used in a waterproof sculpture is crucial to maintaining its structural integrity and water resistance. The method used to join materials will depend on the types of materials being used in the sculpture.
For materials like wood, proper gluing is essential. Using a high-quality outdoor waterproof wood glue will create a strong, water-resistant bond between wooden pieces. Apply the wood glue according to the manufacturer’s instructions and clamp the pieces firmly together until the glue sets.
Allowing for expansion and contraction of the wood pieces is also important. Wood naturally expands and contracts with changes in temperature and moisture. If the pieces are glued too tightly, this natural movement can cause joints to split. Leave a small gap between pieces, about 1/16th of an inch, to allow space for expansion and contraction.
For materials like plastics, solvent welding is an effective joining method. Solvent welding involves using a chemical solvent to melt the pieces slightly and fuse them together. Cut pieces precisely for the tightest fit possible. Use the appropriate solvent and apply per the manufacturer’s directions for the strongest, watertight bonds.
Protecting Joints
When joining materials together, you’ll need to seal the joints to prevent water infiltration. Most joints are rigid connections, which are more prone to leaking as the materials expand and contract. Using a flexible caulking compound is key to making joints watertight.
Look for caulking products designed for water exposure and rated for exterior use. Silicone and polyurethane caulks work well for sealing joints in outdoor sculptures. Read the product specifications to ensure it will adhere well to your sculpture materials.
Apply the caulk along the joint seam, smoothing it into a concave shape. The bead should be wide enough to accommodate expansion and contraction. Take care not to leave any gaps or air bubbles. Once cured, the caulk will flex as the joint moves.
Inspect sealed joints periodically, especially after periods of intense sun/cold exposure. Any cracked or deteriorated caulk should be removed and replaced to maintain water tightness.
Preparing Surfaces
Proper surface preparation is crucial for achieving a watertight seal. All surfaces must be clean, dry and free of any contaminants like grease, oil or existing sealants. Here are some tips for preparing surfaces:
Begin by thoroughly cleaning the sculpture with soap and water to remove any dirt or debris. Use a stiff bristle brush to scrub away any built-up grime. Rinse well and allow to dry completely. For an extra level of cleaning, you can wipe the surface down with a solvent like denatured alcohol.
Next, sand the surface with progressively finer grit sandpaper, up to 400 or 600 grit. This will remove any loose material and roughen up the surface to help the sealant adhere. Be sure to sand off any existing paint, sealant or glossy coatings which could interfere with adhesion.
If there are any cracks, gaps or joints, clean them out thoroughly. Use compressed air, small wire brushes or dental picks to remove any old sealant or debris from deep crevices.
Once fully cleaned, dried and sanded, wipe the entire sculpture down to remove any sanding dust or residue. The surface needs to be completely clean and dry for the sealant to properly cure.
Applying Sealants
There are three main methods for applying sealants to your waterproof sculpture – brushing, rolling, and spraying.
Brushing the sealant allows you to fully coat all the tiny nooks and crannies of your sculpture by working the sealant into all the crevices with the brush bristles. Use a high-quality natural or synthetic bristle brush. Apply the sealant liberally and brush evenly over the entire surface.
Rolling sealant on with a paint roller is a quicker process for covering large flat areas. Use a short-nap synthetic fiber roller and roll vertically first then horizontally to ensure you don’t miss any spots. Apply several coats to create a thick protective layer.
Spraying sealant with an airless spray gun allows you to quickly coat an entire sculpture with a fine mist. Move the spray gun steadily back and forth over the surface, maintaining an even distance. Apply multiple coats, allowing drying time between each. Check for any missed areas and touch up by hand.
Regardless of technique, it is critical to get full coverage with the sealant. Missed areas or thin application can compromise the waterproofing. Do a final inspection, looking for any pinholes or thin spots. Touch up these areas by hand brushing to ensure durable waterproof protection.
Curing and Drying
Proper curing and drying are critical steps when creating a waterproof sculpture. The curing process allows sealants to fully crosslink and bond to the sculpture materials. Drying also ensures all solvents have evaporated from sealants before exposing the sculpture to water.
It’s essential to follow the manufacturer’s directions for curing and drying times. These vary based on temperature, humidity, ventilation, and the specific products used. Typical curing times range from 24-72 hours before light use of the sculpture, and 1-2 weeks for full cure.
Allowing inadequate curing or drying can severely compromise the waterproofing. Solvents trapped in the sealant may leach out over time, leaving pores and gaps. Insufficient crosslinking will also lead to weak bonding. Forcing the sculpture into service too early often leads to leaks, detachment, erosion, and other failures.
Err on the side of caution when curing and drying a waterproof sculpture. Be patient and allow the full recommended times before water exposure. Perform periodic checks as the sculpture cures to ensure all solvent has evaporated and the sealant has fully hardened. Following the proper procedures will result in effective, long-lasting waterproofing.
Maintenance
Properly maintaining your waterproof sculpture is crucial to preserving it over time. Here are some tips for ongoing maintenance:
Checking for Cracks
Inspect your sculpture regularly, at least once per season, for any cracks or damage that may allow water to seep in. Pay close attention to joints and seams between materials. Even hairline cracks can expand over time and lead to interior damage.
Reapplying Sealants
Over time, sealants can wear away or degrade, compromising their water-repellent properties. Check the manufacturer’s recommendations for reapplication timing, but plan to reapply sealants at least every 2-3 years. Ensure the surface is clean before reapplying.
Protecting in Winter
In colder climates, take steps to protect your sculpture in winter. Temperature swings from freezing to thawing can damage materials and seals. Store the sculpture indoors or cover it with weatherproof, breathable materials when not on display.