How Do You Make Clay Drinking Cups?
Clay cups and mugs have been used for thousands of years to hold liquids for drinking. Traces of clay drinking vessels date back to ancient China over 9,000 years ago. Clay is an ideal material for cups and mugs because it is durable, retains heat well, and can be formed into almost any shape and size.
Clay cups have many benefits over modern disposable cups or plastic drinkware. Clay is a natural material that does not leach chemicals or toxins into beverages. The porous nature of fired clay allows subtle evaporation of liquids, which can enhance the flavor. Clay cups also feel pleasant to hold in the hand due to their tactile nature. And handmade clay cups have an artisanal, hand-crafted aesthetic that brings visual beauty and character to everyday dining and drinking.
Making your own functional clay drinking cups is a rewarding process that allows creativity and personal expression. The general steps include: gathering clay and tools, wedging and preparing the clay, shaping the cup form, refining decorative details, applying glaze, and firing the finished pieces. With some basic skills and studio equipment, beautiful handmade clay cups can be achieved with practice.
Gather Materials
To make clay drinking cups, you’ll need to gather the following materials:
-
Clay – Choose an appropriate clay for functional pottery such as stoneware or porcelain. You’ll need 1-2 lbs of clay per cup.
-
Pottery wheel – This allows you to throw and shape the clay into a cup form.
-
Ribs and trimming tools – These smooth and refine the shape of the thrown cup.
-
Firing kiln – You’ll need access to a kiln that reaches cone 5-6 temperatures for high-fire clays.
-
Glazes and decorating tools – Choose food-safe glazes to coat the bisqueware before firing. Paint brushes and sponges allow you to apply glazes.
-
Sealant – A food-safe sealant is required after firing to make the clay non-porous.
Once you have these basic supplies, you’ll be ready to begin making your clay cups!
Prepare the Clay
The preparation of clay is a crucial step in making clay drinking cups. Properly preparing the clay ensures the clay is smooth and free of air bubbles so your cup will hold its shape during sculpting and firing.
Start by kneading the clay with your hands to warm it up and make it more malleable. Knead it like bread dough, pressing down and forward. This softens the clay by mixing the moisture throughout. Knead the clay until it is smooth, soft, and workable.
Next, wedge the clay. Wedge by cutting the clay in half, standing the two pieces on their sides and smashing them together. Then fold the clay over on itself and smash it together again. Repeat this process, cutting, folding, and smashing until the clay feels smooth, soft, and homogeneous. Wedge thoroughly to remove all air bubbles.
The clay should end up with a uniform smooth, elastic consistency, like chewed gum. Adjust moisture levels by spraying water if too dry or letting clay sit wrapped in plastic if too wet. Test consistency by poking a hole and ensuring it slowly fills in without cracking around the edges.
Once your clay is kneaded and wedged to the proper consistency, it is ready to be shaped into your clay cup.
Shape the Cup
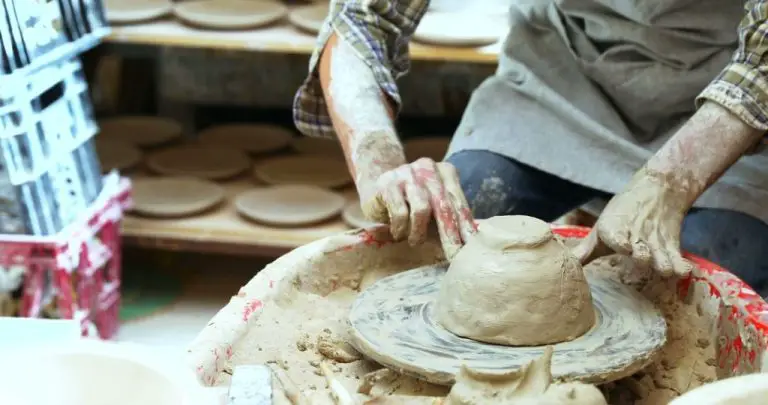
There are two main methods for shaping clay cups – using a pottery wheel or handbuilding. The pottery wheel allows for symmetry and uniform wall thickness, while handbuilding enables more unique, asymmetric designs.
If using a pottery wheel, center a lump of wedged clay on the wheel and begin shaping while the wheel spins. Apply pressure from different directions to pull the clay upward into a cup form. Use your fingers on the inside to thin out the walls evenly. Refine the rim shape by compressing it between your fingers. Allow the wheel’s centrifugal force to shape the clay into a smooth, rounded cup.
For handbuilding, roll clay into a thick tube approximately the height of the finished cup. Connect the ends to form a ring, then press gently outward to define the interior space. Use clay slabs cut with a wire to build up the exterior surface. Blend the seams together by smoothing with a rubber rib or your fingers. Carefully shape the finished form by hand, paying attention to symmetry and wall thickness.
Consider adding details like a rolled lip, foot, or handle while the clay is still flexible. Let the shaped clay dry and stiffen slightly before proceeding to refinement.
Refine the Shape
Once you have molded the basic shape of the cup, the next step is to refine the shape by smoothing surfaces and adding any handles or spouts.
Use your fingers and some water to smooth over any cracks, bumps or uneven areas in the clay. Gently rub the surface to blend the clay and create a uniform texture. Pay close attention to the rim and bottom of the cup, making sure they are even and refined.
If you want to add a handle or pouring spout, now is the time. Roll a coil of clay and use water or slip to attach it where you want the handle/spout to be. Use your fingers to gently blend the coil into the side of the cup. Refine the shape and size of the handle or spout as needed.
Take your time at this stage to perfect the shape and feel of your clay cup. The smoothing and refinements will enhance the final look, durability and functionality of the finished piece.
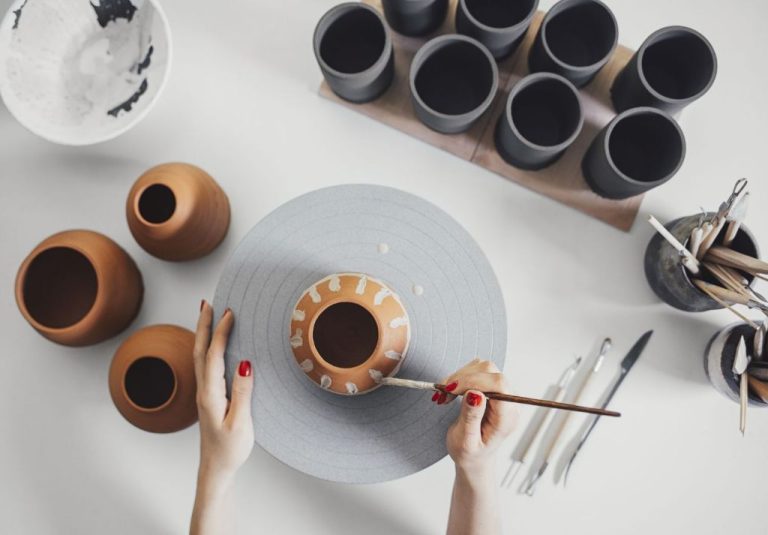
Decorate
After the basic shape of the clay cup is formed, it’s time to decorate it before firing. Decorating the unfired clay allows you to incise designs, carve patterns, or paint images that will become permanent once the clay is fired.
One popular decoration technique is incising, which involves using a sharp tool to carve linear designs into the surface of the leather-hard clay. Incising creates recessed lines and patterns that add visual interest to the finished piece. Geometric patterns like circles, spirals, and cross-hatching work well, but you can carve any design you wish.
Another option is to paint designs onto the clay using special ceramic underglazes formulated for use on unfired clay. Underglazes come in many colors and can be used to paint intricate images, patterns, and accents. The painted designs become fused with the surface after firing. Make sure to use underglazes rated for the firing temperature you will be using.
Consider the final use of the cup when deciding on decoration methods. For a functional drinking vessel, simple incising or minimal painted accents may be best. More elaborate carved or painted designs can make the cup more decorative. Add your personal creative touch at this stage to make each handmade clay cup unique.
Apply Glaze
Glazing clay is an important step that serves multiple purposes when making ceramic cups. Glazes add durability, make the cup waterproof, enhance visual appeal, and allow for creative decoration.
There are many glaze options to choose from including clear, colored, matte, glossy, and textured glazes. Popular choices for cups are food-safe clear glazes, colored glazes in various hues, and glazes with decorative crackle effects. The clay body and desired aesthetic will inform the best glaze choice.
When applying glaze, use a soft brush to coat the inside and outside of the bisqueware cup. Apply glaze in even layers, avoiding drips. Pay extra attention to rim and base. Let the cup dry completely before firing to set the glaze. Consider using different glazes on interior and exterior for added flair. Multiple coats can be applied for a thicker glaze layer if desired.
First Firing
The first firing, known as bisque firing, is done before the clay cup is glazed. Bisque firing further hardens the clay structure through heat. It prepares the clay to hold glaze and undergo final firing later.
For bisque firing, the kiln temperature needs to reach around 1000°C to 1100°C or cone 04. Slow firing schedules are recommended, with firing periods lasting 6-12 hours. Firing too quickly can cause cracks or explosions. The clay needs time to release steam and solvents.
Once the clay has reached temperature, allow 1-2 hours of soak time for heat to fully penetrate the clay before cooling. Cool the kiln slowly over 4-6 hours. Avoid thermal shock by never opening the kiln before 100°C.
After bisque firing, the clay will have a dry, chalky, porous surface ready for glazing. Inspect carefully for cracks before applying glaze.
Final Firing
The final firing brings your clay pieces to completion by hardening the clay and setting the glaze. The firing needs to reach a high enough temperature for the glaze to melt and fuse with the clay body beneath. Firing clay too fast can cause cracking or breaking, so bring the kiln up to temperature gradually.
The final temperature you fire to depends on the clay body and glaze used. Typical stoneware clays fire between 2,200-2,300°F (1,205-1,260°C). Check the specifications of your clay and glaze for the ideal temperature. Hold at that peak temperature for the recommended amount of time to fully mature the clay and glaze.
During firing, different glaze ingredients melt at different temperatures which creates varied visual effects. Certain materials produce vibrant colors while others create cracking or texture. The final appearance depends on the clay body, glaze ingredients, and maximum temperature. Experiment with test tiles first before firing your finished pieces.
When firing is complete, allow the kiln to cool down slowly over several hours. Rapid cooling can cause breakage. Once fully cooled, your fired clay vessels are ready for use.
Final Steps
After the clay cups have completed their final firing, it’s time to finish them up for use. Here are the key final steps:
Removing from Kiln and Cooling
Once the final firing is complete, turn off and unplug the kiln. Wait for it to cool down completely before opening it and removing your clay cups. The cups will be extremely hot right out of the kiln, so handle them carefully with heavy gloves or tongs. Place the cups on a heat-resistant surface like a wire rack to finish cooling.
Resist any urge to touch the cups before they’ve cooled fully. Clay holds heat very well and can burn you if still hot. Give the cups several hours to return to room temperature.
Polishing and Cleaning
After cooling, inspect each cup closely. Use fine-grit sandpaper to gently smooth any rough patches on the sides or base, being careful not to scratch the glaze. Wipe away any dust or debris with a soft cloth.
For any stuck-on residue, use a soft nylon brush and warm soapy water to gently scrub. Avoid abrasive materials or harsh chemicals that could damage the finish. Rinse and dry the cups thoroughly before use.
With that, your handmade clay cups are ready to enjoy! Be sure to wash by hand before and after each use.