How Do You Make Clay Easy To Work With?
Clay is an incredibly versatile medium used by sculptors, potters, and artists of all kinds. However, its plasticity and malleability that make it so useful also present challenges. If not properly prepared, clay can be sticky, easily torn, and difficult to work with.
The composition and moisture content of clay impacts its workability. Clays with high plasticity tend to be more challenging to work with. Thankfully, with a bit of knowledge and preparation, any clay can be conditioned into a state that is smooth, flexible, and easy to sculpt or throw on the wheel.
Proper conditioning involves controlling moisture, temperature, and using clay softeners and tools appropriately. With the right techniques, clay artists can avoid frustration and take full advantage of this dynamic medium. The following tips will help you make clay as malleable and enjoyable to work with as possible.
1. Get the Right Kind of Clay
When choosing clay for sculpting or modeling, there are three main options: polymer clay, oil or resin-based clay, and natural clay. Each type has pros and cons to consider based on your particular project. Some key differences:
Polymer Clay – Made from polymers combined with fillers and pigments. Very versatile and available in many colors. Holds fine detail well. However, can be brittle when thin and needs baking to fully harden.
Oil/Resin-Based Clay – Made from natural ingredients like beeswax, linseed oil, and pine resin. Stays malleable at room temperature. Great for sculpting organic figures. However, sticky texture requires tools/oil for handling and messy clean-up.
Natural Clay – Derived from the earth, usually with a high mineral content. Can be abundant and inexpensive. Responds beautifully to hands and tools. However, requires drying time, firing, sealing and more fragile when thin.
Consider the characteristics of each type of clay and whether you need the sculpture to be sturdy, hold fine details, or remain workable. Polymer clays offer the most flexibility and durability for detailed sculptures. Oil-based clays are great for sculpting life-like figures. Natural clays work well for large pottery pieces. Choose the clay that best suits your project goals, skill level, and artistic vision.
Condition the Clay
Properly conditioning your clay before sculpting is crucial for achieving a smooth, workable texture. The two main techniques for conditioning clay are kneading and wedging.
Kneading clay involves repeatedly folding, pressing, and stretching the clay to distribute moisture evenly throughout. This helps break up air pockets and allows any dried clay particles to absorb water. Knead clay for 5-10 minutes until it reaches a uniform consistency. The clay should be malleable but not sticky.
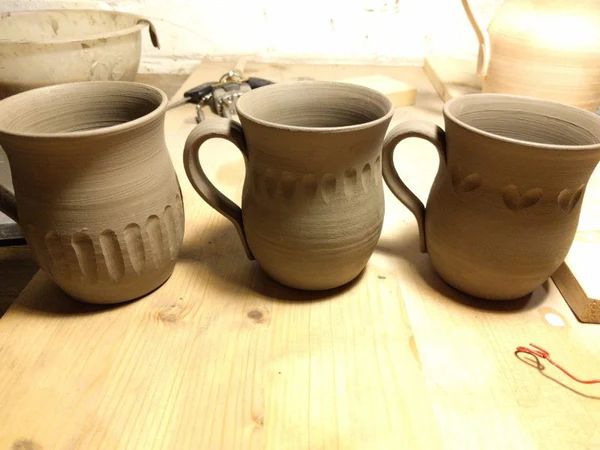
Wedging is another conditioning method where you cut the clay into sections, press them together, and reform a slab. This helps align the clay particles and further removes air bubbles. Try cutting the clay in half, stacking the sections, pressing down, and reforming into a ball. Repeat this process until the clay feels smooth and elastic.
Properly conditioned clay is much easier to sculpt with. It won’t crack or break apart as you work with it. The moisture level will also be consistent, preventing dried or soggy sections in your sculpture. Take the time to knead and wedge your clay thoroughly before sculpting for best results.
Use Clay Softener
Clay softener is a liquid additive that can make clay more pliable and easier to work with. It allows clay to be smooth and elastic, which prevents cracking and makes it easier to roll, cut, sculpt and shape.
Clay softeners work by coating the clay particles and providing lubrication between them. This prevents the clay from becoming stiff and crumbly. Most clay softeners contain polyvinyl alcohol, propylene glycol or glycerin as the main ingredient.
Some popular and effective clay softener products to try are:
- Sculpey Clay Softener – few drops soften 1 block of clay
- Premo Clay Softener – mix 1 part softener to 5 parts clay
- Fimo Clay Softener – recommended 1:10 ratio of softener to clay
- Cernit Clay Diluent – start with a 1% ratio and add as needed
To use clay softener, add a few drops or squeezes and knead it thoroughly into the clay. Test a small piece to ensure it reaches the desired pliability before softening the entire clay amount. Start with less rather than more softener. Too much can make the clay sticky. Find the ideal balance for your project and clay type.
Keep it Cool
Keeping clay cool as you work with it is important to maintaining a soft, pliable texture. Here are some tips for keeping your clay at the right temperature:
Store unused clay in a cool place away from direct sunlight and other heat sources. The ideal storage temperature is around 60-70°F. Higher temperatures can cause clay to dry out.
Avoid leaving clay out on a warm work surface for too long. The heat from your hands as you work it can also warm the clay. Take breaks to re-chill the clay if it starts feeling stiff.
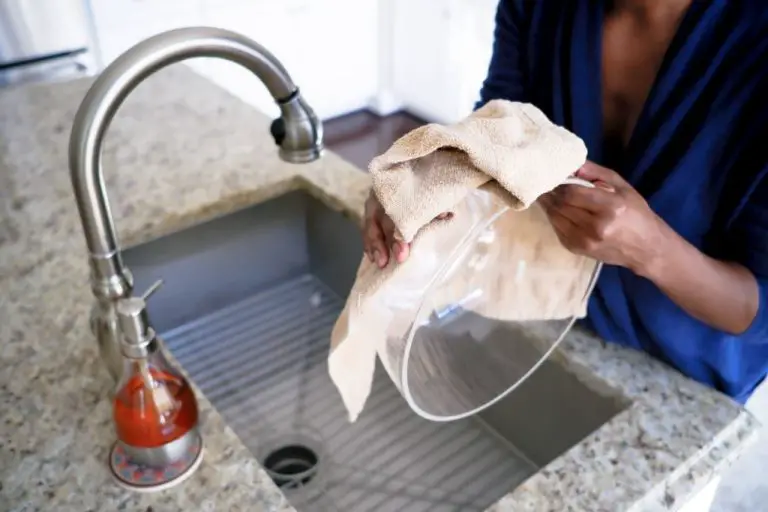
Place clay on a marble slab, ceramic tile or other cool, nonporous surface while sculpting. You can also try freezing a damp sponge or washcloth and placing it under the clay to draw out excess warmth.
If the clay does become too warm and difficult to work with, place it in a plastic bag and refrigerate for 30 minutes before using again. This will bring it back to a pliable state.
Keeping clay cool requires some effort, but it makes the clay much easier to manipulate into intricate shapes and textures.
Use the Right Tools
Having the proper clay sculpting tools is essential for cutting, shaping and smoothing your clay sculptures. Some key tools to have include:
- Loop tools – These have a variety of shaped wire loops on the end that are great for smoothing clay and creating textures.
- Clay shapers – Silicone tipped tools used for smoothing, blending and shaping clay.
- Cutting wires – Sturdy wires used to cut slabs and slices of clay.
- Ribs – These tools have straight or curved edges for scraping and smoothing clay surfaces.
- Fettling knives – For detailed trimming and cutting of clay.
- Spatulas – Helpful for applying slip and scoring clay.
It’s important to keep your clay tools clean by wiping off excess clay after each use. Allow tools to air dry completely before storing. Any clay residue left on tools can dry out and cause scratches or tears in fresh clay. Proper care will keep tools in optimal shape for working with clay.
Work Methodically
When sculpting with clay, it’s important to take your time and work slowly and methodically. Rushing through the process can lead to mistakes, uneven textures, and a lower quality end result.
Plan out each step of your sculpture beforehand so you know what you need to do and when. Allow sections of the clay sculpture to firm up slightly before moving on. This will prevent unintended smudging or distortion of previous work.
Avoid overworking any one section excessively. Too much handling and manipulation can degrade the clay structure. The clay may become dried out, crack more easily, or lose its ability to hold fine detail.
By pacing yourself, working deliberately, and allowing proper drying time between steps, you’ll achieve better results. Your final sculpture will have clean lines, refined shapes, uniform textures, and crisp details. Work methodically for higher quality clay creations.
Maintain Moisture
Keeping clay at the right moisture level is crucial for working with it easily. Clay that is too dry becomes stiff and difficult to manipulate. On the other hand, clay that is too wet becomes mushy and loses its shape.
While working with clay, aim to keep it moist but not dripping wet. Having a water mister on hand allows you to spritz water onto the clay surface when it starts to dry out. You can also cover your clay with a damp cloth when taking a break from sculpting to prevent it from drying out.
Once your clay sculpture is complete, there are a few options for sealing it to maintain proper moisture levels. Applying a thin layer of acrylic paint or varnish will create a protective barrier to lock in moisture. If you want a more natural look, you can use food-grade oils like walnut oil. Another option is a matte fixative spray. Just be sure to apply sealants in a well-ventilated area.
Properly sealing finished clay art will help keep the clay from becoming brittle and cracked over time. Maintaining the right moisture both during sculpting and after completion is key for longevity of your clay creations.
Store Unused Clay Properly
To keep unused clay workable for later projects, it’s important to store it properly so it doesn’t dry out. Here are some tips:
Wrap any leftover clay in plastic wrap or place it in a resealable plastic bag. Press out any air pockets and seal it up tight. This prevents the clay from being exposed to air, which can cause it to dry out and become brittle. Make sure the plastic wrap or bag is clean so it doesn’t contaminate the clay.
You can also store clay in airtight plastic containers. Look for containers with a tight sealing lid to lock in moisture. Glass jars with clamp lids or screw top plastic containers work well. Just place the clay in the container and seal it completely.
No matter how you store it, keep unused clay in a cool, dry place away from direct sunlight. Don’t let it freeze or overheat. With proper storage, clay can keep for months.
Check on stored clay occasionally. If it starts to dry out, add a damp paper towel or spritz it with a little water before resealing. This keeps the clay soft and moist so it will be ready to use for your next project.
Conclusion
There are a variety of techniques to make clay easy to work with, including getting the right type of clay, conditioning it properly, using clay softeners, working in a cool environment, having the proper sculpting tools, working slowly and methodically, maintaining moisture, and storing unused clay correctly.
The key takeaways for preparing clay and sculpting are:
- Select polymer, air-dry, or oven-bake clay formulated for sculpting.
- Knead clay thoroughly to condition it and achieve an even consistency.
- Use a clay softener like oil or glycerin to increase pliability.
- Work in a cool space and keep clay cool to avoid drying out.
- Use sculpting tools designed for clay rather than improvised items.
- Work slowly and carefully to avoid tearing or distorting the clay.
- Mist clay with water to maintain flexibility and prevent cracking.
- Wrap unused clay tightly in plastic to retain moisture when storing.
Following these guidelines for preparing and handling clay will make it easy to sculpt detailed creations without frustration.