How Do You Make Clay That You Can Bake?
Bakeable clay, also known as polymer clay, is a modeling material that can be shaped when soft, then hardened by baking it in a standard home oven. This versatile clay allows you to create a wide variety of decorative, artistic, and functional objects that will maintain their shape after baking.
The process involves choosing the type of polymer clay you want to use, conditioning it to make it pliable, sculpting your desired objects, and then baking them according to manufacturer instructions to permanently harden them. Polymer clay can be used to make jewelry, figurines, ornaments, bowls, beads, and countless other decorative and functional items.
Once you learn the basics, you’ll be able to craft custom clay creations that make wonderful gifts, home decor items, DIY projects, and more. The possibilities are endless with bakeable polymer clay!
Choose Your Clay
When making clay items that you can bake, you have two main options – air-dry clay or polymer clay. Both have their pros and cons to consider when deciding which type to use.
Air-Dry Clay
Air-dry clay is very easy to work with and dries at room temperature. It’s great for beginners and for larger sculptural pieces. The downsides are that it can crack if dried too fast, and the finished pieces are not as durable. Air-dry clay is also cheaper and widely available. Some common brands are Crayola Model Magic and Activa Air-Dry Clay.
Polymer Clay
Polymer clay requires baking to cure and harden fully. It results in very durable, professional finished pieces. Polymer clay can also hold finer detail. However, it usually costs more and can be trickier to work with. Popular brands include Sculpey and Fimo.
You can buy pre-made clay at craft stores or online. Making your own is more cost effective if you plan to use a lot of clay. It also allows you to customize colors and textures. However, making clay takes more time and effort.
Make Your Own Clay
Making your own clay at home is a fun DIY project, and allows you to create a clay body suited to your specific needs. Here are some clay recipes to get you started:
Clay Recipes
All homemade clay recipes start with a base ingredient that provides plasticity. This is usually a starch like flour, cornstarch, or potato starch. You then add other ingredients to address stickiness, strength, flexibility, and workability.
Common recipes include:
- 2 cups flour, 1 cup salt, 1 tablespoon oil, 1 cup water
- 1 cup cornstarch, 1 cup flour, 1⁄2 cup salt, 1 teaspoon oil, 1 cup water
- 1 cup cornstarch, 1⁄2 cup flour, 1 cup salt, 1 tablespoon oil, 1 cup water
Feel free to experiment with different proportions to achieve your ideal texture.
Ingredients Needed
To make your own clay, you will need:
- A base (flour, cornstarch, potato starch)
- Salt
- Vegetable oil or glycerin
- Water
- Optional: Acrylic paints or natural powdered pigments for coloring
Step-by-Step Process
Follow these steps:
- Combine the dry ingredients in a large mixing bowl.
- Add the wet ingredients and mix thoroughly until a dough forms.
- Knead the clay vigorously for a few minutes until smooth and elastic.
- Allow the clay to rest in an airtight container for at least 24 hours before using.
- Knead again before sculpting to improve pliability.
- Shape into desired figures, shapes or projects.
The clay can be stored in an airtight container indefinitely. Knead it occasionally with more water to refresh it as it dries out over time.
Prepare the Clay
Once you have your clay mixed, you’ll want to spend some time preparing it before you start sculpting. Properly preparing the clay is an important step that will make the clay easier to work with and help prevent cracking and breakage once baked. Here are some tips for preparing polymer clay:
Conditioning/Kneading
After mixing up a new batch of clay, it’s important to thoroughly knead and condition it. This helps make the texture smooth and pliable. Continue kneading and folding the clay over itself until it becomes soft and elastic. The warmth and pressure from your hands will help relax the clay and get it ready for sculpting. Knead for at least a few minutes per batch of clay.
Rolling Out
Once conditioned, you can roll out the clay to your desired thickness. Using an acrylic roller is an easy way get an even, smooth sheet of clay for cutting shapes. You want the clay to be rolled out thick enough to maintain its form, but thin enough to bake properly. Aim for an 1/8 inch thickness for most projects. Dust your work surface lightly with cornstarch or talcum powder so the clay doesn’t stick as you roll.
Cutting Shapes
Use cookie cutters, craft knives, or various improvised tools to cut shapes out of your clay sheet. Cut shapes while the clay is still soft and pliable to get clean edges and prevent cracking. You can also hand-shape pieces and sculpt details. Let the cut shapes firm up slightly before baking so they hold their form better. Now your clay is ready to be turned into jewelry, figurines, decorative objects, and more!
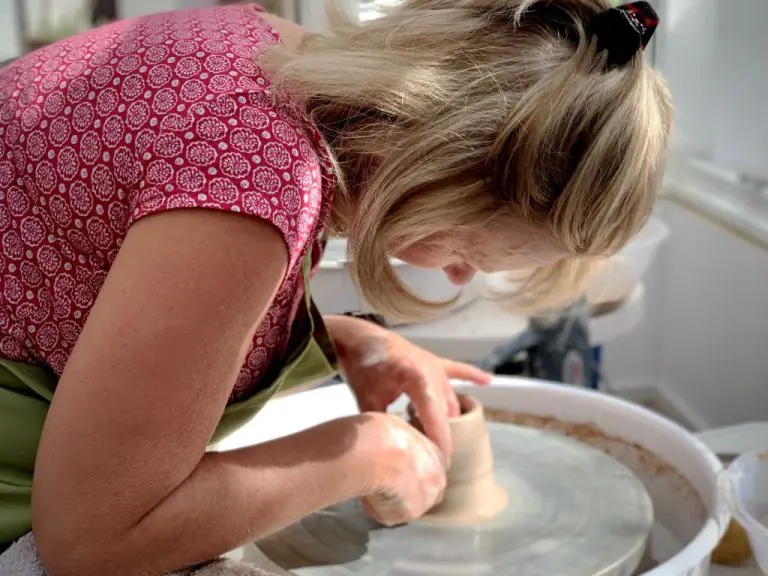
Creating Your Items
After you have prepared your clay and allowed it to condition, it’s time for the fun part – making something! There are several techniques you can use to create unique items out of polymer clay.
Sculpting
Sculpting is shaping the clay freehand to create 3D objects. It takes practice, but is a great way to make one-of-a-kind designs. Start with basic shapes like balls, coils, and teardrops, then attach them together. Use modeling tools to smooth seams and add texture. Let your imagination guide you! Sculpt characters, animals, food, jewelry – anything you can dream up.
Molds
For more uniform items, use molds. Press clay evenly into the mold cavity, then remove gently. Smooth over any seams or imperfections after unmolding. You can find all kinds of molds for jewelry, figurines, dishes, buttons, and more. Or make your own from reusable materials like silicone. Custom molds let you replicate designs precisely.
Textures & Colors
Textures and colors allow you to add interest and realism. To embossed textures, press clay into a textured material like lace or burlap before baking. You can also use a variety of tools to imprint patterns. Adding color is easy with polymer clay – simply knead in pigments or mix custom color blends. You can even marble colors or create faux looks like woodgrain, granite, and turquoise. The options are endless!
Baking Instructions
Proper baking is essential for hardening your clay creations. Follow these tips for best results:
Oven Temperatures
Bake clay at the manufacturer’s recommended temperature, usually between 275°F and 325°F. Higher temperatures may cause burning or cracking. Check your clay packaging for specific guidelines.
Baking Times
Thinner pieces require less baking time while thicker pieces need longer. Bake for 15-20 minutes per 1⁄4 inch thickness. Test doneness and add more time if needed. Avoid overbaking.
Testing Doneness
Insert a toothpick into the thickest area after baking. If it comes out clean, the piece is fully cured. If not, return to the oven for 5-10 more minutes.
Cooling
Allow clay pieces to cool completely before handling. Drastic temperature changes can cause cracking or breaking. Let cool for 30-60 minutes before touching.
Finishing Touches
Once your clay creations have been baked and have cooled completely, there are a variety of finishing techniques you can use to give them more polish and character.
Sanding
Lightly sanding baked clay pieces will smooth any rough edges and create a uniform surface for painting or sealing. Start with a fine grit sandpaper around 400 and work your way up to 600 or 800 grit for a super smooth finish. Be careful not to sand too much or you may remove details from your sculpture.
Painting
Acrylic paints work great for handmade polymer clay pieces. Make sure to use acrylics formulated for plastics, as they will flex better with the clay as it moves. Thin layers of paint work best to avoid cracking or peeling. Allow each layer to dry fully before adding another coat. Apply a sealant after painting to protect the finish.
Sealing
A sealant like polyurethane adds a protective barrier to painted or unpainted clay. This prevents moisture damage and gives items a glossy finished look. Use a foam brush to apply the sealant in thin, even coats. Allow each coat to dry fully before adding more. Two or three coats is usually sufficient.
Varnishing
As an alternative to polyurethane, you can use a varnish to seal and finish clay pieces. Varnishes specially formulated for baked polymer clay provide a durable, flexible protective coating. Make sure pieces are fully cured and cooled before varnishing. Apply multiple thin coats with a soft brush, allowing drying time between each application.
Project Ideas
Baked clay is a versatile material that can be used to create all kinds of fun and interesting projects. Here are some ideas to get you started:
Jewelry
Clay is perfect for making jewelry like beads, pendants, earrings, rings, and more. Make each piece unique by adding textures, impressions, or mixing in beads, glitter, and other embellishments before baking. String your clay beads and pendants together to make necklaces, bracelets, and anklets.
Figurines
Sculpt miniature animals, people, fantasy creatures, and more out of your clay. Add small details like eyes, noses, and hair or fur before baking to bring your creations to life. Make scenes by grouping multiple figurines together on one base. Customize heads, bodies, and accessories to design your own custom figurines.
Decor
Use baked clay to create one-of-a-kind decor items like bowls, vases, boxes, coasters, knick-knacks, wall hangings, tiles, and tableware. Imprint or sculpt designs into your pieces before baking or paint them afterward. Craft decorative objects to display around your home or give as personalized gifts.
Troubleshooting
If your finished clay pieces don’t turn out quite as expected, here are some common issues and how to fix them:
Cracking
Cracking can occur if the clay dried out too much before baking. To prevent cracking:
- Store unused clay in an airtight container or plastic bag.
- Lightly moisten overly dry clay before working with it.
- Avoid using too much water when conditioning the clay as excess moisture can cause cracking.
Bubbles
Air bubbles in the clay can form from improper conditioning. To avoid bubbles:
- Knead the clay thoroughly to remove any air pockets.
- Don’t over-mix the clay which can cause air to get whipped in.
- Gently press out any bubbles before baking.
Discoloration
Clay pieces can become discolored from contamination or improper baking. To prevent discoloration:
- Avoid handling baked clay pieces with dirty hands.
- Ensure clay doesn’t come into contact with contaminants.
- Follow manufacturer’s instructions carefully for baking time and temperature.
Conclusion
Getting started with baking clay can be an enjoyable and fulfilling hobby. Whether you choose to purchase clay or make your own, the basics are straightforward. With some preparation, creativity in sculpting, and proper baking, you’ll soon have decorative and artistic pieces to display. While it may take some trial and error to master, don’t get discouraged. With practice, you’ll be designing beautiful objects in no time. Be sure to check online for more clay recipes, sculpting tutorials, baking tips, and project inspirations to further develop your skills. Clay crafting is a wonderful artistic outlet, so have fun unleashing your imagination.
Some additional resources for working with baking clay:
- The Ultimate Guide to Polymer Clay – Step-by-step beginner tutorials
- Sculpey Blog – Tips, tricks, and inspiration from clay artists
- The Blue Bottle Tree – Reviews of clay brands and baking tips
- Polymer Clay for Beginners Facebook Group – Share ideas and get feedback