What Techniques Are Used To Make Clay Pots?
History of Clay Pottery
Clay pottery dates back over 20,000 years, with some of the earliest known pottery pieces discovered in China and Japan. Archaeologists have found fragments of clay pots, figures, and other objects that were made during the Paleolithic era. In the Neolithic period around 10,000 BCE, cultures began using clay to create vessels for storing food, water, and other materials. The invention of the potter’s wheel between 6,000-4,000 BCE revolutionized how clay pots were made, enabling more uniform shapes and thinner walls. Ancient Egyptians, Greeks, Romans, Mesopotamians, and Chinese all had thriving pottery traditions, with distinctive styles and technological innovations. Pottery served both practical and artistic functions in early societies. Over centuries, pottery techniques evolved and spread around the world, adapted to local customs and needs. Today, ceramic artisans continue ancient traditions while also innovating and pushing the boundaries of what clay can create.
Clay Types and Properties
The main types of clay used for pottery making include earthenware, stoneware, and porcelain. Each type has different properties that affect its workability and the final characteristics of fired pottery.
Earthenware clays are very plastic and easy to work with. They can be shaped into pots even when wet, keeping their form as they dry. Earthenware clays contain iron and other mineral impurities that result in them firing to a red, brown, or terra cotta color at lower kiln temperatures up to around 2,100°F (1,150°C). The clay remains somewhat porous after firing.
Stoneware clays are less plastic than earthenware, but still very workable. They are fired at higher temperatures ranging from about 2,200°F to 2,400°F (1,200°C to 1,300°C). The high heat vitrifies the clay, causing the pottery to become nonporous and watertight. Glazes are often applied to stoneware pieces before firing to produce colored finishes.
Porcelain clays have very low plasticity and high shrinkage during drying and firing. But they can be fired at extremely high temperatures up to 2,650°F (1,450°C) to produce nonporous, translucent pottery. Porcelain clays are usually mixed with other clays or minerals to improve their workability.
Preparing the Clay
Before clay can be shaped into a pot or vessel, it must be prepared to remove any air pockets and achieve an even consistency. One of the main preparation techniques is called wedging or kneading. This involves cutting the clay into smaller sections, then slamming it against a flat surface to squeeze out any air bubbles. The clay is then folded and re-wedged until it has a uniform texture and flexibility. Some clays are also mixed with water to reach the desired plasticity. As clays are hydroscopic materials, meaning they absorb moisture, controlling water content is key for proper wedging. The clay should become one solid mass, smooth and ready for throwing or handbuilding without any interior air pockets that could explode during firing. Proper wedging and kneading ensures the clay has the right moisture content, plasticity, and stability for the potter to shape it into the desired forms.
Shaping Techniques
Clay pots and vessels can be shaped using a variety of techniques. The two main methods are handbuilding and wheel throwing.
Handbuilding
Handbuilding involves shaping the clay without the use of a pottery wheel. Common handbuilding techniques include:
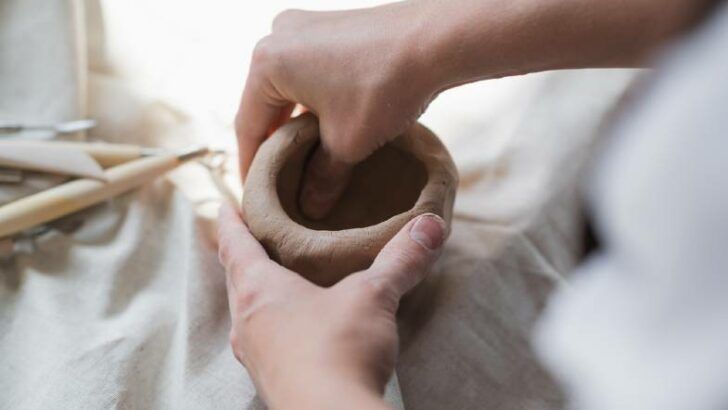
- Pinching: Pinching is likely the oldest and most basic handbuilding technique. It involves taking a ball of clay and pinching the sides to form the desired shape. Pinch pots tend to have a rounder, organic form.
- Coiling: With the coiling technique, rolls or coils of clay are stacked and joined together to build up the sides of the pot. More coils can be added to reach the desired height. Coiling creates an intimate hand-crafted look.
- Slab Building: This method involves rolling out flat “slabs” or sheets of clay and cutting shapes that are assembled into the form. Extra slabs can be added for more height or layers. The seams are smoothed together with water or “slip.” Slab construction allows for greater control of the final shape.
These handbuilding techniques allow the artisan to work slowly and mindfully to create one-of-a-kind pieces full of imperfections that showcase the artist’s hand.
Wheel Throwing
Wheel throwing involves shaping clay vessels on a potter’s wheel. The clay is centered on the spinning wheel head and opened up with thumbs. Then the sides are pulled up with steady pressure from the fingers and palm to raise the walls. Further techniques like ribbing, compressing, and trimming refine the final shape.
Wheel throwing enables an experienced potter to create precisely symmetrical pieces with thinner, elegant walls. Lines can be incised into the surface for decoration. The centrifugal force of the rotating wheel allows for taller, more delicate shapes than handbuilding.
While handbuilding and wheel throwing employ different techniques, they can also be combined to take advantage of both methods. Many potters also decorate or alter their pieces after initial shaping as well. The possibilities are endless for clay artisans to stamp their creative mark through shaping techniques.
Surface Treatments
After shaping the clay, potters often decorate or alter the surface in various ways. Some common techniques include:
Burnishing
Burnishing involves rubbing and compressing the clay surface using a smooth tool like a polished stone, bone, or wood. This compacts the clay and creates a smooth, shiny effect. Burnishing can be done when the clay is leather-hard or after firing.
Sgraffito
Sgraffito involves scratching designs into the clay surface using a sharp tool. This is usually done when the clay is leather-hard. The scratched lines create contrast that remains after glazing and firing.
Slipping
Applying liquid clay slip to the surface can change the color or texture. Colored slips made from clays, pigments, and water are brushed on before firing. Slips can make the surface smoother or highlight carved details.
Glazing
Glazes provide a glass-like coating over the clay after firing. Glazes come in many colors and effects. They can be brushed, dipped, or sprayed onto the bisqueware before the final firing. Glazes melt and fuse to the clay surface during firing to create a durable, impermeable finish.
Drying the Clay
Once the clay pottery has been shaped, the next step is to carefully dry the clay before firing. There are two main techniques used for drying clay:
Air Drying
Air drying involves allowing clay pottery to sit at room temperature to slowly release moisture over time. The clay is placed on plastic or wooden drying boards so air can circulate underneath. To prevent warping or cracking, the drying process should be slow and even. Air drying can take anywhere from several days to several weeks depending on factors like the size and thickness of the clay piece.
Using a Dryer
As an alternative to air drying, some potters use special dryers designed for clay. These dryers gently warm the air and speed evaporation of moisture from the clay. Using a dryer allows the clay to be dried more quickly and evenly than air drying alone. The temperature must be monitored carefully, as excessive heat can cause cracking or damage. Once the clay has reached the ideal moisture level, it is ready for the kiln firing process.
Firing the Pottery
After the clay pots have been sufficiently dried, they are ready to be fired in a kiln to harden and set the clay permanently. The firing process involves heating the pottery up to high temperatures ranging from 1800-2300°F and then slowly cooling it down. There are several different types of kilns used for firing pottery.
Kiln Types
– Electric kilns are modern kilns that use electric heating elements to fire the pottery. They allow for precise control over firing temperatures and heating/cooling rates.
– Gas kilns use natural gas or propane as the heating fuel. They provide even, consistent high temperatures but are less precise than electric kilns.
– Wood-fired kilns use wood as the fuel source. This can create unique atmospheric effects on the pottery surfaces.
– Pit firing involves placing pots in a pit dug into the ground and building a fire over them. This is an ancient technique still used for its rustic effects.
Firing Stages
The kiln firing process generally consists of three key stages:
– Preheating: The pottery is slowly brought up to around 300-400°F to prepare it for higher temperatures.
– Firing: The temperature is ramped up as high as possible, generally over 1800°F. This vitrifies and hardens the clay permanently.
– Cooling: The pottery is cooled slowly over several hours, even days for large kilns. This prevents cracking from uneven cooling.
Post-Firing Treatments
After initially firing clay vessels, potters often apply additional decorations and treatments. Common post-firing techniques include:
Glazing
Glazes provide a glassy coating that adheres to the clay surface during a second round of firing at high temperatures. The glazing process enhances the appearance, color, texture, and waterproofing abilities of the finished pottery. Glazes come in countless colors and effects. Potters can brush, pour, or spray glazes onto bisque ware (once-fired pots). The vessels are then returned to the kiln for a second firing at an even higher temperature to melt and fuse the glaze.
Painting
Clay paints allow for freehand decoration on top of an existing glaze or directly onto bisque ware. Typical clay paints contain metal oxide pigments suspended in a flux mixture. Just like glazes, the painted designs become permanent after firing. Potters often use clay paints to add fine details, crisp lines, or graphic patterns on their pieces.
Staining
Stains create effects by permeating into the surface of unglazed terra cotta clay. Metal oxides in the stain react with elements in the clay body during firing. Stains appear more subtle and natural than surface paints. Potters frequently apply stains to textured areas or carved areas on vessels. The stains settle into crevices and highlight modeled details.
Tools for Pottery Making
Potters rely on a variety of tools to shape, carve, and finish their clay pieces. The types of tools depend on if the pottery is made by hand or on a potter’s wheel.
Hand Tools
When handbuilding pottery, the potter uses various implements to roll, cut, shape, and smooth the clay. Common hand tools include:
- Rolling Pins – Used to roll out slabs of clay to an even thickness.
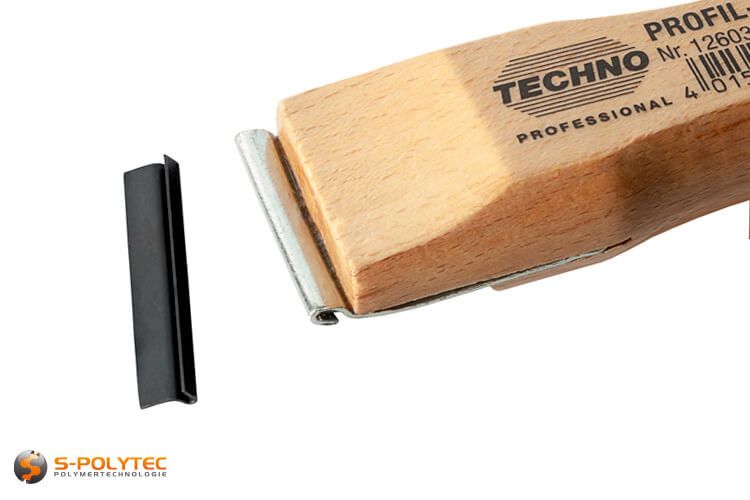
- Ribs – Shaped wooden or metal sticks used to smooth clay surfaces.
- Loop Tools – Used to carve details and shapes into leather-hard clay.
- Knives & Cutters – For cutting slabs and trimming clay.
- Texturing Tools – Such as stamps, combs, and brushes that add texture.
Wheel Tools
When throwing pottery on the wheel, potters rely on specialized wheel tools including:
- Bats – Portable canvases that clay is thrown on.
- Trimming Tools – Metal scrapers for refining thrown pieces.
- Needle Tools – Used to trim and refine details.
- Ribs – Help shape and smooth clay as it rotates.
- Fettling Knives – Sharpen and trim excess clay.
Kilns
Kilns provide the high temperatures needed to permanently harden clay into ceramic. Main types are:
- Electric Kilns – Offer precise digital controls.
- Gas Kilns – Can reach higher temperatures.
- Wood-Fired Kilns – Unique natural effects.
- Raku Kilns – Small, basic kilns for raku firing.
Modern Innovations
The art of making clay pots and ceramics has evolved over thousands of years, but new innovations continue to push the craft forward. Modern potters have access to advanced tools, technologies, and experimental techniques that allow them to take their artistry to new levels.
Some key innovations in modern pottery making include:
- Electric pottery wheels – These modern wheels allow for precise speed control and consistency when throwing pots on the wheel.
- Kiln technology – New kiln designs provide more accurate temperature control and uniform heating for optimal firing results.
- Specialized modeling tools – Silicone and rubber tipped tools allow potters to refine curves and textures in more detail.
- Digital sculpting – Some potters use 3D modeling software to design and prototype forms before sculpting them by hand.
- Alternative firing methods – Techniques like raku, pit firing, and smoke firing create unique visual effects.
- Mixed media – Incorporating other materials like metal, glass, or found objects is popular in contemporary ceramic art.
- Experimental glazes – New glaze recipes and application methods result in innovative surfaces and textures.
While ancient pottery techniques are still practiced, modern innovations give potters more control over the entire ceramic process from start to finish. The combination of new technology with age-old hand skills pushes pottery art into new frontiers.