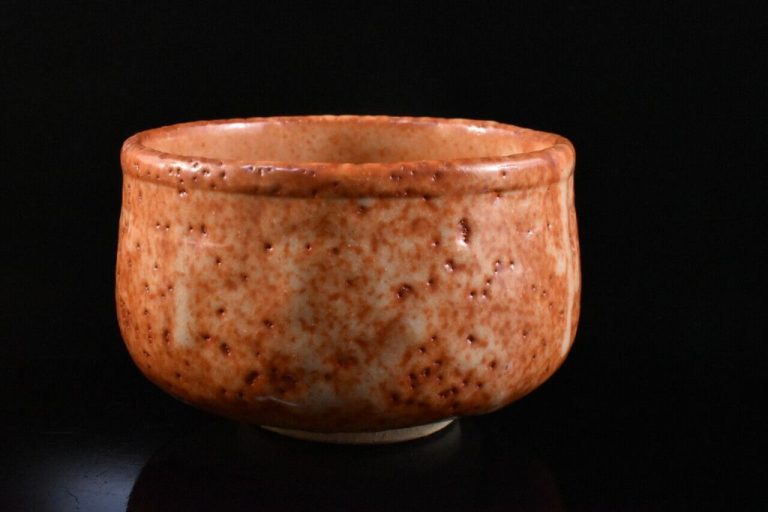
How Do You Make Plaster Bats For Pottery?
Plaster bats make using a potter’s wheel more convenient. They are essentially plaster bowls that you can temporarily attach your clay piece to while throwing, so you don’t have to worry about centering the clay directly on the wheel over and over.
Plaster is an ideal material for pottery bats because it’s porous, absorbent, and not too abrasive on clay. While wooden bats are also commonly used, plaster tends to grip clay better and won’t warp from getting wet like wood can. Plaster bats can be molded into any shape and thickness to suit your projects.
Materials Needed
To make plaster bats for pottery, you will need the following materials:
- Plaster – Plaster of Paris is commonly used for making plaster bats. Look for a fine, quick-setting plaster for smooth surfaces and clean edges.
- Water – You will need water to mix the plaster to the proper consistency. Typically you will use about 1 part water to 2 parts plaster.
- Mold frame – This can be made from wood, plastic, or other materials to create the shape and size of bat you need. Make sure it is non-porous.
- Release agent – Coat the mold frame with a release agent like petroleum jelly so the plaster does not stick.
- Mixing containers/tools – You’ll need something to mix the plaster in like a bucket or bowl. And tools to stir like a stick, spoon, or drill with a mixing attachment.
Making the Mold
To make the mold for your plaster bats, you’ll first need to construct a mold frame. This provides structure and helps contain the liquid plaster as it sets. The frame should be watertight and made from a non-porous material like plastic, glass, or metal. Wood can be used, but may absorb moisture and warp over time.
Build a four-sided frame, keeping the inside dimensions slightly larger than the size of bat you want to create. Height is also important, as deeper molds will allow you to pour thicker bats. Aim for at least a 1-2 inch depth. Seal any joints or gaps in the frame with caulk, modeling clay, or another waterproof material.
Once constructed, the interior surfaces of the frame need to be coated in a mold release agent. This coating prevents the set plaster from sticking to the mold, allowing you to remove the finished bat easily. Common release agents include petroleum jelly, silicone sprays, and especial mold release waxes. Apply the release agent carefully and evenly to all inside surfaces of the frame.
You now have a watertight mold frame ready for pouring plaster! Be sure to brace or clamp the frame so it doesn’t shift during pouring. The mold is temporary and can be discarded after creating your plaster bats.
Mixing the Plaster
The key to properly mixing plaster is using the right ratio of plaster powder to water. Typically, the ratio should be about 2.5 parts plaster to 1 part water by volume. However, be sure to read the packaging on your plaster to verify the manufacturer’s recommended ratio.
Start by measuring out the dry plaster powder into a mixing container, like a 5 gallon bucket. Next, slowly pour in the water while mixing. Mix thoroughly to fully incorporate the plaster and water together. Avoid adding too much water, as this can weaken the plaster. The mixture should be like a thick pancake batter in consistency.
Use a power drill with a mixing paddle attachment to combine the plaster and water. Mix for 2-3 minutes, scraping the sides and bottom of the bucket periodically. Make sure there are no dry clumps of plaster. Small bubbles may form during mixing, which is normal.
Move quickly once the plaster is fully mixed, as it will begin setting up in around 15 minutes. Do not try to remix plaster once it has started setting up, as this will compromise the strength of the final product.
Pouring the Plaster
Once you have your plaster mixture whipped to the proper consistency, it’s time to carefully pour it into the mold. Tilt and rotate the mold to coat all surfaces evenly. Pour continuously in a thin, steady stream, allowing the plaster to flow smoothly over the pattern.
As you pour, gently tap the sides of the mold with a rubber mallet or the handle of your mixing spoon. This vibration will help release air bubbles trapped against the surface of the mold. Work your way around the entire mold, tapping and slightly shaking it to remove bubbles.
Pour and vibrate in layers until the mold is filled to the top. Try to avoid plunging the stream of plaster directly into the mold, as this can introduce more unwanted air. Instead, keep the plaster flowing gently and smoothly into the mold.
Drying and Curing
Once you’ve poured your plaster into the mold, it’s important to allow it to dry and cure fully before unmolding. This ensures the plaster has hardened completely and will retain its shape when removed from the mold. The amount of drying time needed can vary based on factors like plaster thickness, temperature, and humidity.
In general, you’ll want to allow plaster bats to cure for 24-48 hours before unmolding. Thicker or more elaborate pieces may require 3-4 days. You can test if the plaster is ready by gently pressing on the surface – there should be no give. The plaster should not feel cool to the touch anymore either. Any soft spots mean it needs more time.
As the plaster dries, avoid jostling or moving the mold. You want the plaster to set smoothly without any cracks or weak spots. Once fully cured, you can pop the plaster bat out of the mold and proceed to finishing.
Allowing enough cure time is crucial for plaster to reach its maximum strength and durability. Rushing the unmolding process risks damaging the final piece. Patience during curing will ensure your handcrafted plaster bats hold up through repeated use.
Unmolding
Once the plaster has thoroughly cured and hardened, you’re ready to unmold the plaster bats. Proper technique during unmolding is crucial to avoid damaging the bats. Here are some tips for successful unmolding:
Before unmolding, make sure the plaster is fully cured. Gently flex the mold edges to check. The plaster should feel rigid with no soft spots. Insufficient curing can lead to broken bats. Allow extra drying time in humid conditions.
Run a thin tool like a palette knife around the plaster bat edges to separate it from the mold walls. Slowly pry the bat loose, working around all edges. Never yank or twist the bat out forcefully.
Tap the mold’s back lightly to jiggle the bat free if needed. Applying talcum powder inside the mold beforehand can ease release. Avoid using oil sprays that may contaminate the plaster surface.
Work over a table when removing the bat so it doesn’t fall and break. Support the underside as you extract it. Lift straight up in a controlled motion.
Check the mold interior after removing the bat. Patch any flaws in the mold before casting again. Minor plaster bits left behind can be scraped or sanded out.
With care, plaster bats can be demolded without crumbling or sustaining damage. Patience during drying and gentle handling allows extracting intact bats for finishing.
Finishing the Plaster Bats
Once the plaster bats have fully cured and hardened, there are a few finishing steps to complete before they are ready to use. Sanding the bats will help smooth out any small imperfections and rough edges. Start with a medium grit sandpaper, working up to a fine grit to achieve a smooth sanded surface. Be sure to sand evenly across the entire surface. After sanding, clean off any residual plaster dust with a dry cloth.
Next, you’ll want to seal the plaster to help protect it from moisture and make it more durable. Use an acrylic sealant and apply a thin, even coat per the manufacturer’s instructions. Let the sealant fully dry before handling the bats further. The sealant will also provide an enhanced, low-sheen finish.
Finally, adding feet to the bottom of the bats will help increase airflow during drying and prevent direct contact with countertops or tables. Use simple clay feet, attaching them with a bit of watered down clay slip or glue. Let the glue fully cure before using the bats. The feet only need to raise the bats about 1/4″ off the surface. With the finishing steps complete, the plaster bats are ready for use in pottery and ceramic work!
Using Plaster Bats
Once your plaster bats have fully cured and hardened, they are ready to use for your pottery projects. Here are some tips for preparing and caring for your plaster bats:
Preparing Bats for Use
Before using a new plaster bat, you’ll want to condition it to avoid excess absorption of moisture from your clay. Submerge the bat completely in water for at least 24 hours before first use. This will saturate the plaster and prevent it from sucking moisture too quickly from the clay.
You may also wish to apply a “bat wash” which creates a thin separating layer between the bat and the clay. Common bat washes include calcium stearate, talc, baby oil, ArmorAll, or watered down clay slip. Apply the wash evenly across the surface of the bat and let dry completely.
Caring for Plaster Bats
With proper care, plaster bats can be used for many years. Here are some tips for maintaining your bats:
– Keep bats soaking in water when not in use so they stay saturated. Change the water periodically.
– Avoid gouging, scratching or denting the surface. Use a rib or kidney tool to smooth any marks.
– Do not let clay dry or sit on the bat’s surface for extended periods.
– Reapply bat wash regularly to maintain a protective layer.
– Allow bats to fully dry between uses to prevent bacterial or mold growth.
By preparing plaster bats before use and taking proper care of them over time, you’ll be able to enjoy consistent, high-quality results with your pottery projects.
Troubleshooting
Plaster bats are prone to some issues like cracking, uneven surfaces, and the mold sticking. Here are some tips for troubleshooting common problems:
Fixing Cracks
Small cracks and fissures can occur as the plaster dries and shrinks. To fix these, wait for the plaster to fully cure and dry. Then mix up a small batch of plaster, add water to make a thick syrup, and brush the mixture over the cracks. Let it seep in and cure.
Uneven Surfaces
If your plaster bat has lumpiness, air bubbles, or an uneven surface, you can sand it down once fully dry. Start with a coarse grit sandpaper to aggressively smooth the surface, then use progressively finer grits to achieve a smooth finish.
Mold Sticking
To prevent your plaster from sticking to the mold, make sure to apply a mold release agent before pouring the plaster. Vegetable oil, petroleum jelly, or commercial release agents will do the trick. If plaster does stick, carefully tap and pry it loose once fully cured. Apply more release agent before making the next batch.