How Do You Make Polymer Clay Look Like Granite?
Polymer clay is an incredibly versatile material loved by crafters and artists. It can be shaped, molded, baked, and painted to create beautiful handicrafts and decorative objects. Granite is an igneous rock known for its interesting speckled coloration and durability. While real granite requires advanced tools and techniques to carve and shape, polymer clay allows anyone to achieve a remarkably realistic granite look in their projects. This tutorial will cover tips and techniques for making polymer clay mimic the visual style of natural granite.
The goal is to use simple polymer clay ingredients and finishing touches to create decorative objects with a faux granite surface. Whether you are making jewelry, figurines, or household decor, this will allow you to add an elegant natural stone look without the hassle of handling real rock. With polymer clay, you can achieve beautiful homemade results with granite patterning and colors. The following steps outline everything you need to know to make your polymer clay creations look like real granite.
Gather Materials
To make polymer clay look like granite, you’ll need to gather some basic supplies:
- Polymer clay in various colors like gray, black, white, red, brown, yellow, etc. You’ll want at least 8 ounces total of clay, but more colors gives you more options for creating granite patterns.
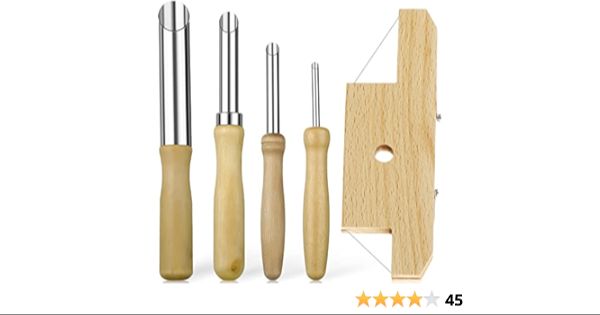
- Clay tools like a roller, texture sheets, rubber stamps, and sculpting tools. These help shape the clay and add granular texture.
- Something to bake the clay on like a tile, glass, or metal baking sheet.
- An oven for baking the clay at the temperature specified on the packaging, usually around 130°C.
- Clear acrylic sealer to apply after baking.
- Optional items: acrylic paints, makeup sponges, rubbing alcohol, etc. These can help antique the clay after baking for additional color and texture.
Make sure you have a smooth, clean work surface for conditioning the clay and sculpting your faux granite. A tabletop, countertop, glass, or ceramic tile works well.
Condition the Clay
Before you start sculpting your polymer clay, it’s important to condition it properly. Conditioning involves warming and softening the clay by kneading it before use. This makes the clay more pliable and easier to shape.
To condition polymer clay:
- Start with a lump of clay right out of the package. It will be firm and cold.
- Knead the clay vigorously with your fingers until it starts to soften. This allows your body heat to warm it up.
- As you knead, also stretch, twist, and fold the clay over itself repeatedly. This helps distribute the oils evenly throughout for smooth, pliable clay.
- Keep kneading and working the clay for 5-10 minutes until it is soft, smooth, and warm. It should be malleable enough to shape easily without cracking.
- If the clay is still stiff, let it rest for a few minutes then resume kneading until properly conditioned.
Properly conditioned clay is crucial for sculpting realistic looking faux granite. The warm, supple clay will meld together smoothly and take on intricate textures. Conditioning also prevents cracking or breakage when shaping thin clay sheets.
Create the Base
The first step in creating faux granite with polymer clay is to roll out and shape a neutral base color that will serve as the foundation. This base color should be a light tone like white, cream, or light grey. Roll the clay out with a roller or acrylic rod until it is approximately 1/4 inch thick. Cut the clay into a rectangular shape using a tissue blade or craft knife. This base layer should be large enough to accommodate the full size of your intended granite project.
Smoothing out the base color clay thoroughly will help the faux granite appear more realistic in the end result. Use your fingers and an acrylic roller to gently smooth out any imperfections in the surface. You can also use liquid polymer clay or rubbing alcohol on a paintbrush to help smooth seam lines or uneven areas.
Take care while conditioning and smoothing the clay not to over-mix colors or condition too vigorously, as this can unintentionally alter the clay color. Work slowly and handle the clay gently for best results. Once your neutral base color is rolled out and smoothed into the appropriate shape and thickness, it’s ready for adding colors and textures to create the faux granite effects.
Add Colors
To capture the mottled and multi-colored look of real granite, you’ll need to mix and blend additional colors into your clay base. Start with just a touch of contrasting colors like black, gray, and brown. Knead them in thoroughly so they are distributed throughout the base. You can also add pops of color like red, blue, or green, but use these more sparingly.
Work in small batches as you add colors so you can control the effects. Blend until you achieve an overall granitelike color with interesting striations of contrasting shades. The colors should be well-incorporated but still retain some visible marbling and movement similar to real granite. This blending process is key for making the clay take on the rich, complex coloring of natural stone.
Shape the Granite
When shaping the polymer clay to look like granite, you want to create an irregular, rocky texture. There are a few techniques you can use:
-
Roll pieces of the conditioned clay into pebble or rock shapes using your hands. Press and pinch the clay to create ridges and indentations for a natural look.
-
Use clay sculpting tools to carve grooves and chisel shapes into the clay as you form it. Try loop tools, rubber stamps, or even chopsticks.
-
Press crushed dry pasta, rice, or beans into the clay surface while soft to create small dents and pores when baked.
-
Use a roller over the clay to create flat, uneven surfaces. Fold and twist sections as you roll for ridges.
-
Cut or tear off pieces of clay to create jagged edges and layers in your rock formation.
Combine these techniques to sculpt your clay into an organic, rocky granite shape before baking.
Add Texture
One of the keys to making polymer clay look like real granite is to add texture. Granite has a very rocky and speckled appearance with pits, cracks, and a rough surface. To recreate this in polymer clay, there are a few different techniques you can try:
Use clay impression tools to add small indentations to the surface. Tools like clay rollers, silicone molds, or even the back of a paintbrush can create little dips and grooves. Press firmly and randomly across the clay to mimic the uneven surface of granite.
Add fine glitter to introduce speckles and sparkle. Use a granite-colored glitter and carefully press it into the surface while the clay is still soft. The glitter will add tiny flecks of shimmer.
Lightly etch lines into the clay with toothpicks or skewers. Drag the tips across the surface to create small scrapes and cracks, just like real stone. Be careful not to dig too deep.
Consider a clay extruder gun. This tool can push out thin strings of clay that, when dried, look like veins running through the granite. Arrange the strings randomly for an organic look.
Impressing various objects into the clay can also produce a granular texture. Things like crumpled foil, lace, burlap, or mesh can leave behind interesting patterns when pressed in. Get creative with household items to find unique textures!
No matter which technique you choose, the goal is to break up the smooth clay surface with irregularities that mimic the rough and varied texture of real granite. This will go a long way in making your polymer clay creation look impressively realistic.
Bake the Clay
Proper baking is crucial for curing polymer clay and ensuring finished pieces have the right level of hardness and durability. Follow these instructions when baking your granite polymer clay:
-
Preheat your oven to the temperature specified on the clay package, usually around 130°C/275°F. Do not exceed this temperature.
-
Bake in a well-ventilated oven, not a toaster oven which can overheat. Prop the oven door open slightly with a folded piece of aluminum foil to allow airflow.
-
Place pieces on a ceramic tile, glass baking dish or directly on the center oven rack. Avoid baking directly on foil or a baking sheet.
-
Check recommended baking times, but usually 15-25 minutes is sufficient for most items under 1⁄4 inch thick. Bake longer for thicker pieces.
-
Let cool completely before handling. Baking too briefly can result in uncured pieces.
-
Consider rebaking projects that will receive heavy use, like jewelry or sculptures. The additional baking further hardens the clay.
Following proper polymer clay baking techniques will result in durable, fully cured faux granite you can use for jewelry, bowls, figures and more.
Add Finish
Adding a finish is an optional final step when making polymer clay look like granite. There are a few different options for finishing that will help protect the clay and enhance the realism of the granite effect.
A matte varnish or acrylic sealer sprayed over the baked clay piece will help seal and protect the clay. Avoid glossy finishes, as real granite has a matte, non-reflective surface. Lightly spray or brush on 1-2 thin, even coats of a matte sealant and allow to fully dry between coats.
You can also buff the surface with fine grit sandpaper or steel wool once it has been baked and cooled. This will smooth any rough spots and create a more polished look. Work in a circular motion and go lightly to avoid removing too much of the pattern and texture.
Another option is to mix a bit of liquid polymer clay with a few drops of acrylic paint to tint it grey or tan. Spread this thinned mixture over the surface of the baked clay and bake again for 30 minutes to set it. This can help fill in any cracks or uneven spots.
The finish you choose is up to personal preference, but always test products first on a clay sample before using them on a finished piece. The right finish can enhance the realistic granite look of your polymer clay creation.
Create Granite Projects
The granite polymer clay technique opens up many possibilities for fun DIY projects. Here are some ideas to spark your creativity:
Granite Jewelry
Make pendant necklaces, bracelets, rings, earrings, and more using granite polymer clay. Cut the baked clay into interesting shapes and use jewelry findings to transform it into wearable art.
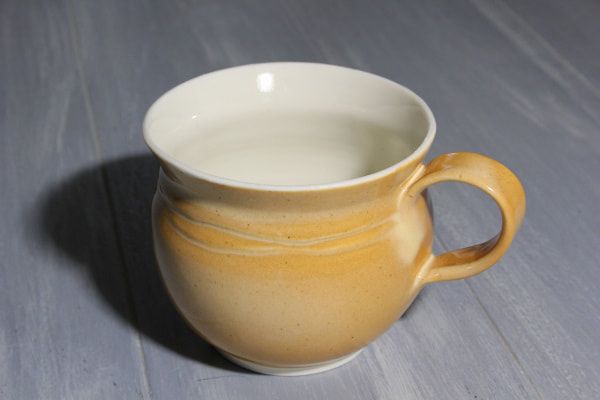
Granite Bowls, Vases, and Containers
Shape balls of granite clay into bowls, vases, boxes, and other vessels. Try sculpting free-form shapes or using molds. The granite effect makes these items look like precious stone.
Granite Magnets and Ornaments
Crafters can create custom refrigerator magnets, holiday ornaments, and decor using scrap pieces of granite clay. Make them any shape you like!
Home Decor Accents
Use granite polymer clay to add an upscale touch to home decor items like bookends, coasters, frames, knick-knacks, and more. The natural stone look elevates any space.
Let your creativity run wild with granite polymer clay! The possibilities are endless for crafters of all skill levels to make professional-looking projects.