How Do You Paint Pottery Before Firing?
Painting pottery before firing is an important step in creating beautiful and unique ceramic pieces. Properly preparing and decorating the bare clay ensures the paint adheres correctly and produces vibrant, lasting colors after kiln firing. Knowing the basics of pre-firing paint options, techniques, and processes allows artists to create diverse works ranging from simple solid glazes to intricate multi-layered designs.
This article will provide an overview of the key steps involved in painting pottery and ceramics before placing them in a kiln. It will cover common types of paints and glazes used, how to prepare raw clay for decorating, applying base coats and design layers, recommended drying times, and finally firing finished painted pieces.
Types of Pottery Paint
There are several types of paint that can be used on pottery before firing. The most common options are acrylic paint, oil-based enamel paints, and specialized ceramic paints:
Acrylic paint is water-based, non-toxic, and fast-drying. It works well on bisqueware and greenware and comes in many colors. Acrylics bond well to clay surfaces and maintain their color through firing. Popular brands for pottery painting include FolkArt Enamels and Pebeo Ceramic.
Oil-based enamel paints like those found at most hardware stores can be used. However, the fumes are strong and they take longer to dry. Enamels may also turn brown or crack during firing. Still, enamels provide good coverage and come in many colors.
Specialized ceramic paints, like Pebeo Porcelaine, are designed for pottery painting. They fuse to clay bodies at high temperatures. Ceramic paints allow blending and layering colors easily. They are available in sets with popular pottery painting colors.
Prepping the Pottery
Before painting, it’s important to properly prepare the bisqueware pottery. Start by washing the piece with soap and water to remove any dust or debris. Use a soft sponge or cloth to gently scrub the surface.
After washing, lightly sand the bisqueware with fine grit sandpaper. This helps the paint adhere better by giving the surface some tooth. Be sure to sand evenly across the entire piece. According to https://www.classpop.com/magazine/painting-ceramics, you can also use a damp sponge to sand off any rough edges.
Next, wipe away all dust with a lint-free cloth. It’s critical to thoroughly clean the pottery so there’s no residue that could prevent the paint from properly bonding.
Some potters recommend applying a bisqueware sealer or primer before painting. This creates an extra barrier to prevent the paint from soaking in too deeply. It also allows colors to pop more vibrantly. Let any sealer or primer fully dry as directed before starting to paint.
Base Coat
The base coat is an important first layer of paint that goes on before the design work. This coat serves several purposes:
- It protects the bare pottery from the subsequent layers of paint.
- It provides an even, uniform surface for the design colors.
- It allows the design colors to really “pop” against a lighter background.
- It prevents interactions between the bare clay and the colors on top.
The base coat is typically white or another light color like cream or light gray. Stay away from dark base coats, as these will cause the design colors to appear muted. Apply the base coat evenly across the entire surface of the pottery using broad brush strokes. Let it dry fully before moving onto the next step of adding your design.
Design Work
There are a few main methods for adding decorative designs when painting pottery before firing:https://www.thesprucecrafts.com/how-to-paint-pottery-2746190
Freehand painting allows you to freely create any design directly on the pottery. This takes skill and a steady hand, but allows for unlimited creativity. You can paint freehand designs using any type of ceramic paint. Practice first on scrap clay pieces until you feel comfortable with the paint consistency and brush control.
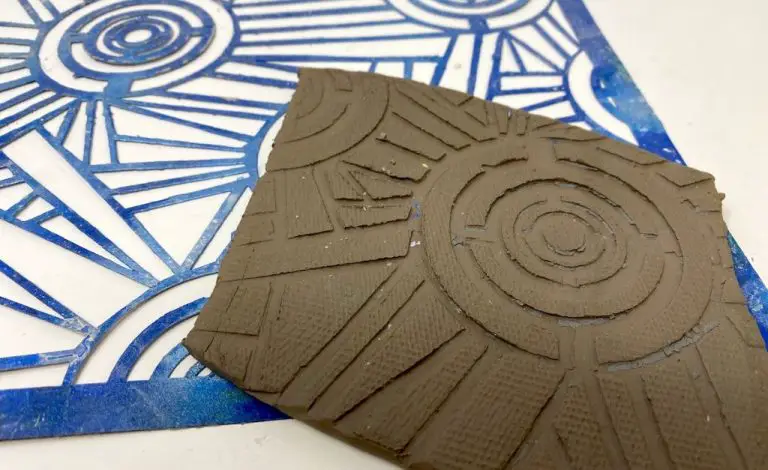
Stencils provide guidance and structure for painting repeatable patterns. Cut stencils out of thick paper, cardboard, or reusable plastic sheets. Secure the stencil to the pottery, then apply paint over it with a brush or sponge. Lift the stencil straight up to reveal the design.
Decals involve pre-made ceramic sticker designs that you transfer onto the pottery. Simply peel off the decal and place it face down on the pottery, using a bit of water. Once applied, the decal can be sealed in with a finish coat. Decals allow you to easily reproduce complex painted designs.
Multiple Layers
When painting pottery, it’s important to build up colors in multiple layers for the best results. According to Creating a Layered Composition, you can create depth and dimension by layering colored underglazes loosely to start, filling in outlines and shapes. As you build up layers, the underglazes will become more opaque and vivid.
According to 5 Methods for Painting on Pottery, it’s best to work in multiple thin layers when using liquid underglazes, since they are not at full strength until you have applied three layers. Allow each layer to dry before adding the next. Building up colors gradually prevents mixing and muddying of hues. Be patient and let the painted design evolve slowly across layers.
Finishing Coat
After the painted design has dried completely, a finishing coat needs to be applied to seal and protect the artwork. There are two main options for finishing coats – gloss and matte.
A gloss finishing coat will give the pottery a shiny, glass-like appearance. Gloss coats tend to enhance colors and make them appear more vibrant. Glossy finishes also provide the most protection for painted designs. Mod Podge and polyurethane are common gloss finishing products.
A matte finishing coat has more of a flat, muted finish. Matte coats allow the natural texture of the clay to show through more. They provide a more natural, subtle look compared to high gloss. Matte sprays and acrylic mediums can be used to create a matte sealant.
When choosing between gloss and matte, consider the look you want and the purpose of the pottery piece. Glossy finishes are ideal for items like mugs and plates that need to withstand frequent use and cleaning. Matte finishes may suit more decorative items like vases and wall hangings. Test samples to see which finish enhances your painted design the best.
Drying Time
It’s important to let painted pottery dry fully before firing. The paint needs ample time to cure and set on the pottery surface. According to the Painted Pig Studio, painted pottery should be left to dry for at least 24 hours after painting before firing.
Ceramic paint generally takes 20 minutes to dry to the touch but requires a full 24 hours to fully cure, as noted on the Montmarte blog. Rushing the drying time can lead to the paint blistering or cracking during firing. Be patient and allow a full day for painted designs to dry and harden before exposing them to high kiln temperatures.
Some sources like the Painted Pig Studio recommend waiting even longer, up to 48 hours, for the best results. Letting the paint cure for a couple days ensures it adheres properly and avoids issues later on.
Drying time depends on factors like temperature, humidity, paint thickness, and glaze layers. But allowing 24 hours or more is a good rule of thumb for painted pottery to dry fully before firing.
Firing
Firing is a critical stage in painting pottery. There are generally two firings – the bisque firing and the glaze firing. Bisque firing refers to the first firing before any glazing or painting is done. This initial bisque firing hardens the clay body and makes the piece less porous. According to research, bisque firing temperatures are usually around cone 04-06 which is about 1885°F-1915°F (González, 2019).
After the initial bisque firing, the pottery piece can be painted, glazed, or decorated. Glazes are applied at this stage to provide color and a glossy finish. The pottery then undergoes a second firing, known as a glaze firing, to melt and permanently affix the glazes to the bisque. Glaze firing temperatures are much higher, around cone 6-10 which is about 2200°F-2345°F. It is critical to match the glaze and clay body correctly to avoid glaze defects. With proper firing, the painted pottery will emerge with vibrant, durable colors (The Craft Shed, 2022).
Conclusion
In summary, painting pottery before firing requires careful preparation and technique. Clean and prepare the bisque pottery by washing and sanding. Apply a base coat of paint for good coverage. Use acrylic craft paints and layer the colors from light to dark. Allow plenty of drying time between coats. Finish with a top protective coat like varnish or glaze. Be patient during the drying and firing process for best results. Follow any specific instructions from the paint manufacturer. With some practice, you can create beautiful painted pottery ready for display after firing.
Painting pottery can be a fun and rewarding hobby. Take your time, don’t rush the process, and learn from each piece. Explore different techniques like sponging, stippling, and shading. Use quality brushes and paints intended for ceramics. Find inspiration from art books, YouTube, and Pinterest. And most importantly, enjoy unleashing your creativity on each unique ceramic project!