How Do You Sculpt A Hand Out Of Clay?
Gathering Supplies
When sculpting a hand from clay, the first step is to gather the necessary supplies. The main decision is which type of clay to use – air dry clay, firing clay or polymer clay. Air dry clay is the easiest to work with as it hardens at room temperature without needing to be baked. Firing clay requires a kiln to harden at high temperatures but can produce more durable sculptures. Polymer clay needs to be baked at relatively low temperatures to set.
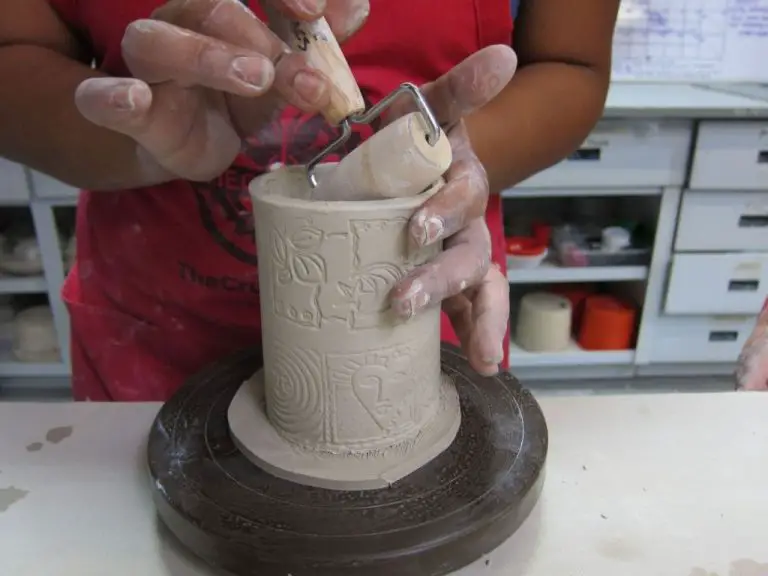
In addition to the clay, you will need sculpting tools like loop tools, shapers, ribbon tools, etc. These allow you to refine the details and texture of the sculpture. Paints and glazes are optional for adding color after the sculpture has hardened. Water can be useful during sculpting to keep the clay malleable. You may also want an armature or base for supporting the sculpture as you work on it. Gather all these supplies before starting to make the process go smoothly.
Preparing the Clay
Before sculpting a hand out of clay, it is crucial to properly prepare the clay by conditioning and kneading it. This serves several purposes. First, it warms up the clay and makes it more malleable so it will be softer and easier to sculpt. Second, kneading the clay thoroughly ensures that there are no air bubbles trapped inside it. Air bubbles can cause cracks or explosions in the clay when baking.
To condition the clay, you will need to repeatedly push down and fold the clay over itself with your fingers. Continue kneading it like dough for several minutes until the clay is smooth, pliable, and free of lumps. If you notice any stubborn air bubbles, press down on them firmly or pierce them with a toothpick to remove the trapped air. Well-conditioned clay should be smooth, elastic, and have a uniform texture with no cracks or bubbles.
Properly preparing the clay before beginning to sculpt will enable the clay to hold finer details and will prevent cracking or explosions during the baking process. Taking the time to thoroughly knead and condition clay is an essential first step to sculpting a hand or any clay figure.
Shaping the Palm
After preparing the clay and having a rough round base formed, it’s time to begin shaping the palm. Start by firmly rolling the clay out on a flat surface until you have an oval shape. Make sure to frequently lift and turn the clay while rolling to achieve uniform thickness and prevent sticking.
Once you have a flattened oval base, begin smoothing the edges by gently manipulating the clay with your fingers. Create a slight cupped shape for the palm by indenting the center slightly while maintaining the oval edges. Use your fingers and some water to gently smooth out any fingerprints or creases in the surface. The palm should have a uniform thickness of around 1/4 inch.
Take care to achieve a balanced and proportional palm size in relation to the fingers you will add later. The palm should form the foundation of the hand sculpture and support the realism once details are added.
Sculpting Each Finger
After you finish shaping the palm, it’s time to sculpt each individual finger. The easiest way to do this is by rolling out “snakes” – thin coils of clay. Roll each snake to your desired finger thickness and cut into finger-length pieces.
Attach each snake to the palm, pressing gently to blend the seam. Work from the thumb around to the pinky finger. Use a sculpting tool to refine the shape and blend the fingers into the palm. Create creases at each knuckle for realism. Go slowly and check proportions as you work.
Make sure to vary finger thickness, with the pointer and middle fingers slightly thicker. Leave space between each finger, keeping the clay from sticking together. Define the rounded fingernail shape on each finger tip. Add finer details like wrinkles and knuckle lines to finish sculpting the hand.
Creating Fingernails
The fingernails are one of the most delicate and intricate parts of sculpting a realistic hand out of clay. Care must be taken to properly shape and define each nail using the right sculpting tools.
Start by using a rounded sculpting tool to define the base of each nail bed where it meets the finger. Gently press and smooth the clay to create a rounded cuticle area. Be careful not to press too hard or you may thin the surrounding clay.
Next, use a small wedge tool to shape the nail free edge into a gentle slope from base to tip. The angle of the slope will vary for different fingers. Make the nails slightly wider at the base and taper them towards the tip.
Add some texture to the nails by very lightly dragging the wedge tool from base to tip to define the nail plate. Be very gentle as clay nails can easily be smoothed away if worked too much.
Use a needle tool to add a delicate crease down the center of each nail, defining the shape. You can also use the needle tool to create subtle horizontal lines along the width of the nail if desired.
Get the angles and curves of each nail right by looking at reference photos of hands. The nail shape should mirror the form of the finger beneath it. Add these finishing details carefully to get realistic looking fingernails.
Defining Details
Adding finer details to the sculpture brings realism and finishes the hand. Use various sculpting tools to indent knuckles into each finger. Make shallow lines across the palms and backs of hands for wrinkles and creases. With a thin tool, sculpt veins that run across the back of the hand and up each finger. Use a textured tool to add fingerprints and skin pores. Make shallow nail beds at the tip of each finger. Adding these intricate defining details makes the sculpted hand come alive and look realistic.
Baking/Drying
Properly baking or drying your sculpted clay hand is an essential step to ensure it maintains its shape and structural integrity. Follow the package instructions for baking/drying times and temperatures. Clay can be fragile before being fully cured, so handle it gently and support any slender areas like fingers to prevent drooping or breaking. Use clay safe-supports and bake the hand elevated on a baking sheet rather than laying flat to allow airflow circulation. Check on the clay periodically while baking/drying and rotate as needed if there are any hot spots in your oven. The clay should bake/dry evenly without scorching. Allow plenty of time for cooling fully before handling your finished sculpture.
Painting the Clay Hand Sculpture
After the clay hand sculpture has been fully shaped, detailed, and properly dried or baked, it’s time to bring it to life with paint and glazes. Carefully choosing the right paints and glazes for the look you want is an important step.
Acrylic and oil-based paints are commonly used for painting clay. Acrylics dry quickly and are easy to work with. Oils allow more time for blending but take longer to dry. For glazes, options like commercial clay glazes, acrylic glazes, or food-safe epoxy resin can create different finishes from glossy to matte.
Consider the look you want to achieve – more realistic skin tones, vibrant colors, metallic or pearlescent effects, etc. Test different paints on clay samples first. Thin layers of diluted acrylics or water-based glazes tend to work better than thick paint. Allow each layer to fully dry before adding the next.
Use multiple paint layers to achieve depth and shadows. Add highlights and sheen with metallic rubs or gloss varnishes. Consider utilizing different techniques like dry brushing, stippling, sponging and more for texture and realism. With care and practice, painting can bring your sculpted clay hand to life.
Sealing
Once your clay hand sculpture is complete, you’ll want to seal it to protect the finished piece. There are a few different sealant options to choose from:
Polyurethane is a common sealant for clay sculptures. It provides a clear, glossy coating that is water-resistant. Polyurethane is easy to apply with a brush. You’ll need 2-3 thin coats, letting each coat dry completely before adding the next. Polyurethane helps protect the clay from moisture and prevents chipping.
Another option is acrylic resin or varnish. These create a shiny surface and hard, protective coating. Resins can be brushed or poured on. Let each layer dry fully before adding more. Resin helps waterproof the sculpture.
A matte finish can be achieved with acrylic matte spray sealants. These are applied in a few light coats. Matte sealants don’t alter the clay’s original texture and appearance as much as gloss coatings.
Wax is also used to seal clay sculptures. Wax provides light protection from moisture and prevents dust buildup. As a final step, you can buff the wax to create a soft sheen.
Test sealants on scraps first. Apply 2-3 coats for best protection. Handle the clay sculpture carefully while sealing, as it remains fragile until fully cured.
Displaying Your Clay Hand Sculpture
After putting in all that hard work sculpting your hand out of clay, you’ll want to proudly display it for all to see. Here are some tips for effectively showcasing your clay hand sculpture:
Construct a custom stand or mount to hold your sculpture upright. This could be something as simple as a basic square pillar or a more ornate wrought iron display. Get creative with the stand design and materials to complement your sculpture.
Display your sculpture under glass. Place the mounted hand sculpture on a base or pedestal and cover it with a glass dome or cloche. This will protect the clay from dust and damage.
Illuminate your sculpture with focused lighting. Spotlights work well to create dramatic shadows and draw attention to the details. Position the light above or on the side of the display at an angle.
Situate in an alcove or bookshelf nook. The hand sculpture will pop when placed in a recessed cubby or alcove. Bookshelf nooks with accent lighting also make striking display spots.
Elevate on a decorative table or shelf. Place the hand on an artistic pedestal or mount to exhibit on tabletops, mantles, or shelving. Match the height for ideal viewing.
Rotate display location. Since sculptures are viewed from all angles, occasionally move its placement to showcase different perspectives.
By thoughtfully displaying your clay hand sculpture using one of these techniques, you can proudly highlight your artistic creation for all to admire.


