How Do You Waterproof Air Dry Clay For Plants?
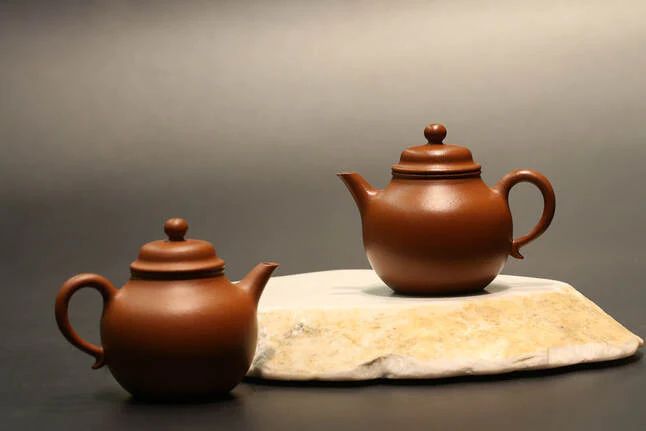
Air dry clay, also known as modeling clay, is an easy to work with clay that dries into a durable material at room temperature. It is an accessible and versatile crafting material often used for making DIY ceramic planters and pots for plants.
Air dry clay planters provide a number of benefits for plants. The porous nature of clay allows air and excess water to pass through, preventing root rot. The clay also absorbs and releases moisture slowly, helping maintain consistent soil moisture. Planters made from air dry clay are heavier than plastic ones, providing stability for top-heavy plants. Lastly, the finished look of a handcrafted clay pot can be very aesthetically pleasing.
Why Waterproofing is Important
Waterproofing your air dry clay planters is crucial to preserve their integrity and prevent damage over time. Air dry clay is porous and permeable, allowing water to seep in and compromise the structure. When exposed to moisture, unsealed clay can become misshapen, crack, or even disintegrate entirely.
Without a waterproof barrier, water saturates the clay and causes the material to swell and expand. This leads to warping and deformities in the planter’s shape. Continuous water exposure erodes the structural stability of clay and accelerates weathering. Sealing the surface prevents this absorption of liquid.
In addition, waterproofing guards against efflorescence – a white, powdery deposit that forms on clay surfaces. This occurs when water soluble salts leach out of the clay body and turn into crystals upon drying. Efflorescence is not only unsightly, but can also be difficult to remove from unsealed terracotta or clay.
Applying a waterproof finish preserves the beauty of your handmade clay pots. It protects the planter from moisture damage so it maintains its artistic form. Waterproofing also extends the life of your planter by blocking absorption and deterioration.
Waterproofing Sealants
When using air dry clay for a planter, it’s crucial to seal and waterproof it before planting anything inside. Air dry clay is highly porous and will quickly absorb any water poured into the planter. This can lead to leaks, drips, and make a mess. It can also cause your clay planter to slowly disintegrate over time as the moisture erodes the clay.
There are several effective waterproofing sealants that you can use:
Varnish – An oil-based varnish is a classic sealant for clay crafts. Multiple coats of varnish will fully seal the surface and create a glossy, water-resistant finish. Be sure to use an outdoor varnish made for weather exposure.
Mod Podge – This popular DIY sealer comes in matte and gloss finishes. Brush on several coats of Mod Podge to seal the entire surface, inside and out. It dries clear and creates a protective barrier.
Resin – For the most heavy duty waterproofing, you can coat the planter with a layer of epoxy resin. This will make it fully impervious to water with a glass-like finish. Use resin rated for outdoor use.
Beeswax – Melted beeswax can be brushed on as a natural sealant. It repels moisture while letting the clay “breathe”. Reapply wax each season for ongoing protection.
Applying Waterproof Sealants
When applying a waterproof sealant to your air dry clay planters, it’s important to apply multiple coats and allow for proper drying time between coats. This ensures maximum protection against leaks and moisture damage.
It’s recommended to apply at least 2-3 thin coats of sealant rather than one thick coat. Thin coats dry faster and provide a more even application. Allow each coat to fully dry for the time specified on the product instructions before adding the next coat, usually 1-2 hours.
Gently sand lightly between coats with fine sandpaper to help the next coat adhere. Wipe away any dust before reapplying. The final coat can be a bit thicker to provide extra waterproofing.
Sealants like varnish, polyurethane, and epoxy resin will provide the best waterproof protection for air dry clay. Apply using a clean paint brush, following the grain direction of the clay for the smoothest finish.
Be sure to seal both the inside and outside surfaces of the planter to prevent moisture seepage. Allow the final coat to cure fully before using your planter, usually 24-48 hours. Then you can confidently fill it with soil and plants without worrying about leaks.
Other Waterproofing Options
If air dry clay alone doesn’t seem like it will provide sufficient waterproofing for your planter, you can try using concrete sealers or epoxy.
Concrete sealers are designed to protect concrete and masonry from water damage and staining. Look for ones specifically made for indoor and outdoor use. Make sure to read the label and follow instructions closely. Applying 2-3 coats of sealer should create a protective barrier. Let each coat dry fully before adding the next.
For maximum waterproofing, you can coat the inside of the planter with a layer of epoxy resin. Epoxy resin creates an impermeable seal that prevents water from seeping through. Thoroughly mix and apply the epoxy according to instructions, using proper ventilation, gloves, and eye protection. Allow to fully cure before exposing to soil and water.
While more intense, these industrial solutions will ensure no moisture penetrates your handmade clay pot. It provides peace of mind for displaying plant creations indoors and outdoors.
Tips for Maximum Waterproofing
There are a few key tips to follow to ensure your DIY clay planters are thoroughly waterproofed for long-lasting use outdoors:
Fully Cure Clay Before Sealing
It’s crucial that air dry clay planters are allowed to fully cure and dry before applying any sealant. This allows any moisture to completely evaporate and helps the sealant adhere properly. Allow several days of curing time before waterproofing.
Seal Inside and Out
Applying waterproofing sealant to just the outside of the planter may not be enough. Make sure to coat the entire inner surface as well. This protects the clay from moisture exposure on all sides for maximum waterproofing.
Sealing just the outside leaves the inner clay vulnerable to becoming damp and breaking down over time. Take the extra step to waterproof inside and out.
Caring for Waterproofed Planters
Once your air dry clay planters are sealed and waterproofed, you’ll want to take proper care of them to ensure the sealant remains intact. Here are some tips for caring for waterproofed clay planters:
Clean them gently. Use a soft cloth or sponge with mild soap and water to clean the outside of planters when needed. Avoid abrasive cleaners or scrubbing that could scratch the sealant.
Avoid letting them sit in water. While waterproofed, it’s still best not to let planters sit in water for extended periods, as it could weaken the seal over time. Empty excess water from cache pots or saucers promptly after watering.
Repair any scrapes or nicks. If the sealant does get damaged from a scratch or other abrasion, touch up with additional layers of sealant to maintain waterproofing.
Reseal annually. Over time, sun exposure and use can break down sealants. For best results, apply a fresh coat of sealant once a year to maintain waterproofing integrity.
With proper care and maintenance, your decorative handmade clay planters can remain watertight and last for many years of enjoyable use!
Troubleshooting Issues
Even with the best application and curing techniques, it’s common for waterproof sealants to develop minor chips, cracks, or thin spots over time. Don’t fret, these are easy to repair. Here are some tips for troubleshooting the most common issues:
Repairing Sealant Chips or Cracks
Small chips or hairline cracks allow water to seep into the clay and cause leaks. Check thoroughly for any flaws after curing the sealant. Use a thin layer of additional sealant to patch chips and fill cracks. A sealant repair is often stronger than the original application.
Reapplying Sealant
If the sealant has extensive damage, wears thin in areas of the planter, or needs refreshing after a few years of use, do a full reapplication. Lightly sand the old sealant to rough up the surface. Clean away any dust and apply new sealant. This replenishes the protective barrier and waterproofs the planter like new.
DIY Clay Planter Inspiration
Air dry clay allows you to get creative with the shape and texture of your planters. Here are some fun ideas to spark your imagination:
Unique Shapes: Mold the clay into fun forms like animals, geometric shapes, bowls, vases, or abstract sculptures. Let your imagination run wild!
Textured Designs: Use items around your home to press textures into the clay like lace, burlap, leaves, seashells, or cookie cutters. Get creative with patterns.
Layered Looks: Stack two or more differently shaped planters together for a dynamic layered look. Or wrap rope, twine, or raffia around the planters.
Painted Accents: Once cured, you can paint the planters with acrylics. Try ombré effects, patterns, images, or inspirational words. Seal with a clear acrylic sealer.
Let your creative juices flow and make planters as unique as you are! The possibilities are endless with air dry clay.
Conclusion
In summary, there are a few key steps to effectively waterproofing air dry clay planters. First, clean and dry the planter thoroughly before applying any sealant. When selecting a sealant, opt for non-toxic products designed for ceramics like varnish, polyurethane, or food-safe epoxy resin. Apply multiple thin coats of the sealant, allowing ample drying time between coats. Let the planter cure for at least 24 hours after the final coat before using. Check for any cracks or pinholes and touch up if needed. With proper sealing and curing, an air dry clay planter can be made fully waterproof and ready to grow plants outdoors. Just be sure to monitor the planter over time and reapply sealant as needed. With the right protective coating, handmade clay planters can provide a charming home for plants for years to come.