What Are The 3 Techniques Used To Mold Clay Into A Vase?
Pottery and vase making have a long and rich history, with examples found dating back over 20,000 years. While techniques and materials have evolved over time, the basic methods for shaping clay into a vase have remained relatively consistent. The process requires patience, practice and an artistic eye to transform a lump of clay into an elegant container.
Clay can be molded into a vast array of shapes and sizes, but a vase tends to be a taller, slimmer vessel with a narrow base and an open top. Vases serve both practical and decorative purposes, holding flowers or other objects while adding visual interest through style, texture and color. There are several primary techniques used to create the signature shape of a vase from clay.
Pinching
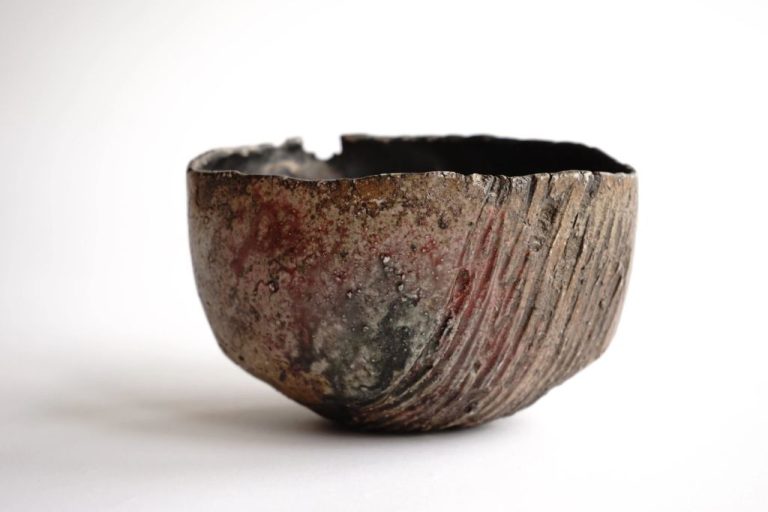
Pinching is one of the oldest and most basic techniques for molding clay into pottery. It involves taking a ball or lump of clay and pinching it with your fingers to form the desired shape. This technique allows for a high degree of control and is great for making small items like cups, bowls, and vases.
To pinch a piece, start with a ball of clay and press your thumb into the center while squeezing the clay between your fingers and thumb. Rotate the ball while pinching to thin out the walls. Use your fingers to indent and shape the interior and smooth the exterior. Pinching takes practice, but allows you to work intuitively and make unique, handcrafted pieces.
Pinch pots can then be smoothed and refined by rubbing with a wet cloth. Extra clay can be added and blended onto the surface while the clay is wet. The pinch pot technique enables a direct connection between the maker’s hands and the clay.
Coiling
Coiling is one of the oldest and most fundamental clay forming techniques. It involves rolling out “snakes” or coils of clay and stacking them on top of each other to build up the walls of a pot or vase.
With coiling, you can build thicker walls and larger vessels than you may be able to achieve with pinching alone. The technique involves taking a lump of clay and rolling it into a long coil shape on a flat surface. The thickness of the coils depends on the size of the pot you are making – thicker coils for larger pots and thinner coils for smaller pieces.
To build the vase, take the first coil and lay it in a circle on your working surface to form the base. Then, take another coil, dip it in slip (liquid clay), and lay it on top of the first coil while gently squeezing the coils together. Add another coil on top, overlapping the joint of the previous coils. Continue building up with more coils, overlapping each layer and smoothing the joints together.
As you get higher, gradually angle the coils inwards to shape the vase walls. Support the shape with your fingers on the inside as you build. Let the clay firm up slightly between adding coils. Add increasingly smaller coils as you near the top. Finally, smooth the coils together with a moist sponge or finger to conceal the coil joints and even out the surface.
Using a Pottery Wheel
The pottery wheel is the most common modern technique for molding clay into a vase or other vessel. With this method, the clay is centered on a spinning horizontal disk. While the wheel spins, the potter uses their hands, fingers, and tools to shape the clay into the desired form.
Pottery wheels allow for symmetry and uniformity when shaping the clay. The spinning motion helps shape the clay into a rounded form. As the clay spins, the potter can use their hands to compress the clay, smooth the surface, and shape the contours. The speed of the spinning wheel can be adjusted as needed during the process.
An electric or kick-powered wheel rotates while the potter skillfully molds the clay from a formless lump into an elegantly shaped vase, bowl, or other creation. This throwing technique takes practice to master but allows for delicate and detailed vessels.
Using a pottery wheel is ideal for making multiples of the same shape and size. The consistency from the spinning platform enables uniform creations. It also allows the clay walls to be thinned out while still maintaining structural integrity.
From ancient times through today, the pottery wheel remains a quintessential technique for talented potters to shape, carve, and etch clay into incredible works of art.
Draping
Draping is another technique used to mold clay into a vase or other vessel. With draping, soft slabs or balls of clay are placed over or inside a mold and then smoothed out by hand to conform to the mold’s shape. Here’s an overview of the draping process:
First, prepare your clay by wedging it thoroughly until it’s soft and pliable. Create slabs by rolling out the clay with a rolling pin, or form balls of clay by hand. The clay should be soft and loose enough to drape smoothly over the mold.
Next, choose a mold made of plaster, wood, metal, plastic, or another non-porous material. Apply a mold release if needed to prevent the clay from sticking. Hold or suspend the mold in place.
Then, starting at the top or opening of the mold, gently drop small clumps of the prepared clay over the mold, letting them drape smoothly downward. Work your way around the mold, overlapping the edges slightly as you drop more clay clumps. Cover all surfaces of the mold.
Once the mold is fully draped with clay, use your fingers to gently smooth out any wrinkles, folds or uneven areas. Press the clay against the mold to flatten and shape it. Extra clay can be trimmed off with a knife or roller tool.
After the clay has dried and stiffened partially, carefully remove it from the mold. Then let it dry fully before smoothing, refining the shape, and applying any decorative elements or glazes.
Press Molding
Press molding involves pressing soft clay into a rigid two-part mold. The mold is typically made of plaster or earthenware and consists of two halves that fit together.
To create a press molded piece, the inside surfaces of the mold are first coated with a release agent to prevent sticking. Soft clay is then pressed into one half of the mold, making sure to push it firmly into all crevices and shapes.
Next, the other half of the mold is fitted on top and securely closed. Pressure is applied to compress the clay completely into the mold. After a short waiting period, the mold is opened and the molded clay piece is removed.
Press molding allows efficient mass production of intricate shapes and identical pieces. It is commonly used to make plates, bowls, tiles and other items with decorative surface patterns. The molded pieces can be trimmed and refined after releasing from the molds if needed.
Overall, press molding makes use of rigid molds to shape soft clay through compression. It enables efficient duplication of designs and is ideal for high volume production.
Slip Casting
Slip casting is a technique that involves pouring liquid clay slip into a plaster mold. The plaster mold absorbs water from the clay, leaving a layer of solid clay on the mold surface that takes its shape. Excess clay pours out of the mold, leaving a hollow clay form behind.
To make a plaster mold for slip casting:
- Create a prototype shape out of clay.
- Make a two or more part plaster mold around the prototype.
- Remove the prototype from the mold once the plaster has dried.
- Pour liquid clay slip into the mold cavity.
- Allow the slip to sit in the mold for a few minutes as the plaster absorbs moisture.
- Pour out the excess liquid clay.
- Open the mold once the clay has dried and hardened.
- Remove the finished slip cast piece.
The slip casting process allows for consistency and uniformity when making multiple copies of the same form. It is commonly used in commercial pottery production.
Combining Techniques
While potters often specialize in one or two techniques, combining methods can lead to exciting new forms and textures. Blending approaches allows artists to capitalize on the strengths of each technique and mask any limitations. For example, pinch pots make it easy to pull up walls but can result in uneven rims. However, attaching a pinch pot to a thrown base achieves both desired effects. Some potters also coat pinch pots with slip before firing to create a smooth exterior. Combining handbuilding and wheel throwing opens new creative possibilities. Artists can throw a basic cylinder on the wheel, then add handbuilt elements like handles, spouts, feet, or decorative textures. With thoughtful planning and practice, clay artists can invent innovative hybrid techniques tailored to their vision.
Finishing Touches
Once the clay vase has been molded into its basic shape, potters will add finishing touches to refine the look and feel of the piece. Three common techniques used are smoothing, carving, and glazing.
Smoothing involves rubbing the surface of the vase with a wet sponge or cloth to eliminate any cracks, wrinkles, or uneven textures. This helps create a seamless, polished appearance. Some potters will also use metal rib tools or surform blades to carefully scrape and smooth the clay.
Carving involves using metal loop tools, wooden ribs, or even toothpicks to incise lines and patterns into the surface of the clay. This can create interesting visual effects and textures. Potters will often carve decorative designs like florals, geometrics, or scenes into their pieces.
Finally, glazing provides a glossy coating and can introduce colorful finishes. Liquid glazes with metal oxide pigments are applied by brushing, dipping, or pouring over the bisque-fired clay. When fired again at a high temperature in a kiln, the glazes melt and fuse to the clay body to create a durable, watertight surface. Glazes come in infinite colors and effects, allowing potters to get very creative with the final look of their vase.
Conclusion
There are three main techniques used to mold clay into a vase or other pottery. The first is pinching, which involves pinching and pulling the clay to form the basic shape. The second is coiling, where ropes or coils of clay are stacked and joined together to build the form. Finally, the most common technique is using a pottery wheel, where the clay is centered on the spinning wheel and shaped with your hands and tools. All three produce unique effects and can be used alone or in combination. Pinching gives an organic, handmade look while coils provide visible texture. Using a wheel allows for uniform walls and smooth surfaces. While learning any single technique takes practice, all can produce beautiful and functional pottery when done skillfully. Whichever method is used, the possibilities are endless when molding formless clay into an elegant vase or work of art.


