Why Did My Clay Crack While Drying?
Clay is a unique material composed of tiny plate-like particles. When clay is mixed with water, it becomes plastic and moldable. However, as clay dries, the loss of moisture causes it to shrink. This shrinking creates stress in the clay that can lead to cracking and warping. Drying cracks are a common problem when working with clay, but there are ways to minimize and repair them.
Chemical Changes During Drying
When clay is mixed with water, the clay particles absorb water molecules into their structure. The water molecules bond with the clay particles through a process called hydration. This gives the clay plasticity, allowing it to be shaped.
As the clay starts to dry, the water begins to evaporate. The water molecules break their bonds with the clay particles and escape as vapor. This chemical change from hydrated clay to dry clay is the primary cause of cracks forming.
Plasticity
One of the key properties of clay that leads to cracking is its plasticity. Plasticity refers to clay’s ability to be molded and shaped when wet, without cracking or crumbling. This is because water interacts with the clay minerals on a molecular level, penetrating between the stacked mineral layers and forcing them apart. The mineral layers can then slide over one another, giving clay its plasticity.
When clay is wet, the water acts as a lubricant between the clay mineral layers. This allows clay to be shaped, bent, squished, or rolled without cracking or breaking apart. As the water evaporates during drying, the clay minerals are no longer separated and begin to bond tightly together again. This transition from a pliable to a hardened state is partially what causes the clay to shrink and crack.
Shrinkage
As clay dries, it shrinks. This is because water acts as a plasticizer in clay – it allows the clay particles to move around and slide over each other. When the water evaporates during drying, it leaves gaps between the clay particles that were previously filled by water molecules.
The clay particles get packed closer together as the water evaporates, causing the entire piece to shrink in size. Up to 10-12% shrinkage can occur from the wet state to the dried state. This shrinkage causes stress and tension to build up within the clay.
The rate of drying impacts how evenly the clay shrinks. If dried too quickly, the surface dries out faster than the interior, causing uneven shrinkage. Slow, even drying allows the clay to shrink more uniformly throughout.
Some clay types, like stoneware or porcelain, shrink more than others. The amount of shrinkage depends on factors like the clay body composition and the drying/firing process.
Managing shrinkage through proper drying and firing is key to preventing cracks and producing high quality ceramic work.
Stress Buildup
As clay dries, the moisture level decreases unevenly throughout the piece. The outer areas and thinner sections dry faster than the inner and thicker areas. This uneven drying causes internal stresses to build up in the clay.
The dry outer sections start to shrink and pull on the still damp inner sections. However, the inner moist clay is still flexible and wants to resist shrinking. This tug of war between the contracting dry areas and resisting moist areas causes stress to build up within the clay.
These internal stresses continue mounting as the moisture gradient between the dry outer sections and moist inner sections increases. The stress reaches its peak when the outer sections become completely dry and rigid while the core is still damp and plastic.
This difference in drying rates and the resulting internal stresses are responsible for most cracking that occurs while clay is drying.
Cracking
As clay dries, it undergoes shrinkage which causes stress to build up within the clay body. This stress continues increasing as the clay loses moisture and hardens. At a certain point, the stress becomes too much and exceeds the strength of the hardened clay, causing cracks or fractures to form.
Cracks most often occur because of the natural shrinkage of clay as it dries. When clay is wet, the clay particles can move around freely. But as drying happens, water is lost and the clay particles get closer together. This shrinkage causes stress to build up from the clay contracting. The clay wants to shrink, but if areas are attached to thicker clay or restricted, this creates tension and pull on the clay.
Areas where stress concentrates are often where cracks first begin emerging. Stress concentration can happen along soft slab joins, attachments like handles or bases, near cut-outs or indentations in the clay, and at natural weak points in the clay body. As stress passes the strength limits of the hardening clay, cracks spread out from these areas of concentration.
Temperature changes and moisture loss don’t happen evenly throughout a clay piece as it dries. Areas that dry faster than others are more prone to cracking because they shrink more rapidly. Stress and cracking will occur from the imbalance in the rate of drying and shrinkage in the clay body.
Preventing Cracks
There are a few techniques you can use to help prevent cracking while your clay is drying:
Slow, even drying – Allow your clay pieces to dry slowly and evenly to prevent uneven shrinkage and stress build up. Avoid quick drying methods like heat lamps or direct sunlight. Store pieces in a climate controlled room out of drafts.
Adding fillers – Mix in fillers like grog, vermiculite, perlite, or sand to improve the clay’s plasticity and reduce cracking. Fillers create gaps in the clay that allow for contraction without stress build up.
Maintain thickness – Keep walls and bases of pieces thick and even. Thin areas are prone to cracking and warping.
Reinforce seams – Score and slip seams to bind pieces together, reducing cracks along joints as the clay shrinks.
Bisque fire gradually – Bring pieces up to bisque temperature slowly, holding at intervals to allow heat to soak in evenly before proceeding. Quick changes in temperature can cause cracks.
With careful drying, strategic fillers, and gradual firing, you can minimize cracking and warping to achieve beautiful lasting finished clay pieces.
Fixing Cracks
While it’s best to avoid cracks altogether through proper drying techniques, cracks do sometimes happen even with the most careful handling. Thankfully, there are a few methods to fix cracks that form in clay:
Filling
One of the simplest ways to fix cracks is by filling them with water or a clay slurry. To do this, simply wet a small brush or sponge and use it to gently rub water or diluted clay into the crack. The water will soften the clay and allow you to gently push the edges of the crack back together as it dries.
Sanding
For very fine cracks, you may be able to simply sand them away. Use a fine grit sandpaper or sanding sponge to lightly buff the area until the crack is no longer visible. Be careful not to sand too aggressively or you may create more cracks. Work slowly and gently.
Re-wetting
If the cracks are small and shallow, you may be able to re-wet the entire piece of clay and smooth out cracks through kneading. Mist the clay lightly with water or spritz it with a clay spray bottle. Then, knead the clay until the cracks close up. Allow the clay to dry fully before handling again.
Curing
Once the clay has completely air-dried, the next step is to cure it. Curing is the process of further hardening and strengthening the clay by exposing it to heat. This can be done in a few different ways:
– Firing the clay in a kiln. Kiln firing will fully vitrify (turn to glass) the clay body, making it extremely hard and durable. The high temperatures will lock all the constituents together at a molecular level. However, firing requires access to a kiln.
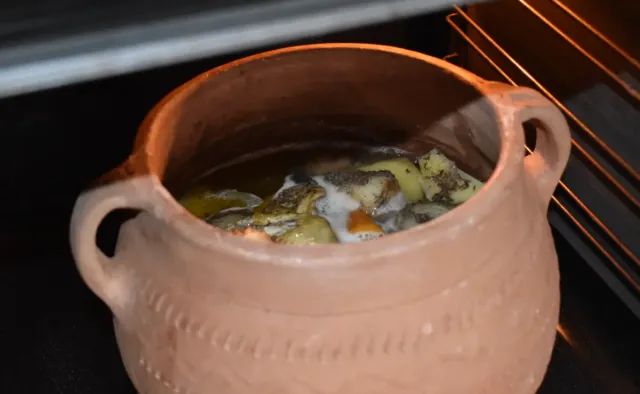
– Oven curing. If a kiln is not available, oven curing is a good alternative. The clay is placed in a standard kitchen oven and “baked” at low temperatures, usually around 300°F. This is enough to drive out any remaining moisture and cause additional hardening. The downside is that oven curing will not achieve the same level of hardness as kiln firing.
– Sun curing. Exposing the clay to direct sunlight for an extended period can also promote additional drying and hardening. The UV rays help to cure the material. Place the pottery in a spot with full sun for a few days. Rotate it periodically for even exposure. Just be cautious of any moisture if brought indoors at night.
No matter the curing method, the goal is to lock in the desired shape and make the clay as durable as possible. With proper drying, firing, and curing, you can create strong ceramic pieces that will last for years. The curing process is essential for developing maximum strength and hardness.
Conclusion
In summary, clay can crack while drying due to several factors. Clay’s plasticity allows it to be molded when wet, but this also makes it prone to shrinking as it dries. The shrinking causes internal stresses to build up, which leads to cracks forming to relieve the stress. Cracks can be prevented by proper drying techniques like slow drying, scoring, and using additives. For finished pieces that already have cracks, repairs can be made by wetting and smoothing cracks, or using liquid clay products. Following the right curing and firing procedures will also minimize cracking. With some care and technique, ceramic artists can successfully work with clay and limit troublesome cracking.