How Do You Smooth Pottery Clay?
Smoothing pottery clay is an important step in preparing your clay for firing. It helps remove any uneven surfaces, air bubbles, and cracks. The purpose is to achieve an even, uniform surface that will hold detail well when carved or sculpted. Proper smoothing also minimizes cracking and breakage when the clay pieces are fired.
There are a few different techniques for smoothing clay. Rib tools, hard and soft rubber rollers, sanding, and using water are some of the most common methods. It’s best to smooth clay in multiple stages – starting with getting rid of larger uneven areas and air pockets, then gradually refining the surface. Overworking or overtly wetting clay can cause other issues like sagging or cracks. Finding the right balance is key.
With some simple tools and techniques, you can learn to reliably smooth your clay sculptures and functional ware. The smooth surface will enhance the finished look, strength and durability of your fired pottery.
Remove Air Bubbles
Air bubbles in clay can form in several ways during the clay preparation process. Kneading or wedging clay introduces air, as does pouring slip into a mold. Using a porous material like grog or foam can also trap air bubbles in the clay body. As clay dries, the moisture level drops and any air pockets will expand, creating cracks and weak spots.
It’s important to remove air bubbles before letting clay dry fully. Otherwise, the piece will be structurally unsound. There are several techniques to release trapped air:
Use a Rib
Ribs are common tools used to smooth and shape pottery clay. Ribs are thin, rigid strips of metal, wood, or plastic that help compress clay and eliminate grooves and bumps in the surface. To smooth with a rib:
- Hold the rib perpendicular to the clay surface
- Gently stroke back and forth in straight lines, applying even pressure
- Work methodically to cover the entire area, using overlapping strokes
- Focus on problem spots that have rough areas or grooves
- Metal ribs provide more compression while wood/plastic are more flexible
- For tighter curves, use a flexible plastic rib that can bend with the form
Ribs are an effective hand tool for both smoothing flat surfaces as well as reaching into bowls, vases, and other pieces with concave areas. Using long strokes and light pressure, ribs compress and seal the clay for a smooth, professional look.
Use a Hard Roller
Hard rollers made from materials like acrylic or wood are ideal for smoothing pottery clay and removing any lines or grooves. They apply firm, even pressure to compress the clay. Hard rollers work well for the initial smoothing right after shaping the clay. Using a hard roller helps pack the clay particles together and forms a uniform surface.
Look for rollers with a smooth finish and rounded edges. The hardness of the material enables it to flatten the clay thoroughly without absorbing water or sticking. Hard acrylic rollers are a popular choice for efficiently smoothing and compressing wet clay. Choose a roller width suitable for the size of your piece.
Applying too much pressure with a hard roller can thin or distort the clay. Use a light touch, rolling back and forth while gently pressing down. Work methodically over the entire surface to evenly smooth and consolidate the clay body.
Use a Soft Roller
A soft roller is a great tool for smoothing out slight irregularities in clay. Sponge rollers work particularly well for this purpose. Start by wetting the sponge roller slightly to prevent it from sticking to the clay. Then, gently roll it over the surface, applying even pressure. The sponge will compress over any bumps and smooth them out. Be careful not to overwork any single area as too much rolling can cause distortion.
Focus on problem spots that have cracks, grooves or texture from your sculpting tools. Roll back and forth over them until the clay starts to even out. As you work, rotate the roller to expose a fresh sponge surface and prevent sticking. Rinse and re-wet the sponge as needed. Soft sponge rollers are safe for most clay bodies and won’t introduce grooves or markings of their own.
Use a light touch and work methodically until the entire surface feels smooth and looks uniform. The sponge roller helps blend the clay for a flawless finish. Allow the clay to firm up slightly between rolling if it starts to feel too soft. When done properly, this technique will create smooth pottery ready for decorating and firing.
Sand the Surface
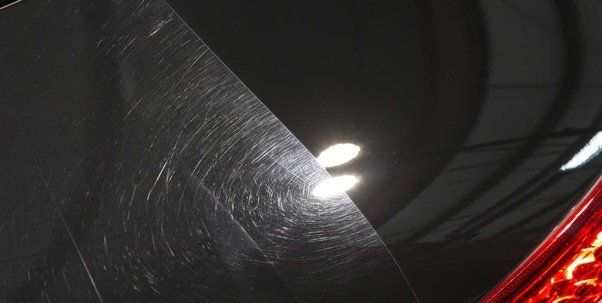
Lightly sanding the surface of the clay can help smooth out any remaining irregularities. Use a fine grit sandpaper around 320 grit. Gently rub the sandpaper over the surface using even strokes. Be careful not to sand too hard or you may scratch the clay. The goal is to just take down any small bumps or ridges. Sanding will also help open up the clay’s pores to accept water, glazes or stains.
You only need to sand until the surface feels smooth and consistent to the touch. Over-sanding can actually introduce new scratches and defects. It’s better to do multiple light sanding sessions, checking the smoothness in between, rather than try to heavily sand in one pass.
Make sure to fully clean and wipe down the piece after sanding to remove any clay dust before moving onto the next smoothing step. A clean work surface is essential for properly assessing the clay’s smoothness.
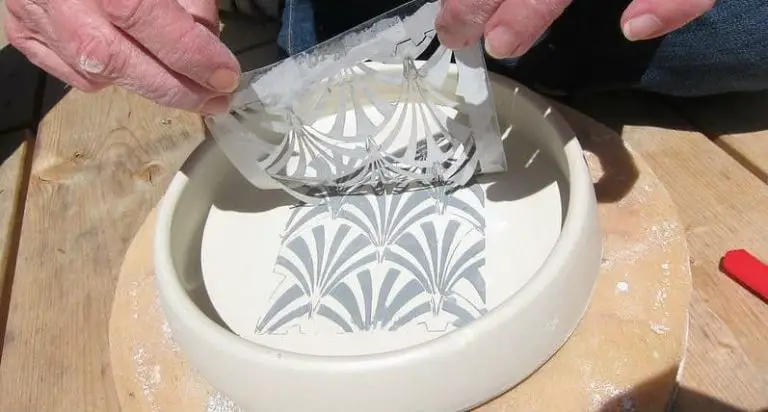
Use Water
One of the most important techniques for smoothing pottery clay is using water. Adding water to the clay surface allows you to more easily even out any irregularities or rough patches. The water acts as a lubricant, allowing you to burnish the surface to a smooth, glossy finish.
Wet your fingers or a soft sponge and gently rub the water over the clay surface. Apply even pressure and work in small circles. Slowly move across the entire piece, wetting as you go. The water will soften the clay and fill in any cracks or grooves.
As you wet the surface, you can then use a rib, roller, or even just your fingers to burnish and compact the clay. Burnishing polishes the surface and pushes the clay particles closer together. Work thoroughly across the entire piece until the surface feels smooth and looks glossy.
Allow the piece to dry slightly before burnishing again. Repeating this wetting and burnishing process several times will help smooth the clay and minimize cracking as it dries. With practice, you’ll be able to achieve a beautifully smooth finish on your pottery.
Avoid Overworking
Overworking or overhandling clay can cause a number of issues that negatively impact the final quality of your pottery. When clay is overworked, the clay particles become overaligned, causing the clay to lose its plasticity and become stiff and hard to work with. The overworked clay is also more prone to cracking and breaking, both during construction and after firing.
Overworking clay destroys air bubbles naturally present in the clay body that help the clay sustain high temperatures during firing. Without these air pockets, pieces are more likely to slump or warp. Overhandling clay also closes the clay body, preventing any trapped moisture from escaping while drying, which can lead to cracks and explosions during bisque or glaze firing.
The effects of overworking are irreversible, so it’s important to handle clay only as much as needed. While kneading and wedging clay helps remove air bubbles and make clay uniform, avoid repeating these processes excessively. When throwing on the wheel, use only light pressure and compress clay as little as possible. Let the clay body rest between stages of construction to allow moisture and stiffness to equalize.
Let it Rest
Allowing your clay to rest is an important step in creating a smooth surface. After you have wedged or kneaded your clay to remove air bubbles and achieve an even consistency, resist the urge to immediately start sculpting or throwing pots on the wheel. Instead, let the clay sit for a period of time, wrapped in plastic to prevent drying out.
There are a few benefits to letting clay rest before working with it:
- It allows any remaining air bubbles to rise to the surface and pop.
- It gives the clay time to absorb moisture evenly throughout, preventing cracking or tearing as you sculpt.
- It allows clay particles to align themselves uniformly, improving plasticity and workability.
- It enables any chemicals added during processing to distribute evenly.
The ideal resting time can vary based on factors like the clay type, whether it was previously wedged or kneaded, and the working environment. In general, let clay rest for at least several hours and up to overnight. Pay attention to how the clay feels – if it still seems stiff, let it rest longer. A properly rested clay will be smooth, flexible, and ready for shaping.
Final Polish
The final step in smoothing pottery clay is to give it a fine polish. This will help remove any remaining small imperfections and give the clay a smooth, glossy finish. There are a few options for polishing compounds you can use:
– Wax Polish – Rubbing wax onto the clay and buffing it with a soft cloth will create a nice sheen. Beeswax, carnauba wax, and special clays waxes work well.
– Oil Polish – Wiping a thin layer of mineral oil over the surface and buffing it will also polish the clay nicely. Olive oil and other food-safe oils can work too.
– Commercial Polishes – There are specialty polishing compounds made for pottery that contain ingredients like waxes, oils, and polishing abrasives. These can be rubbed on and buffed off for an extra glossy finish.
– Burnishing – Rubbing the clay surface aggressively with a smooth tool like a rounded stick, stone, or the back of a spoon can bring out the natural sheen. This takes some effort but doesn’t require any extra polish.