How Do You Throw With Marbled Clay?
Marbled clay is a unique type of clay that is characterized by its beautifully mottled and variegated appearance resembling the patterns found on marble stone. It gets its distinctive coloring from the mixing of differently colored clays together while the clay is in a plastic state.
The benefits of working with marbled clay include its visual appeal and one-of-a-kind patterns that can enhance handmade pottery pieces. No two marbled clay projects will turn out exactly the same due to the random blending of the colors. Marbled clay also provides the versatility of clay while allowing artists to achieve a look similar to natural stone.
Marbled clay is well-suited for both handbuilding techniques and wheel throwing. It can be used to create a variety of ceramic items including mugs, vases, bowls, decorative objects, jewelry, and more. The unique patterns of the clay come to life when fired, making marbled clay an excellent choice for artisan pottery and other ceramic art projects.
Selecting the Right Marbled Clay
When selecting marbled clay, you’ll want to consider the type of clay, the colors, and where you can purchase it. The type of clay and specific colors you choose will impact the finished look of your piece.
The most commonly used types of clay for handbuilding and throwing are stoneware and porcelain. Stoneware has more tooth and grog which gives it a nice texture for handbuilding. Porcelain is smoother and more translucent which can create some beautiful coloring effects when marbled. For functional pieces, stoneware is better for durability. For decorative sculptures, porcelain offers more possibilities for intricate shapes and translucency.
As for colors, there are endless options when it comes to hand-mixing or buying pre-mixed marbled clay. Neutral tones like white, black, gray, and cream are versatile. Earth tones like terra-cotta, brown, yellow, and red work well together. You can also use bright colors like blue, green, or purple for a more lively look. Consider the overall aesthetic you want to achieve.
Recommended brands for marbled clay include Amaco Brent, Laguna, Continental Clay, and Standard Clay. Many art stores will carry these brands. Local ceramic shops and online retailers like The Ceramic Shop or Clay Planet are also great options for buying marbled clay. When purchasing, get at least 10-25 lbs so you have enough clay to work with for marbling and throwing your pieces.
Preparing the Clay
Before you can throw with marbled clay on the pottery wheel, you need to properly prepare the clay. Two key steps here are conditioning and wedging the clay.
Conditioning involves kneading and working the clay to achieve an even consistency throughout. Start by cutting chunks of clay from your marbled clay block and slamming them against your work surface. This will help release any air bubbles trapped in the clay. Next, knead the clay forcefully with your hands, almost like you are giving a deep tissue massage. Fold, press, and push the clay continuously for several minutes until it feels smooth, elastic, and homogeneous.
Wedging is a technique used after conditioning to further mix the clay and remove air pockets. To wedge, cut the conditioned clay in half. Then slam the two pieces together. Using your hands, form the clay into a cylinder shape. Fold the cylinder into thirds and press down firmly. Repeat this process, cutting, folding, and pressing, until the clay feels cohesive with no air bubbles. The wedging action evenly distributes moisture and creates a smooth, workable texture.
Throughout the conditioning and wedging process, pay attention to the clay’s consistency and moisture level. You want the marbled clay to be moist enough to be malleable, but not so wet that it sticks heavily to your hands. The clay should feel cool, smooth, and slightly resistant when pressed. Add water or clay powder sparingly if needed to reach the ideal texture for throwing on the potter’s wheel.
Centering the Clay
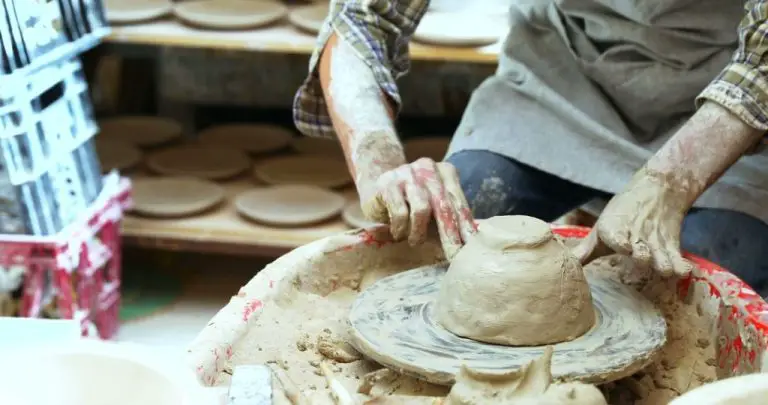
Centering the clay properly on your pottery wheel is a crucial step before raising the walls of your marbled clay piece. Properly centered clay will allow you to open up the form and pull up the walls evenly. Here are some tips for getting your clay centered:
- Start by securing the clay on the wheel with some water. Place it in the center and apply gentle pressure as the wheel spins slowly.
- Keep your hands and tools moist as you center. Adding water helps the clay move smoothly under your hands.
- Apply even pressure with your thumbs and fingers as you center. Don’t push too hard in any one spot.
- Watch for any wobbling or movement. Adjust the pressure and angle of your hands until the clay spins smoothly.
- Make sure the clay is centered before opening it up. An off-center start will cause problems as you pull up the walls.
Some common centering mistakes to avoid:
- Don’t center the clay off-axis. Make sure it aligns properly with the wheel head.
- Avoid centering too thin or too thick. The walls need an even thickness to pull up successfully.
- Don’t leave any heaviness or thickness on one side. Keep the form symmetrical.
- Prevent collapse by centering firmly but not overly aggressively.
Take your time getting the clay perfectly centered before moving to the next steps. It will pay off with smooth, even walls and forms.
Opening the Clay
Once you have raised the walls to the desired height, it’s time to open up the interior space of your clay form. For pottery that will be decorative or functional, like vases, bowls, and cups, opening up space inside is essential.
There are a few techniques for opening up tall, narrow forms versus shorter, wider forms:
- For tall vase shapes, insert your thumb into the bottom then gently press down and out to widen the base. Use a rib tool to refine the interior walls, smoothing it into an even thickness.
- For wider bowl forms, start by pushing your thumbs into the bottom and slowly working in a circle to widen the space. Use a rounded rib to define the curve of the interior walls.
- For unusual asymmetrical forms, turn the clay frequently as you hollow out the insides. Check thickness and use various tools to shape hard to reach spots.
Be sure not to make the walls too thin, usually 1/4 inch thickness is ideal. Open up the interior space gradually. If you feel any cracking or giving, stop and allow the clay to firm up before hollowing further. Use a spray bottle to keep clay moist if needed.
Raising the Walls
Once you have centered and opened your clay, the next step is raising the walls to build up your piece. When raising walls it’s important to focus on pulling up evenly, controlling wall thickness, and shaping with ribs.
As you pull up on the walls, apply even pressure with your palms, fingers, and thumbs to raise the clay up evenly. Try to avoid pulling too much on one section, which can cause thinning or warping of the walls. Go slowly and focus on keeping an even thickness as you build up the height. Using a ruler tool can help check that walls are level and uniform.
Pay close attention to maintaining consistent wall thickness as you raise up. Thicker walls will be stronger and thinner walls can become prone to cracking and collapsing. Aim for walls that are roughly 1/4 inch thick, adjusting for the size and style of your piece. Using calipers can help monitor and control your thickness.
Use ribs to refine the shape and smooth the exterior and interior walls as you build upwards. Cut ribs to the desired curve and use the edge to gently shape and thin walls. Ribs can also compress clay and remove bumps or ridges on the surface. Take care not to overwork the clay, which can cause issues like cracking when drying.
Refine the Form
Once you have raised the walls to the desired height, it’s time to refine the form to create a smooth, symmetrical piece. Carefully smooth any ripples, wrinkles, or irregularities on the exterior surface of your marbled clay piece. Use a rubber rib or wooden modeling tool to gently compress and even out the clay. Work slowly and patiently to avoid damaging the patterned exterior.
Next, carefully refine the lines and contours to create clean edges and crisp details. Use metal loop tools to accentuate lines and a wooden knife tool to define edges. Take care not to drag or smear the marbled exterior. Work incrementally and let the clay firm up a bit between refinements. Frequently step back to check proportions and symmetry. Refine until you achieve the desired uniformity and definition.
Make sure to preserve the integrity of the marbled patterning as you refine the form. Clean up lines between color variations and enhance the marbled effect. The final piece should have crisp definition with a smooth, refined marbled motif.
Adding Decorations
There are numerous ways you can decorate marbled clay pieces to add visual interest and texture. Here are some of the most common options:
Options for Markings, Textures, and Carvings
One simple way to decorate marbled clay is by adding markings and textures to the surface. You can press items into the soft clay to leave impressions, like lace, leaves, seashells, or fabric. Using clay tools, you can also incise patterns, lines, or designs into the surface.
Carving into leather-hard clay is another great decorating technique. You can carve patterns, words, or images using clay carving tools, loops, or toothpicks. Consider carving textures like waves, spirals, dots, or geometric patterns.
Incising Techniques
There are several incising techniques you can use to decorate marbled clay:
- Scratching or scoring the surface with needle tools
- Pressing items into the clay, like leaves or seashells
- Using loop tools to carve lines or patterns
- Incising designs using a sharp needle or piercing tool
Aim to make incisions at least 1/8″ deep so they remain visible after firing. Consider incising lines, spirals, words, or geometric shapes.
Applying Slip or Glaze Accents
Adding colored slips or glazes is a simple way to accentuate textures and carved patterns. Try applying black slip to incised lines or dipped glazes over texture patterns. You can also paint on colored glazes in a brushstroke pattern for a artistic effect.
Keep in mind that slip and glaze accents will flow and blend during firing, so don’t apply too precisely. Allow areas to remain unglazed to showcase the marbled clay surface as well.
Drying and Firing
Proper drying and firing are essential steps when working with marbled clay. Rushing these processes can lead to cracking, exploding, or weak finished pieces.
After the piece is thrown on the wheel and refined, allow it to air dry completely before firing. Drying time depends on factors like clay thickness, atmospheric humidity, and airflow. Thinner pieces may dry in a few days, while thicker pieces can take weeks. Avoid drying too fast, which risks uneven shrinkage and cracks. Monitor closely and allow even, gradual drying.
Once bone dry, the piece is ready for its first bisque firing. For marbled clay, aim for a bisque temperature of cone 04-06 (1875-1940°F). Slow bisque firing over 8-12 hours. A slower firing schedule gives any remaining moisture time to evaporate safely. Fast firings risk steam explosions inside the clay.
Use witness cones during firing to gauge temperature accuracy. These small pyrometric cones melt at specific temperatures, indicating when those temperatures are reached in the kiln. Place a witness cone one cone number higher than your target temperature. For example, for a cone 05 bisque, use a cone 04 witness cone. When the cone bends over, the target temperature has been reached.
After bisque firing, pieces can be glazed and fired to maturity. For marbled clay, aim for a final temperature of cone 6 (2232°F). Again, use witness cones and fire slowly over 12-18 hours. The longer firing schedule allows glazes time to move smoothly over the clay surface.
With careful drying, bisque firing, and final firing, your marbled clay pieces will be strong, vibrant works of art ready to enjoy!
Tips and Tricks
Throwing marbled clay takes practice, but master potters have learned helpful techniques over the years. Here are some tips and tricks to avoid common mistakes, achieve signature styles, and troubleshoot problems when throwing marbled clay:
Avoiding Common Throwing Mistakes
When centering the clay on the wheel, be patient. Rushing the process can lead to an off-center lump that won’t throw properly. Take your time to evenly compress the clay and remove any air pockets before raising the walls. Also, make sure your clay is properly wedged to remove bubbles and achieve an even consistency. Going too fast at each step of throwing can result in thinner or uneven walls.
Don’t raise the walls too quickly or make them too tall and narrow. Allow the clay to slowly take shape and support its own weight as it is formed. If walls are too thin, they can collapse. Gauge the thickness and gradually shape the piece into the desired form.
Avoid overworking details too soon. It’s best to focus on the overall form first, then refine shapes and add decorations later when the clay has firmed up slightly. Pay attention to the clay’s stiffness and only work details when it has dried to a leather hard stage.
Achieving Signature Styles
The unique properties of marbled clay make it wonderful for producing signature looks. Allow the clay’s patterns to shine through by using minimal glaze. A simple clear coat finish can accentuate the distinctive swirling colors. For more rustic styles, leave the surface unglazed.
Marbled clay’s blend of colors also allows potters to mimic effects like wood grain when throwing. Use modeling tools to create deep, hand-carved grooves while the clay is pliable. Allowing pots to dry naturally in open air produces subtle cracks that add organic characters.
Take advantage of the way marbled clay stretches and distorts. Try throwing unusually shaped forms like waved edges or long, slender necks. The patterns will warp in interesting ways during forming.
Troubleshooting Problems
If clay walls start slumping during throwing, carefully compress the clay again and let it firm up before continuing. Slumping can happen if walls are too moist or soft.
Cracks often occur if clay is allowed to dry too quickly. Slow the drying process by covering thrown pieces with plastic sheets or damp rags. Store clay works in progress in airtight containers to prevent drying.
Control warping effects by maintaining even wall thicknesses while throwing. Dry pottery slowly and fire using consistent heating and cooling cycles. Glazing both sides of pieces can also minimize warping.


