How Hard Is Throwing Clay?
What is Clay?
Clay is a fine-grained natural rock or soil material that combines one or more clay minerals with possible traces of metal oxides and organic matter. Geologic clay deposits are mostly composed of phyllosilicate minerals containing variable amounts of water trapped in the mineral structure.
The origins of clay can be traced back to the gradual chemical weathering of rocks over long periods of time. The weathering process breaks down rocks into smaller particles while chemical reactions alter the minerals. These weathering processes can include mechanical grinding, chemical dissolution, oxidation, hydration, hydrolysis, carbonation, and solution.
There are many different types of clays based on their mineral and chemical composition. The four main groups of clays are kaolinite, montmorillonite-smectite, illite, and chlorite. Some common clay types include kaolin, bentonite, attapulgite, and Fuller’s earth.
According to Wikipedia, “Clay minerals typically form over long periods of time from the gradual chemical weathering of rocks, usually silicate-bearing, by low concentrations of carbonic acid and other diluted solvents.” (Source)
Science Learning Hub notes that since early times, “humankind has had a close association with clay” due to its versatile properties and uses. (Source)
Clay Properties
One of the most important properties of clay is its plasticity, or its ability to be shaped and molded without cracking or rupturing (Plasticity, n.d.). Plasticity is what allows potters to throw clay on the wheel and form various shapes and vessels. According to research, plasticity arises from water interacting with the plate-like clay particles, allowing them to slide over one another when force is applied (Andrade, 2011).
The plasticity of clay depends on several factors like the size of the clay particles, the amount of water present, and the type of clay minerals. Highly plastic clays have very small particle sizes and can hold more water, making them extremely responsive and able to be shaped thin without tearing (Zamek, 2022). Less plastic clays have larger particles and lower water content, making them stiffer and more prone to cracking when worked.
Another key property is how clay changes during the drying and firing process. As clay loses moisture, it shrinks and hardens. Firing clay to high temperatures further hardens it through sintering and vitrification. The clay becomes ceramic material that is no longer plastic. Understanding these properties allows potters to properly dry and fire pieces made of clay.
Tools for Throwing Clay
Pottery wheels are essential tools for throwing clay. Kick wheels and electric wheels allow potters to center and raise clay into various shapes and forms. Quality brands like Brent, Shimpo, and Bailey offer a range of wheel models and sizes for beginners to professionals (source).
Bats, which are rotating surfaces that attach to the wheel head, provide extra support when throwing larger pieces of clay. They allow easy transfer of ware from the wheel to drying racks. Popular materials for bats include plaster, drywall, wood, and plastic (source).
Ribs are important shaping tools made of wood or metal. They help compress clay walls evenly and refine contours. Loop tools create indentations and textures. Trimming tools like kidney shapes, spears, and looped trimmers assist with refinement of bases, feet, and lips (source).
Centering Clay
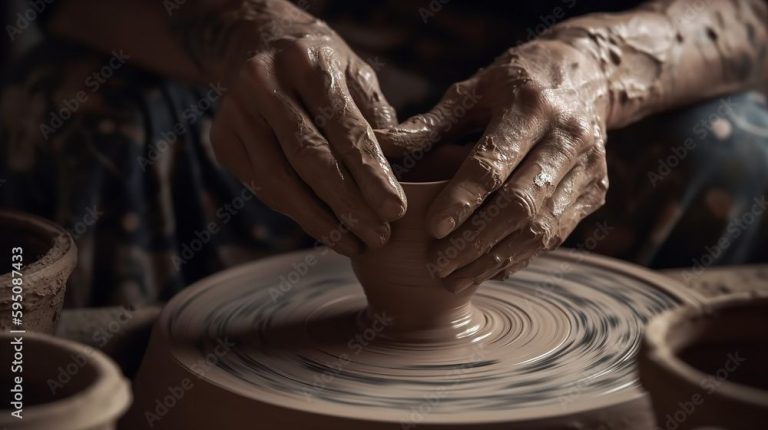
Centering clay on the potter’s wheel is one of the most important steps in throwing clay. It involves shaping a ball or lump of clay into a symmetrical, centered cylinder on the wheelhead 1. Proper centering allows the clay to be opened and shaped evenly without becoming lopsided or collapsing.
To center clay, start by wedging it well to remove air bubbles and make it pliable. Form it into a ball and secure the clay ball onto the wheelhead. Allow the wheel to spin at a moderate speed while keeping both hands on the clay. Apply firm yet gentle pressure on both sides while pulling the clay upwards. This will draw the clay towards the wheelhead and center it. Use the thumbs to compress the clay at the base. Add water to lubricate and smooth the clay as needed.
Continue applying pressure and compressing until the clay forms a centered cylinder or cone shape. Avoid squeezing too hard or thinning the base excessively. Once centered, the clay should feel solid and not wobble when spun. Centering may take practice but is a vital skill for throwing uniform pieces on the wheel.
Opening Clay
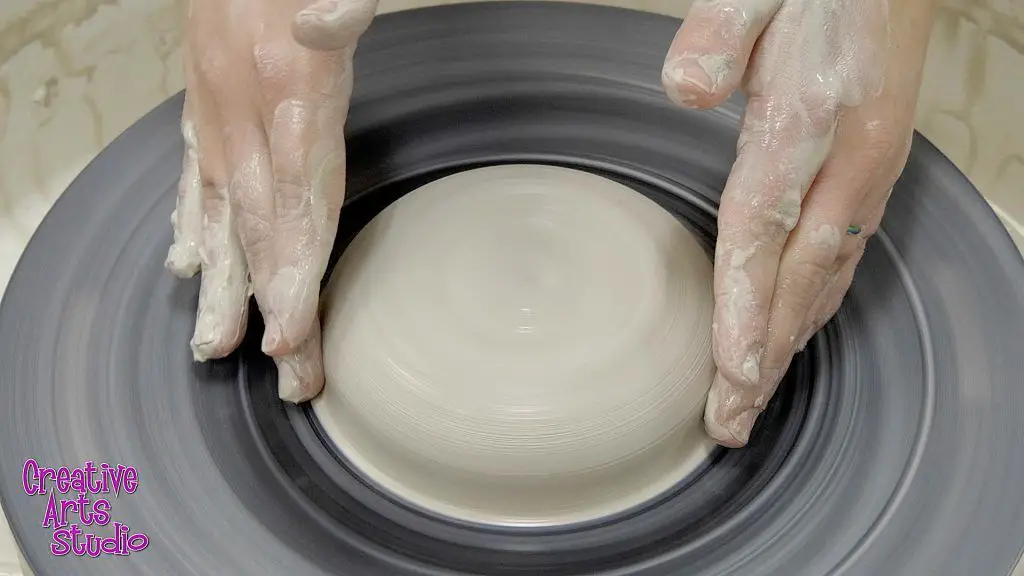
Opening clay is the process of transforming the ball of clay into a hollow cylinder or cone shape in preparation for raising the walls to create a pot. This is a crucial step that sets the stage for the final form. To open the clay:
Start with a ball of wedged clay centered on the wheel. Apply downward pressure with cupped palms to compress the clay while slowly rotating the wheel head. Use the pressure to form the ball into a convex dome shape.
Wet your hands then place one hand inside the dome and the other on the outside. Apply gentle outward pressure from the inside as you slowly rotate the wheel to form the clay into a uniform cylinder or cone shape. The walls should be approximately 1/4″ thick.
Focus on keeping even pressure and thickness on all sides. Avoid teardrops or thick/thin spots. The opening sets the foundation for the rest of the pot.
Once in the desired cylindrical or conical form, stop pressing outwards. Use a rib tool to smooth and refine the shape and thickness. The clay is now ready for the next steps of raising the walls and forming the pot.
Raising the Walls
One of the most challenging parts of throwing clay on the wheel is raising the walls evenly while maintaining the desired thickness. After centering and opening the clay, the next step is to pull up the walls by placing your hands inside and outside the cylinder and gently exerting an upward pressure as the wheel spins. It’s crucial to apply even pressure with both hands to raise the wall vertically. Uneven pressure can cause the walls to collapse or become lopsided.
Controlling the thickness when raising walls takes practice. The natural tendency is to make the base thicker and the walls thinner as they get taller. Focus on keeping a consistent thickness by stopping frequently to measure and compress the clay. Use a ruler or calipers to check for even thickness all around. If some areas are thicker, apply pressure to condense the clay. The goal is to raise the walls slowly and methodically, compressing frequently, until the desired height is reached.
According to this tutorial, continuing the upward pulling action above the rim by 1/2 to 1 inch before compressing can help maintain an even thickness when raising walls. It takes practice and patience to develop a feel for controlling the thickness, but raising walls evenly is fundamental to successful wheel throwing.
Shaping Clay Forms
There are many different shapes that can be created when throwing clay on the wheel, such as bowls, vases, cups, plates, and more. The basic process for each is similar, starting with centering and opening the clay, then pulling up the walls. The key differences come in how the clay is shaped and refined.
For a bowl, once the walls are raised, shape the clay by pushing outward while keeping one hand inside and the other outside the form. Create curves by applying pressure with the thumbs and smooth the transitions. Refine the rim by compressing it between two fingers or a rib. A rounded lip can be made by pinching the clay [1].
For a vase, raise the walls straight up into a cylinder shape. Then use fingers or a rib to refine the outside surface. Collar the rim by pushing from the outside and hollow the neck. A foot can be formed by pushing in at the base. Add decorative elements like flutes or faceting as desired [2].
For plates, raise a short wall and shape into a disk by compressing outward. Create a foot by pushing in at the base. Refine the rim and add decorative elements to finish. For cups, raise a taller cylinder shape then shape the outside curve. Refine the lip and handle attachment area [2].
With practice and creativity, an endless variety of forms can be shaped on the wheel. Understanding the fundamentals allows potters to bring their visions to life in clay.
Trimming and Refining
Once the basic shape of the piece has been formed, the next step is trimming and refining the final shape. This involves removing any excess clay to refine the shape and smooth out the surfaces. Trimming is done using various metal loop tools, ribs, and trimming scrapers while the wheel is turning.
The goal in trimming is to maintain an even wall thickness and create crisp edges and refined details on the piece. This is done by holding the trimming tools against the spinning clay at an angle to carefully slice away excess material. It takes practice to trim just enough to get the desired shape without cutting away too much clay.
As the piece is trimmed, the potter also uses metal ribs and other smooth tools to compress the clay and smooth out the interior and exterior surfaces. Sponges can also be used to moisten and smooth the surface. The trimming and smoothing process removes any bumps, wrinkles, or uneven textures left from throwing the initial shape.
Well-trimmed pieces will have an even symmetry and thin, refined walls and lips. Sharp angled tools help trim precision into details like fluted edges or decorative lines. The end result of thoughtful trimming is a piece with clean lines and smooth surface texture ready for the drying and firing process. With practice, trimmers can create an array of elegant forms not possible simply with throwing.
Source: https://ceramicartsnetwork.org/daily/article/Tips-for-Trimming-Bowls-on-the-Pottery-Wheel
Drying and Firing
Proper drying is a crucial step before firing clay in a kiln. Clay contains water which must be slowly evaporated before firing or else the clay can crack and break apart. Slow drying allows the moisture to leave the clay evenly throughout the piece.
There are several techniques to help clay dry evenly and minimize cracking:
- Wrap clay in plastic after an initial drying period to slow moisture loss.
- Place the clay on racks, shelves or layered newspaper for airflow underneath.
- Mist the clay periodically to prevent uneven drying.
- Avoid placing clay in direct sunlight or drafts which can dry the surface too quickly.
The drying process can take anywhere from several days to several weeks depending on the size and thickness of the clay piece as well as the environment. Checking the moisture level by weighing the clay periodically can help determine when it is ready for firing. Clay is ready for firing when it no longer feels cool to the touch.
Firing clay hardens it permanently by heating it in a kiln to high temperatures. Most stoneware clays are fired to around 2,200°F – 2,300°F (1,204°C – 1,260°C) to vitrify and make them impervious to water. Firing schedules start with a slow temperature rise to allow any remaining moisture to evaporate safely. Careful monitoring of the kiln temperature is necessary to achieve the optimal results. After the final temperature is reached, the kiln is turned off and must cool slowly overnight before unloading.
Difficulty and Learning Curve
Learning to throw clay on a pottery wheel has a steep learning curve and can be quite challenging at first. It requires developing muscle memory and a feel for the clay that only comes with regular practice over an extended period of time. According to experienced potters, it can take 6 months to a year of consistent practice to gain proficiency at the wheel and be able to throw basic forms with some consistency (Source).
Some of the main challenges of learning to throw clay include:
- Centering the clay – Being able to properly center a lump of clay on the wheel head takes a lot of practice to get the feel for the right amount of pressure and movement.
- Opening up the clay – It takes skill to open up the centered clay into an even cylinder without the walls collapsing.
- Pulling up the walls – Raising the clay upward into an even, symmetrical form is one of the most difficult skills to master in throwing.
- Achieving an ideal shape – Creating precise shapes, curves, and features takes a highly trained eye and skilled hands.
- Avoiding flaws and imperfections – It’s challenging to throw a piece without flaws like uneven walls, cracks, pinch points, etc.
Gaining mastery of the pottery wheel to be able to throw advanced forms takes years of dedication. But the challenge is what makes throwing so rewarding as a craft. With regular practice and persistence through frustration, new potters will gradually improve their skills at centering, opening, raising, and shaping clay.