How Is Stoneware Clay Made?
Stoneware clay is a vitreous or semi-vitreous ceramic clay that is fired at high temperatures ranging between 1200°C and 1300°C. Stoneware is less porous than earthenware clays but can be glazed or remain unglazed. It has its origins in China and dates back thousands of years. The first stonewares produced were religious objects, roof tiles, and storage jars.
Stoneware clay is highly heat resistant and durable with low porosity, making it ideal for kitchenware and pottery meant for daily use. It does not require a glaze to be watertight but is commonly glazed to make it non-porous. The clay can be easily molded while wet and becomes very hard and durable after firing. Common colors for stoneware clay include grey, brown, and white. When fired, the clay vitrifies meaning it fuses slightly and becomes non-porous. Stoneware is less prone to thermal shock than porcelain but chips and cracks can occur if subjected to extreme temperature changes.
Due to its high durability and heat resistance, stoneware clay is commonly used to produce kitchenware such as mugs, plates, serving dishes, and even bakeware that can go directly from the freezer to hot oven. It is highly valued by potters and ceramicists for its versatility. The clay can be thrown on a potter’s wheel or handbuilt into various forms. Many artisans create decorative pottery, vases, and sculptures from stoneware clay.
Clay Composition
Stoneware clay is composed of several key ingredients that each contribute unique properties to the final product. The main ingredients are clays, feldspar, and silica.
Clays provide plasticity and ability to hold shape. There are several types of clays used in stoneware, including ball clay, fire clay, and kaolin. Ball clay is very plastic and provides strength when fired. Fire clay has a high heat tolerance. Kaolin clay provides whiteness. The specific proportions of each clay determine the final color and workability of the stoneware.
Feldspar acts as a flux, lowering the vitrification temperature of the clay so that it can fuse and become non-porous at lower kiln temperatures. Soda feldspar is often used. The amount of feldspar impacts the firing temperature and absorbency of the final product.
Silica, usually in the form of quartz, helps reduce shrinkage and adds strength to the fired stoneware. Silica particles enhance the stability of the clay body.
By carefully controlling the ratios of these mineral ingredients, potters can create stoneware optimized for their desired workability, firing temperature, color, and porosity. The percentages of each component in the clay body composition significantly impact the end product.
Mining the Clay
Clay deposits are found across the world, often in areas that were once oceans millions of years ago. The clay is extracted through surface mining or underground mining. Surface mining involves scrapping away the topsoil to expose the clay deposits underneath. Underground mining involves digging tunnels and shafts to reach deeper clay deposits.
Once extracted, the clay goes through a refining process to remove impurities. It is crushed into smaller pieces and dissolved in water. The clay particles separate from larger impurities like rocks and sand because they are lighter and remain suspended in the water. The clay-water mixture is then screened and filtered to remove remaining debris. Any organic matter is also removed through chemical treatment. The refined clay is then dried and prepared for mixing and further production.
Some impurities that need to be removed from raw clay are sand, silt, rocks, shells, organic material like roots and leaves, and iron oxide. If they are not removed, impurities can cause cracking or weak points during the firing process. They can also affect the color and texture of the final ceramic piece. The refining process results in a pure clay body ideal for producing strong stoneware.
Mixing the Clay
Properly mixing the clay is a crucial step in creating high quality stoneware. The ingredients must be precisely measured and thoroughly combined to achieve the right consistency. The amount of water added is especially important.
When mixing stoneware clay, the dry ingredients like clay, feldspar and silica are measured by weight. Digital scales should be used to ensure accurate proportions. Typically, there is 100 parts clay to 10 parts feldspar and 10 parts silica. The dry materials are poured into the mixer and blended together until uniform.
Water is then added gradually as the mixture turns. Enough water must be incorporated so the clay becomes plastic and workable. But too much water will cause issues later when throwing on the wheel or firing the ware. The ideal water content varies based on factors like clay composition and studio humidity. Often 20-25% of the dry weight is sufficient. The mixture should form a smooth, cohesive clay body free of lumps.
Achieving the proper consistency takes experience. But using precise measurements and adding the water slowly helps ensure the clay is uniformly mixed for quality stoneware production.
Kneading the Clay
Kneading is a crucial step in preparing stoneware clay. It helps achieve an even moisture content and removes air pockets that can cause cracking or explosions during firing. The process involves pressing, squeezing, and folding the clay repeatedly.
Start by cutting the clay into fist-sized chunks. Drop each chunk forcefully onto your work surface to help expel trapped air. Using the palms of your hands, press down firmly on the clay and push it away from you. Then use your fingers to fold the clay back over itself. Rotate the clay 45-90 degrees and repeat the process. The clay should feel smooth, flexible, and unified after 5-10 minutes of kneading.
Check for dryness by squeezing the clay in your fist. If it’s too wet, the clay will feel sticky. You can knead in some dry clay or a porcelain absorbent to soak up moisture. If it’s too dry, the clay won’t form into a ball. Just add small amounts of water and knead it in until the right consistency is achieved.
The technique of wedging is also used in conjunction with kneading. It involves cutting the clay into quarters, stacking them, then pushing them down and reforming into a loaf shape. Wedging removes air bubbles and aligns the clay particles lengthwise, improving its workability.
With practice, you’ll learn to gauge the perfect consistency for stoneware just by touch. The clay should be smooth, flexible, and moist but not sticky when ready for throwing or handbuilding.
De-Air the Clay
Removing air bubbles is an important step when preparing stoneware clay. Air bubbles can expand during the firing process and cause cracks or weak spots in the final piece. There are several techniques used to de-air clay:
Vacuuming the clay – Place the clay in an airtight container and use a vacuum pump to suck the air bubbles out. This is very effective at thoroughly removing air pockets.
Paddling – Repeatedly press a paddle into a lump of clay to squeeze out air bubbles. Paddling takes some physical effort but doesn’t require any special equipment.
Slamming – Firmly slam a lump of clay against a flat surface to knock out air bubbles. This takes strength and care to avoid damaging the work surface or clay.
Using a rib – Use a metal or wooden clay rib to slice through the clay and pop bubbles. Ribs provide leverage to compress clay and force out air pockets.
Whatever technique is used, de-airing should be done until no more bubbles visibly rise to the surface. Well de-aired clay results in fewer flaws and stronger finished pieces after firing.
Aging the Clay
Once the stoneware clay has been properly kneaded to remove air bubbles, many potters will let it sit for a period of time before using it. This process is known as “aging” the clay. There are a few benefits to aging stoneware clay:
First, aging allows any remaining moisture in the clay to distribute evenly throughout. This results in a more uniform moisture content, which improves the clay’s workability when throwing on the potter’s wheel. Clay that is aged is less likely to tear or slump.
Second, aging gives time for any organic material in the clay to break down further. This continues the purification process started during kneading. Aged clay fires to a lighter color and has fewer impurities.
Finally, letting the clay rest allows particles time to absorb water and expand. This develops the clay’s plasticity, enhancing its ability to bend and stretch without cracking or breaking. Plasticity is key when shaping clay into pottery.
There are differing opinions on ideal aging duration. Many potters age their stoneware clay for 24 hours up to several weeks. In general, longer aging times improve plasticity and workability. However, aging for more than a month may require re-kneading or wedging to restore an even moisture distribution.
Reclaiming Clay
When working with clay, it’s common to end up with leftover dried pieces that seem unusable. However, with a little effort clay can often be reclaimed, rehydrated, and reused. This helps reduce waste and saves money.
To reclaim clay, start by breaking up any large, dried pieces into smaller bits. Place the clay pieces in a plastic bag and mist them lightly with water. Seal the bag, squeezing out excess air. Let the clay sit for 24 hours, allowing the water to penetrate and soften the clay.
After a day, remove the clay and knead it with your hands, working the water through the clay until it regains a smooth, plastic consistency. If needed, mist additional water into stiff areas as you knead. With thorough kneading, most clay can be rehydrated and made reusable.
You can also recycle fresh clay trimmings and excess clay directly back into your current project. Keep a bag nearby when working to collect scraps, then wedge them back into the clay you are using. This maintains plasticity and minimizes waste.
With some effort, most leftover and dried clay can be rehydrated, reused, and recycled. This saves money and reduces the clay that ends up in landfills.
Throwing the Clay
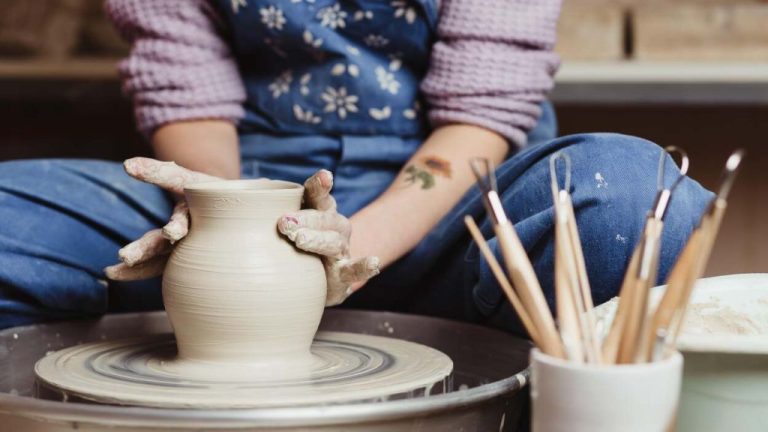
Once the stoneware clay is properly kneaded, aged and ready to use, potters employ a pottery wheel and various shaping techniques to throw clay vessels and objects. Using a pedal or electric powered pottery wheel spinning at the right speed, an experienced thrower centers a clay lump on the wheel head, then pushes and pulls against the spinning clay to shape it into an opened up vessel.
Important shaping techniques when throwing on the wheel include:
- Centering the clay – getting it perfectly centered on the wheel is crucial
- Opening up the clay – pushing out the walls vertically to create an interior space
- Lifting and shaping the walls – using fingers and specialized tools to thin the walls and refine shapes
- Trimming excess clay – removing uneven areas using a special trim tool
Using combinations of these techniques, an adept potter can throw a wide variety of vessels and objects out of stoneware clay on the wheel, including bowls, cups, vases, bottles, and more. The spinning wheel allows for symmetrical smooth shapes difficult to produce without a consistent rotating platform.
Firing the Clay
Proper kiln firing is essential for hardening stoneware clay into its finished ceramic form. Stoneware clays require very high firing temperatures, generally between about 2,200°F and 2,400°F (1,200°C and 1,300°C). These high heat levels cause the clay particles to vitrify, fusing them into a solid mass.
When loading the biscuit-fired stoneware pieces into the kiln, it’s important to place them with sufficient space between each item to allow proper air circulation. Monitor the kiln temperature carefully as it climbs to the target peak temperature. Soak the kiln at maximum heat for the required time to thoroughly fire the clay body.
Once fully matured through soaking at maximum temperature, the vitrified stoneware clay has been transformed into a dense, durable ceramic material ready for glazing and decorating prior to a final re-fire to fuse and harden the surface glazes.