How Many Coats Of Spectrum Glaze?
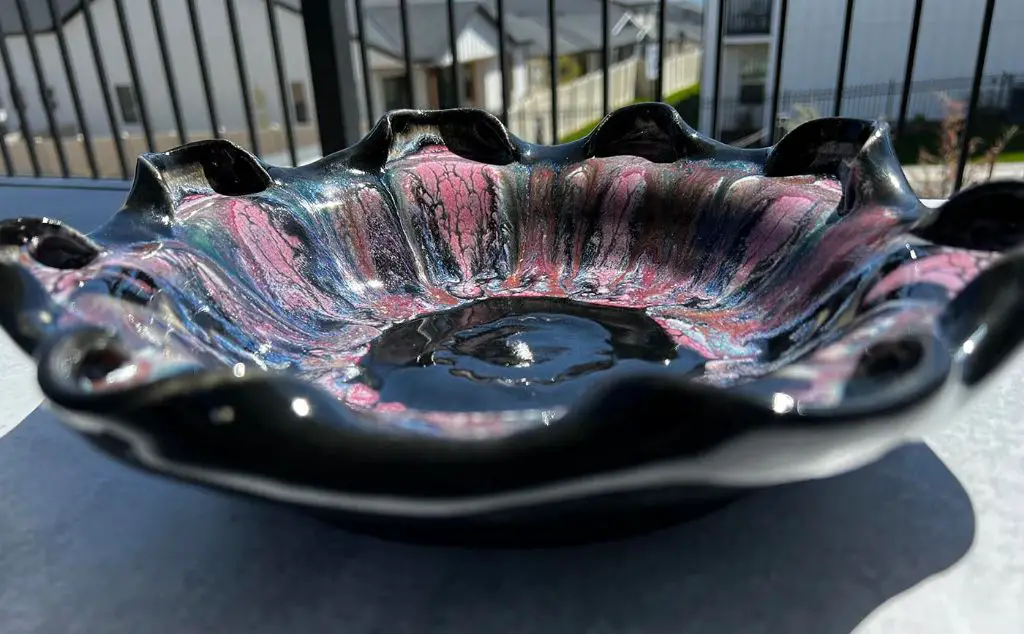
Spectrum glazes are a line of specialty glazes from Spectrum Paint aimed at crafts people and artists. They are most commonly used by ceramicists and potters as decorative and protective surface finishes for ceramics made from terra cotta or stoneware clays. Spectrum glazes come in a wide variety of colors and textures that give the finished pieces a glass-like coating after firing. The glazes can bring out vibrant colors, metallic shimmers, satin lusters and more to clay art.
Spectrum glazes are typically applied in multiple coats to prevent defects and make sure the glaze properly protects and decorates the ceramic.
Factors That Determine Coats Needed
The number of coats of glaze needed depends on several factors:
Type of surface – Porous surfaces like unglazed bisqueware tend to absorb more glaze so require more coats. Smooth glazed surfaces require fewer coats.
Porosity – Highly porous clays absorb glaze so need more coats. Less porous clays and stones need fewer coats. Test porosity with a drop of water.
Desired look – Certain techniques like crawling require thicker application so additional coats. Very smooth surfaces are achieved with multiple thin coats.
Type of glaze – More viscous glazes often require fewer coats for opacity. Runny glazes may need more coats for full coverage.
Firing method – Higher temperatures can thin glazes so more coats may be needed. Cooler firings preserve thickness so require fewer coats.
Personal preference – The artist determines the right amount for the desired effect. Test tiles establish ideal coats for a look.
Following the manufacturer’s recommendations for minimum/maximum coats ensures proper glaze fit and appearance after firing.
The surface material, porosity, glaze properties, firing method and artistic intent all factor into the optimal number of coats for a piece.[1]
Recommended Number of Coats
The recommended number of glaze coats for most pottery pieces is typically 2-3 coats [1]. This allows the glaze to fully cover the piece while building up an even layer that gives the desired look andprotection.

Most glaze bottles and manufacturers suggest using 2-3 thin coats rather than 1 thick coat[1]. Applying multiple thin coats prevents dripping, running, and uneven coverage that can happen with a single heavy coat.
For most bisque pieces, 2 coats is usuallysufficient to provide good coverage. However, pieces with heavy sculpting,carving, or texture may need 3 coats to fully coverthe contours [2].
Underglazes, used underneath a clear glaze, generally require 2-3 coats for full, rich color[3]. The number of top coats of clear glaze is more flexiblebased on the desired glossiness.
So in summary, for most glazing situations, 2-3 thin coats isrecommended for even coverage and protection.
Applying the First Coat
When applying the first coat of Spectrum glaze, it’s important to use proper technique for optimal results. According to Ceramic Arts Network, the most common methods for applying glaze are dipping, pouring, brushing, spraying, splattering, stippling, and sponging [1]. For the first coat, either dipping or pouring tend to provide the most even, consistent coverage.
If dipping, fully submerge the piece in the glaze bucket and lift straight up for a smooth coat. Allow excess glaze to drip back into the bucket before turning the piece to coat all sides. If pouring, slowly pour glaze over the entire piece, turning to coat evenly. Use a soft brush to spread glaze and fill in any thin spots or bare areas. The goal is to achieve a consistent first coat without any bare clay showing. Apply enough glaze to fully saturate the clay surface.
Avoid over-brushing or stippling on the first coat, as this can pull glaze away and create an uneven texture. Be patient and allow time for the glaze to level out. The first coat provides the foundation or background layer, so uniform saturation is key.
Deciding If Another Coat is Needed
After the first coat of Spectrum Glaze dries, inspect the surface to determine if a second coat is required. According to the technical data sheet from Famowood, there are a few signs to look for that indicate a second coat may be needed:
- If the paintbrush strokes are visible, this is a sign that the coating is too thin and an additional coat is needed for proper coverage and an even look.
- If there are thin spots or inconsistencies in the finish, a second coat will help even out the coating.
- If the desired glossy wet-look finish has not been achieved, applying a second coat after the first has fully cured will help build up the gloss.
- Darker colors often require two coats for proper coverage and an opaque finish. If using a dark glaze color and the first coat seems translucent, a second coat is recommended.
According to tips from ceramic artists, inspect the piece at different angles and lighting after the first coat has dried. This will help reveal any thin spots or brush strokes that indicate a second coat is needed for full coverage and an evenly smooth finish.1
Applying Additional Coats
When applying additional coats of Spectrum Glazes, it’s important to use proper technique to achieve the desired results. According to the Stroke & Coat product guide, you should wait 4-5 hours before applying a second coat, and 24 hours before applying a third coat (Mayco). This allows each coat to dry properly before adding the next layer of glaze.
Be sure to stir or shake the glaze well before each application. Use broad, even strokes and avoid overbrushing, which can create an uneven finish. Apply the glaze liberally to ensure complete coverage. Spectrum glazes are highly pigmented, so 2-3 coats are often sufficient to achieve brilliant colors and effects. More thinly applied coats may result in a washed out or inconsistent appearance.
Some artists recommend waiting at least 24 hours between coats, regardless of how many you apply, to allow the glaze to fully dry and bond with the clay surface (Ceramic Arts Daily). This helps prevent bubbling, cracking, or peeling. Be patient and allow ample drying time when building up multiple layers of glaze.
Achieving Desired Look
When applying glaze, the thickness and number of coats will determine the final look. For lighter coverage, use thinner layers and fewer coats. To get a heavier look, apply thicker coats of glaze and use more layers. According to Big Ceramic Store, heavy float glazes are designed to create a full, thick coverage by floating excess material that will even crack on the surface for an artistic effect.
To achieve a light look, dip only the lower half of pieces into the glaze or use a soft brush to lightly apply glaze. Allow glaze to drip off rather than saturate the piece. For heavy coverage, fully immerse pieces into the bucket and move glaze over entire surface. Use a painting motion to brush on thicker layers. Let layers dry between coats.
The number of coats needed will depend on the glaze, your technique, and the desired result. Do test tiles with layering to determine how many coats your glaze needs. As noted by Cone6Pots, heavy glazing can substantially increase the weight of thinner pieces.
Drying and Curing
Glaze needs time to dry and cure before firing. Drying refers to the glaze becoming dry to the touch on the surface. Curing refers to the glaze hardening throughout its entire thickness. Drying times are generally faster than cure times.
According to Potter’s Passion, glaze is often touch-dry within a few hours but full curing can take 24 hours or more. Drying happens quickly because water evaporates from the surface. Curing takes longer because water must evaporate throughout the entire glaze layer.
Allowing enough cure time is important so the glaze does not crack or peel during firing. Rushing the cure may also lead to pinholes or orange peel texture. Be patient and allow the recommended cure time before firing glazed pieces.
Maintenance
To keep Spectrum Glaze looking its best, follow these maintenance tips:
Wash the glazed surface with a mild detergent and warm water using a soft cloth or sponge. Avoid abrasive cleaners or scouring pads as they can scratch the finish. Rinse thoroughly after washing.
For hard water deposits, use a 50/50 solution of white vinegar and water. Wipe on with a soft cloth and rinse.
Use a high quality car wax or ceramic cooktop polish occasionally to enhance the luster and provide added protection.
Take care not to let any metal objects come in contact with the finish as they can leave marks. Remove any spills promptly to prevent staining.
Avoid exposing the glaze to very high temperatures or direct flame as this can cause crazing.
With proper care, Spectrum Glaze can retain its beautiful glossy appearance for many years. Follow these tips to keep it looking like new.
Summary
Spectrum glazes produce beautiful finishes on ceramic and porcelain surfaces. The number of coats needed depends on the look you want to achieve. For full coverage, 2-3 coats are usually required. Apply the first coat evenly according to the manufacturer’s instructions. Allow it to dry fully before inspecting to see if another coat is necessary. Apply additional thin coats until you’ve reached your desired look. Allow the final coat to cure completely. Then you can enjoy your beautifully glazed surface for years to come. With proper care and maintenance, spectrum glazes will continue looking vibrant.


