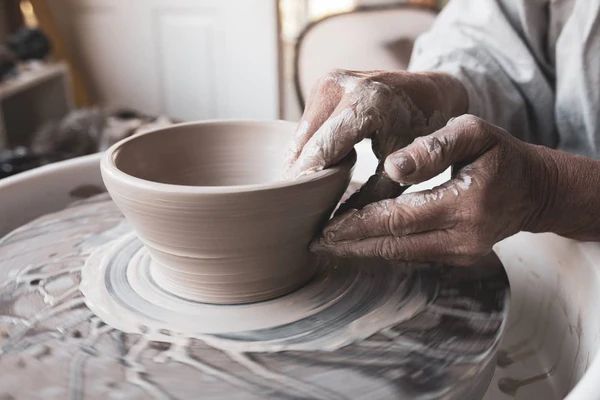
How Much Clay Is Good For Throwing A Cup?
Throwing cups on a pottery wheel is a popular craft that takes some skill to master. One of the most important factors when throwing a cup is determining the right amount of clay to use. Using the proper amount of clay is crucial for successfully shaping the cup and achieving your desired results.
The amount of clay needed depends on several variables. These include the size of the cup, the thickness of the walls, the type of clay used, the potter’s skill level, and the intended firing temperature. Finding the ideal clay weight helps ensure the cup will hold its shape both when throwing and once fired. It also allows the cup to be lifted off the wheel bat without deforming.
Clay Weight Considerations
The weight of the clay is an important factor that impacts the throwing process when making cups on the pottery wheel. Generally speaking, lighter clay weights are easier for beginner potters to center and throw successfully. However, lightweight clay results in more delicate and fragile finished products. Heavier clay weights are more challenging to center and throw cleanly, especially for those without extensive wheel throwing experience. The benefit is that heavier clay produces study, durable final pieces that hold up well to daily use.
Lighter clay requires less force and effort to center into a ball and raise up into a cylinder on the wheel. Additionally, lighter clay is more forgiving during the throwing process – it’s easier to make alterations and adjustments to the forming cup shape without the clay becoming too wet or collapsing. However, very lightweight clay lacks sturdiness and strength once fired, making the finished cups and vessels prone to chipping, cracking, or breaking under pressure and repeated use.
On the flip side, heavier clay requires more force and effort to center and throw upwards from the wheel head. Heavier clay can be more frustrating to work with for beginners as it’s less forgiving – too much pressure or moisture causes it to slump or collapse when throwing. The benefit of heavier clay is that it holds its shape well and produces strong, sturdy finished pieces that are durable and withstand repeated use. The extra density from heavier clay gives fired objects increased stability and resilience against chipping, cracking, or fracturing over time.
Standard Clay Weights
When throwing a standard sized ceramic cup on the pottery wheel, most potters will use a clay chunk weighing between 1-3 lbs. This provides enough clay to throw a properly sized vessel with room for pulling up the walls, while not being an excessive amount that becomes unwieldy or difficult to center on the wheel.
A common starting weight is around 1.5 lbs or 24-28 ounces of clay. This allows throwing a cup approximately 3-4 inches tall with a 3-4 inch diameter. Skilled potters able to center and work quickly may opt for 2-3 lbs as their standard. Ultimately the exact weight depends on factors like the desired size and thickness of the finished piece.
For a typical mug shape, 2 lbs or 32 ounces is a medium default weight for many wheel throwing potters. This amount of clay allows crafting a sturdy everyday vessel in the 10-12 ounce capacity range. Less clay may result in overly thin walls, while more clay provides extra material for pulling the walls up higher.
Less Clay for Beginners
Beginners should start with less clay, around 1-2 lbs, when first learning to throw pots on the wheel. Using a smaller amount prevents frustration from attempting to center and shape larger weights before developing fundamental skills. It allows beginners to focus on properly learning essential techniques like centering the clay on the wheel and shaping the basic form without being overwhelmed by controlling a large lump of clay. Starting with a manageable amount enables steadily building competency and confidence in using the wheel before moving on to larger pieces.
With less clay, beginners can become comfortable with the entire process from centering to opening up the form and establishing an even wall thickness. They can practice creating a simple shape like a cylinder or bowl without struggling to control a heavy chunk of clay wobbling off-center on the wheel. Less experienced throwers may not have the strength or muscle memory yet to properly shape and thin the walls of a larger mass. Beginning with 1-2 lbs allows for gradually working up to larger weights as their skills improve over time. It sets new potters up for success rather than frustration.
More Clay for Experienced Potters
Once a potter has developed their centering skills on the wheel and gained more throwing experience, they may opt to use up to 3-5 lbs of clay to throw a single cup. The benefit of using more clay is that it allows creating larger, more intricate cup shapes and details. Experienced potters can shape a wide angled cup with a sturdy handle, or add decorative ridges, swirls and carvings into the sides that would be difficult with less clay.
However, working with 3-5 lbs of clay requires greater centering strength and wheel control. Novice potters may find this amount unwieldy and difficult to center properly. The added weight makes the clay more resistant to lifting and shaping. Only once a potter has developed the necessary wrist and arm strength through regular throwing practice can they effectively handle and shape larger amounts of clay. Patience and persistence while building skill at the wheel will allow potters to eventually work with more clay and unlock new creative possibilities when throwing cups and other vessels.
Clay Moisture Content
The amount of moisture in clay significantly impacts the weight and workability when throwing on the potter’s wheel. Wetter clay contains more water, so it will be heavier than drier clay at the same volume. However, clay that is too wet can be sticky and difficult to center and shape properly.
Ideally, clay used for throwing should have a moisture content between 11-13%. At this moisture level, the clay will be plastic enough to easily center and form, but not so wet that it becomes floppy or prone to slumping. The clay shouldn’t feel sticky, and you shouldn’t see any free water appearing on the surface.
Testing the moisture content is easy – take a small lump of clay and form it into a ball. Then press your thumb into the center, about 1/2 inch deep. If the thumbprint slowly fills in without collapsing, the moisture level is ideal for throwing. If the thumbprint fills very quickly or slowly, adjust the moisture before throwing by letting the clay dry out or adding some water.
Firing Considerations
The weight of clay used for throwing cups can impact the success rate when firing them. Lighter cups made with less clay may be more prone to warping or cracking during the firing process. This is because thinner walls have less structural integrity and are more vulnerable to stresses from heat exposure. Heavier cups made with more clay are generally more stable in the kiln.
When firing lighter cups, it helps to fire them a little more slowly, particularly during the initial temperature rise. Going too fast can cause quick expansion or contraction in the thinner walls, resulting in cracks. A slower bisque firing is recommended, with a gentler temperature climb at the start. For glaze firing, a slightly slower ramp up and longer holds at critical points can also help prevent issues.
Heavier cups with thicker walls can usually handle a normal firing schedule with no adjustments needed. The extra clay gives them durability to withstand the heat fluctuations during ramp up. A faster firing may also be acceptable, as long as the glaze can mature properly at the faster rate.
Testing out different firing schedules and making small adjustments can help determine the best approach for lighter vs heavier cups made with different amounts of clay. The key is controlling the heat exposure to avoid too much stress on the thinner pieces.
Achieving Desired Results
The amount of clay you use when throwing a cup can have a big impact on the final product. Here are some strategies for using clay weight to achieve specific cup properties:
For thicker cup walls, use more clay. The extra clay will make the walls sturdier and more durable. Thicker walls are great for large mugs and travel cups.
For thinner, more delicate cup walls, use less clay. This allows you to make smaller cups like espresso cups. The walls will be more prone to breaking, so reserve thin-walled cups for display purposes.
If you want to throw a taller cup, start with more clay. The extra clay will give you enough material to pull the walls up higher. Don’t go too tall too quickly though – tall narrow cups are prone to collapsing.
For shorter squatter cups, begin with less clay. The clay will run out before you can pull the walls too high, keeping the overall form compact.
To throw a wider cup, mound the ball of clay up taller before opening it. More clay in the initial ball means you’ll have enough material to stretch the cup walls out wider.
For a narrower cup, begin with a short base clay ball. Limiting the clay will naturally make the cup shape elongate as you pull up the walls.
In the end, the amount of clay is a creative tool for achieving your desired cup proportions. Don’t be afraid to experiment with different weights as you gain pottery experience.
Weight Recommendations
For beginning potters just starting out, it’s often best to use less clay overall while you develop your skills. Aim for 1-2 lbs of clay for simpler projects like basic mugs, bowls, or vases. This allows you to get a feel for how the clay moves without becoming too large or unwieldy.
Intermediate potters who have more experience can comfortably work with 2-3 lbs or more of clay on average. This provides enough clay for most common functional pieces like plates, teapots, or decorative jars while still being very manageable on the wheel.
Advanced potters with mastery of the wheel can use 3-5 lbs or even more clay for very large pieces. But be aware that excess weight requires greater centering skills and control. Heavier pieces also take longer to dry and fire evenly.
In general, let the size and style of your project determine the appropriate clay weight. Small, thin-walled pieces require less clay than thick, robust forms. Sculptural or non-functional artworks may use more clay for aesthetic reasons. Allow extra clay if you intend to trim excess material after the initial throwing.
Also consider the clay’s plasticity and water content, as sticky or wet clays can feel heavier on the wheel. Test different weights to find the ideal balance for your current skill level and each particular piece.
Conclusion
When determining how much clay is good for throwing a cup, it’s important to consider several factors like your skill level, the clay’s moisture content, and your desired results after firing. For beginners, less clay is recommended so the cup is lighter and easier to shape. More experienced potters may opt for more clay, which allows thinner walls and finer detailing. The ideal clay weight can vary based on the size of the cup and other preferences.
This article covered key considerations when deciding how much clay to use when throwing cups on the potter’s wheel. The moisture level of the clay, your personal skill level and preferences, the size of the cup, and firing outcomes all play a role. With some experimentation, you can determine the right clay weight for your projects. The joy of pottery is that you can continually refine your approach. Don’t be afraid to try different amounts of clay as you develop your skills at the wheel.
Hopefully this gives you a helpful starting point as you begin throwing your own cups. Have fun with the process and let the finished pieces be your guide. With practice, you’ll discover the clay weights that work best for your goals and abilities.