How Much Clay Should I Use For A Mug?
The goal of this article is to provide guidance on how much clay is needed to make a mug. Mugs are a common project for beginning and experienced ceramic artists alike. Determining the right amount of clay to use can be tricky, as mugs come in many sizes and clay shrinks during the firing process. Having too much or too little clay can lead to a misshapen or unusable mug. This article will walk through typical mug dimensions, clay density and weight, expected shrinkage, and tips on how to calculate the clay needed for a successful mug.
Typical Mug Dimensions
Mugs come in a variety of shapes and sizes, but most standard mugs have some common dimensions:
- Height: 3-4 inches
- Width (diameter): 3-4 inches
- Handle size: Around 1.5 inches wide and 2-3 inches long
- Bottom width: 2-3 inches (slightly smaller than top diameter)
- Wall thickness: 1/4 – 1/2 inch
- Volume/capacity: Usually 8-12 oz of liquid
Large mugs may be up to 6 inches tall and hold 16-20 oz. Small teacup or espresso mug sizes are around 2-3 inches tall and 6 oz capacity.
The mug should feel comfortable and balanced when held by the handle. Larger mugs tend to have thicker walls and wider handles for stability.
Clay Amount Needed for Different Mug Sizes
The amount of clay needed to make a mug depends on the size and shape of the mug you want to create.
For a small mug that is around 4 inches tall and 3 inches wide, you will need around 1/2 pound of clay.
For a medium sized mug around 5-6 inches tall and 3-4 inches wide, use around 3/4 to 1 pound of clay.
For a large mug like a travel mug that is 6-8 inches tall and 4-5 inches wide, you will need 1 to 1 1/2 pounds of clay.
These are general estimates for basic cylinder-shaped mugs. The more intricate the mug design and the thicker you want the walls, the more clay you will need.
Remember that clay shrinks during the drying and firing process – typically about 10-15%. So the finished mug will be slightly smaller than your initial clay form.
Clay Density and Weight
The density and weight of clay is an important factor in determining how much clay you need for a mug. Clay comes in different weights measured by the pound. A pound of clay contains a certain volume, but denser clays will be heavier and more compact per pound compared to less dense clays.
For example, a pound of dense stoneware clay will contain less volume than a pound of porous earthenware clay. This means you may need 2 pounds of porous earthenware clay to achieve the same volume as 1 pound of dense stoneware clay.
In general, denser clays that are heavier per pound will require less clay by weight but not necessarily by volume. The density impacts the weight of clay you need, but the volume of clay ultimately depends on the size of the mug you are making.
Knowing the density and typical weight of the clay type is helpful, but the key is calculating the volume of clay needed based on the mug dimensions. Denser clays occupy less volume per pound but require about the same volume as less dense clays to form a mug of the same size.
Clay Shrinkage
Clay shrinks when it is fired in the kiln. This is an important consideration when deciding how much clay to start with for a mug or other ceramic piece. As the clay dries, some shrinkage occurs as the water evaporates. However, the real shrinkage happens during the firing process. The high heat causes the clay particles to draw closer together and bond chemically, resulting in a denser, less porous material. This reduction in volume and size is known as firing shrinkage.
Firing shrinkage for stoneware clays typically ranges from 8-12%, though it can vary based on factors like clay chemistry and firing temperature. For example, a mug that measures 4 inches tall when made with wet clay, might only be 3.5 inches after glaze firing. This shrinkage must be accounted for when designing and forming the original piece.
To compensate for firing shrinkage when making a mug, it is recommended to make the form 10-15% larger in overall size. So if desiring a 4 inch tall finished mug, starting with 4.5-4.6 inches of wet clay will help achieve the desired size after firing. Scale up width and depth as well. While shrinkage ratios can be estimated, testing different clays provides more accurate results. Create sample tiles with the clay and note size changes through drying and firing to dial in the perfect clay amount.
Clay Recycling and Reuse
As a potter, you’ll likely end up with a lot of leftover clay scraps from your projects. Instead of throwing them away, consider saving and reusing them. This is a great way to reduce clay waste and save money on materials.
There are a few ways to recycle clay scraps:
- Rewedge and reuse – Take your dry scraps, soak them in water, and knead them together into a reclaimed lump of clay. This reclaimed clay can then be used for new projects.
- Slip and score – Make slip from your clay scraps by mixing them with water in a blender. Use this homemade slip to join fresh clay pieces together.
- Make clay buttons – Roll tiny balls from your scraps and use them as decorative buttons on future projects.
- Mix into new clay – You can also break down old clay pieces, mix them with new clay, and wedge them together.
With a little creativity, you can find uses for most of your leftover clay bits. Just be sure to keep different clay bodies separate and avoid mixing clays that require different firing temperatures. Reusing clay is an easy way to reduce waste and make the most of your materials.
Clay Specifics
The type of clay used will impact how much clay is needed to make a mug. Some key factors to consider:
Clay Body Composition – Clay bodies contain clay and other additives called grog. Grog refers to non-plastic materials like sand or crushed fired clay that help strengthen the finished piece. More grog content means less actual clay content, so you may need a bit more clay if using a heavily grogged body.
Clay Type – Porcelain clays tend to be denser and less porous than stoneware or earthenware clays. Porcelain will require a bit less clay due to its density and low shrinkage rate.
Grog Size – Larger grog particles take up more volume in the clay body, reducing the amount of clay needed. Smaller grog particles allow more clay to be packed in. Standard grog sizes are 20 mesh, 16 mesh, 10 mesh, and 6 mesh from small to large.
Test out a few mugs with the specific clay you plan to use to find the ideal amount that allows proper shaping and avoids excess waste. The clay specifics can fine tune how much you need within the general mug size guidelines.
Creating Clay Slabs
One of the most common handbuilding techniques for making ceramic mugs is using clay slabs. Here are some tips for rolling out high quality clay slabs:
Start by wedging your clay thoroughly to remove any air bubbles. Form the clay into a ball or thick pancake shape.
Use a rolling pin to flatten the clay, applying even pressure as you roll. Roll in different directions to keep the slab thickness uniform.
Lightly dust the clay and rolling surface with slip or water if it starts to stick. Don’t use too much or the clay can become too wet.
Roll the clay to the desired thickness, typically 1/4″ or thicker for mug slabs. Thinner slabs can be stacked for thicker walls.
Smooth any cracks or seams by gently pressing them together or adding slip. Allow the slab to firm up slightly before handling.
Cut the slab using a wire tool or needle tool. Trim to the dimensions needed for your mug walls and base.
Let the freshly cut slabs sit for 10-20 minutes before constructing the mug shape to avoid warping.
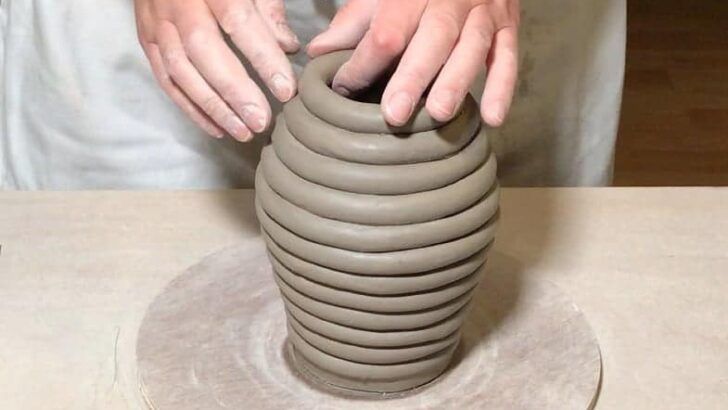
Score and slip the slab edges when joining pieces. Use coils, slabs and clay scraps to create desired shapes and details.
Clay Throwing Tips
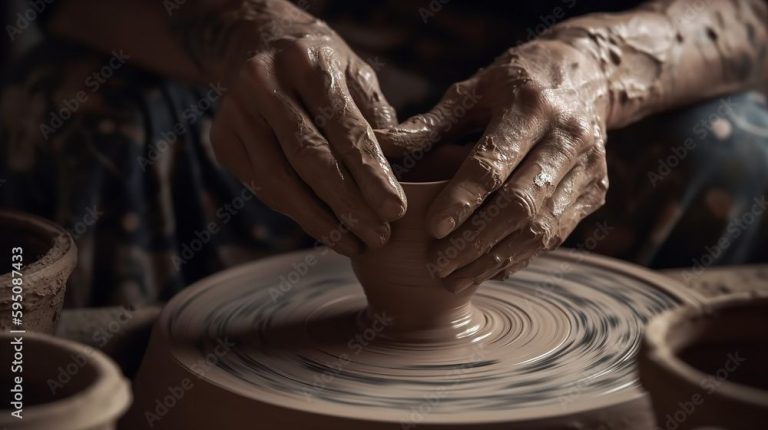
Throwing clay on the pottery wheel requires practice and skill. Here are some tips for centering enough clay when throwing a mug on the wheel:
- Start with around 1.5-2 lbs of clay for an average sized mug. This will provide enough clay to create thicker mug walls.
- Wedge the clay thoroughly before throwing to remove air pockets. Knead the clay until it is uniform in consistency.
- Shape the clay into a ball and center it on the wheel by applying even pressure. Avoid using too much water which can cause the clay to become slippery.
- Open up the ball of clay by pushing your thumbs into the center while allowing the walls to rise up evenly. Form a cylinder roughly the size of the mug interior.
- Use your fingers to smooth the inner and outer walls, collapsing any lumps or wrinkles. Compress the base gently as you shape it.
- Pull the walls up to your desired mug height, keeping them even. Trim excess clay using a wooden rib.
- Shape the lip by compressing the rim outward or inward for your desired style. Refine the contours with wooden tools.
Take your time at each step to center enough clay for the mug walls. Having patience as a beginner is key to creating sturdy, well-formed pieces.
Conclusion
Making mugs with the right amount of clay is crucial for success. The typical mug holds around 12 ounces of liquid and is 3-4 inches tall with a 3-4 inch diameter. For a mug this size, you’ll need around 1/2 pound of clay. Smaller mugs may only need 1/3 pound while larger mugs may need 3/4 pound or more. Keep in mind clay shrinks 12-15% from wet to fired state.
The exact clay needed depends on the density and moisture content. Aim for 1-2 lbs per cubic foot of wet clay. Let your clay dry to a workable state between wet and bone dry. Recycle all unused clay bits to reduce waste. With the right clay amount, your hand building and wheel throwing skills will be set up for success.


