How Much Does It Cost To Make Your Own Silicone Mold?
A silicone mold is a reusable mold made from silicone rubber that can be used to cast resin, concrete, chocolate, soap, candles, and various other materials. Silicone molds are popular because of silicone’s flexibility, durability, and ability to reproduce fine details. Silicone molds are commonly used for baking, cake decorating, jewelry making, prototype development, and more.
The cost of making your own silicone mold depends on several factors, including the type of silicone used, the size and complexity of the mold, and any additional mold-making supplies needed. However, with some DIY tips, making your own affordable silicone mold is very achievable.
This article will provide an overview of the silicone mold creation process, the cost factors involved, and tips to keep your mold-making budget reasonable. You’ll learn that making your own silicone molds can be a fun, creative way to produce customized products.
Silicone Mold Basics
According to 3ERP, “a silicone mold is a kind of container with a hollow cavity.” Source Essentially, silicone molds are soft and flexible forms made from silicone that can be used repeatedly to cast resin, plastic, metal, concrete, and more into a specific shape. The liquid material gets poured into the cavity of the mold and allowed to cure before removing the newly formed shape.
There are a few different types of silicone molds. Block molds are made from a solid block of silicone and have a cavity on one side. Shell molds have a hollow cavity and thin outer walls. Two-part molds use two silicone components that fit together to form the complete mold shape. According to Kevin, “Silicone molding technology refers to using the original sample to make a silicone and then forming model by vacuum forming.” Source
Silicone has many advantages over other mold materials like latex, resin, or metal. Silicone molds are flexible for easy release of castings, durable for repeated use, heat resistant, and provide very detailed molding reproduction. They also don’t require a release agent between pours like other molds. The main downside is the higher cost compared to materials like latex or resin.
Silicone Mold Uses
Silicone molds are versatile tools that can be used for a wide variety of applications, both in professional and hobby settings. Here are some of the most popular uses of silicone molds:
Cooking and baking: One of the most common uses of silicone molds is for baking and dessert making. Silicone is heat resistant up to about 500°F, making it ideal for baking applications. Molds allow you to create custom shaped treats like cake pops, chocolates, cookies, and detailed ice cubes or gelatins. Sources: https://www.pinterest.com/pin/867928159407626974/, https://www.pinterest.com/sheri215/silicone-mold-uses/
Resin casting and jewelry making: Silicone molds are commonly used to cast resin elements for jewelry, keychains, and other decorative accessories. The flexibility of the silicone allows for easy release of cured resin pieces. Intricate and reproducible jewelry pieces can be achieved with silicone molds.
Special effects and prop making: Silicone is valued in special effects production for its ability to accurately reproduce details from a sculpt or object. This makes it ideal for creating skin textures, wound effects, masks, and other theatrical props. Silicone molds can be used to repeatedly cast pieces in foam latex, gelatin, resin, and other materials.
Concrete casting: Concrete crafting has grown in popularity for home décor objects. Silicone molds can be used to give concrete a custom shape such as garden pavers, bowls, and wall art. The flexibility ensures easy release after the concrete has cured.
Silicone Mold Cost Factors
There are several key factors that determine the total cost of making your own silicone mold:
The size and complexity of the mold design significantly impacts the cost. According to JCAD, more complex molds with multiple parts or cavities can range from $500 to $5000+, whereas simpler single cavity molds may start around $500. The bigger the finished mold size, the more silicone material is required.
The type of silicone used also affects the price. Platinum-cure silicone tends to cost 2-3 times more than tin-cure silicone, but provides better heat resistance and durability. Standard tin-cure silicone starts around $60 per gallon, while platinum versions are $150-200 per gallon according to Michelle Marques.
The production quantity influences cost. If making hundreds of castings, a higher quality and more durable silicone will save money in the long run. But for short runs, an inexpensive silicone may suffice. Molds intended for mass production versus prototypes have very different cost considerations.
Silicone Types and Prices
When selecting silicone for mold making, you’ll typically encounter two main types: platinum silicone and tin silicone. Here’s how they compare:
Platinum Silicone
– More expensive, costing $60-100 per gallon
– Food-grade and non-toxic
– Higher heat resistance up to 500°F
– Less prone to inhibiting and longer library life
– Slower curing time, around 16-24 hours
Tin Silicone
– Less expensive at $20-50 per gallon
– Mainly industrial use, not food-grade
– Lower max heat tolerance around 390°F
– Faster cure time of 6-12 hours
– Prone to inhibiting and shorter library life
For food-grade molds that can withstand baking temps, platinum silicone is the best choice but comes at a higher price point. Industrial tin silicone is cheaper but cannot be used for edible casting purposes.
Creating the Mold
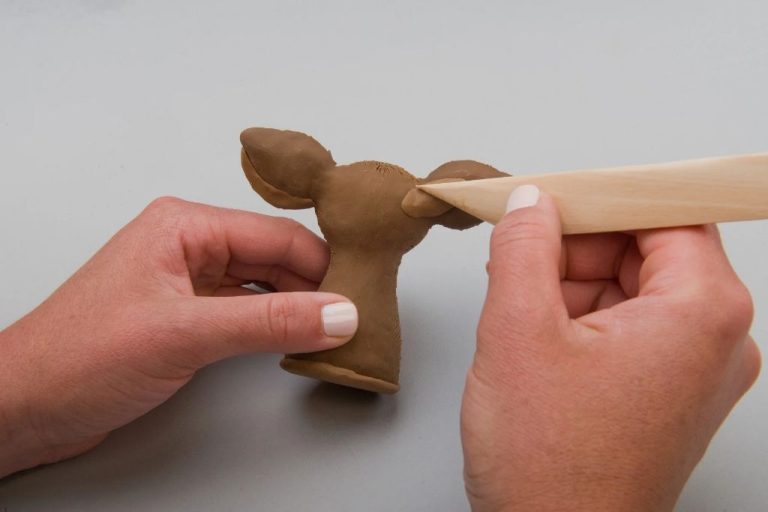
The first step in creating a silicone mold is to make a prototype of the object you want to mold. This can be done by sculpting the object out of clay, carving it out of wax or wood, 3D printing it, or using an existing object. The prototype serves as the positive that will be used to make the negative silicone mold.
Next, you need to build a mold box or container around your prototype. This box needs to be watertight and made of a non-porous material like plastic, glass, or metal. Smooth surfaces work best. The box should be slightly bigger than the prototype, providing at least 1 inch of space on all sides for the silicone to fill in. Mold release spray can be used to prevent the silicone from sticking to the mold box.
Once the mold box is ready, mix up a batch of silicone according to the manufacturer’s instructions. Liquid silicones typically involve mixing a catalyst with a base compound. Thoroughly stir the silicone to activate the catalyst and remove any air bubbles. This degassing process ensures there will be minimal bubbles in the final mold.
Slowly pour the liquid silicone into the mold box, starting in one corner and working to the other side. Gentle tapping can help remove air bubbles. Allow the silicone to cure fully, which can take 16-48 hours. Then carefully remove the mold box and prototype, revealing the finished silicone mold.
Reducing Silicone Mold Costs
There are a few ways to save money on silicone for molds without sacrificing quality:
Make Smaller, Simpler Molds
One of the biggest drivers of silicone cost is the size and complexity of your mold. Making molds as small and simple as possible will significantly reduce the amount of silicone you need to buy. Focus on only molding the essential details and avoid large surface areas.
Use an Affordable Silicone Type
Opt for more affordable silicone varieties like Smooth-On’s Oomoo or Ecoflex series. They have a lower cost per pound but still offer flexibility and decent tear strength for basic molds.
Buy Silicone in Bulk
Purchasing silicone by the gallon or 5-gallon bucket rather than quarts or liters can drastically reduce costs per ounce. This is especially true for platinum-cure silicones. Check manufacturer deals for bulk discounts.
# Additional Mold Making Supplies
In addition to the silicone itself, there are some other supplies needed to successfully make a silicone mold. Here are some of the most essential:
Release Agents
Release agents are applied to the model before pouring silicone over it. This prevents the cured silicone from sticking to the original model, allowing for easy release after curing. Common release agents include petroleum jelly, PVA solutions, and specialized commercial release agents like Mann Ease Release products (https://www.smooth-on.com/products/ease-release-200/).
Mixing Containers and Utensils
You’ll need containers and utensils to properly measure, mix, and pour the silicone. Plastic cups, mixing sticks, and measuring containers work well and are inexpensive. Make sure not to use containers that will interact with the silicone chemicals.
Pigments and Dyes
Adding pigments or dyes is an easy way to color your silicone mold material. This allows for visual quality control when pouring layers. It also produces colored casts from the mold. Smooth-On makes a wide variety of Silc Pig brand pigments specifically for coloring platinum cure silicones.
Analyzing Your Mold Cost
When calculating how much a DIY silicone mold will cost, it’s important to factor in how much silicone material you’ll actually need for your particular project. The amount of silicone required will depend on the size and depth of the mold cavity. To get an accurate estimate, first determine the volume of the cavity in cubic inches, then convert this into fluid ounces based on the silicone manufacturer’s specifications (typically 27-30 cubic inches per fluid ounce). This will tell you how many ounces or gallons of silicone you need to purchase (source).
In addition to the silicone itself, budget for mold-making supplies like spray release agents, mixing containers and stir sticks. Caulk guns, scale and safety gear like gloves and respirators also add to costs. On average, supplies may range from $50-150 depending on what you need. Compare the total DIY cost to quotes from professional mold making shops to determine if outsourcing is more cost effective for your project’s scale and complexity (source). Analyzing all cost factors will give you a realistic sense of the investment required to make your own high quality, reusable silicone mold.
Conclusion
Creating your own silicone molds can be an affordable DIY project with the right planning and techniques. The main factors that affect the cost are the amount of silicone needed, the type of silicone used, having proper mold making supplies, and minimizing waste.
Some tips to save money on your homemade silicone molds include: making molds in simple shapes, keeping molds shallow, using household items as mold frames, and buying silicone in bulk. Reusing scrap silicone can also reduce costs for future molds.
While buying premade molds is easier, creating your own has many advantages. You can customize molds to your exact specifications and projects. Unique molds let you make one-of-a-kind items not available elsewhere. And you’ll gain the creative satisfaction of designing and producing your own silicone molds.