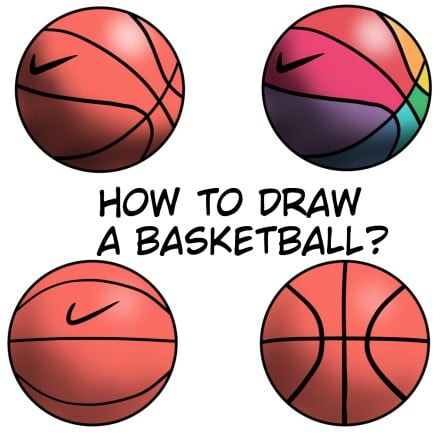
How To Draw A Basketball: Easy Step By Step Tutorial For Kids
If you’re eager to learn how to draw a basketball, you’ve landed in the right spot! With its massive global following – ranking as the 7th most popular sport worldwide and the 2nd most popular in America – it’s no surprise that many enthusiasts share your passion. However, do you also possess the skills to put pencil to paper and bring this iconic ball to life? A circle is an obvious starting point, but there’s more to drawing a basketball than just tracing its shape.
Materials
To get started with today’s creative endeavor, gather the following essentials:
A pencil
An eraser
Some paper
Optional, but encouraged for added flair: markers, paint, or colored pencils for coloring your masterpiece.
How to draw a basketball
Step 1: draw a circle

To create a precise circle, begin by sketching a rough outline. What seems like a straightforward task quickly becomes challenging as the nuances of drawing a perfect circle become apparent. To ensure accuracy, start by lightly tracing lines that you can easily erase if needed. Alternatively, use a cup or another rounded object as a guide to achieve a more accurate shape.
Step 2: draw a line vertically across
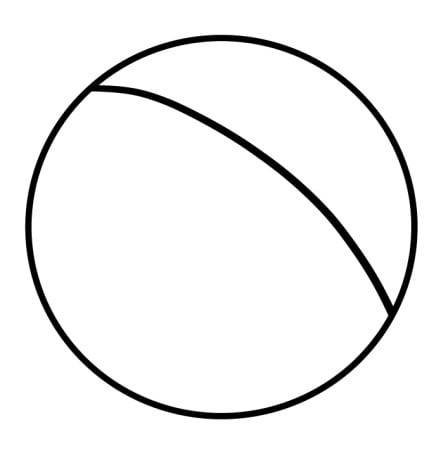
What sets basketball apart from other balls are the distinctive lines that cover its surface. These lines play a crucial role in providing better grip for players, allowing them to handle and maneuver the ball with precision. In total, there are four lines that make up the unique design of a basketball. Accurately drawing these lines is essential if you want to create a convincing representation of the ball. Fortunately, the first line is relatively straightforward to draw. It’s simply a straight line running through the center of your circular shape, but by slightly curving it, you can give the illusion that it’s 3D.
Step 3: draw a line horizontally across

As we explore the nuances of creating perfect lines, it’s interesting to note that the second line bears striking similarities to its predecessor. In fact, the key to achieving harmony lies in ensuring these two lines intersect at an optimal angle – specifically, one that falls beneath 90 degrees. This subtle yet crucial detail is what transforms a simple arrangement into a visually appealing composition.
Step 4: draw a curved line on the left

As you approach the final stages of drawing the intricate design, you’re faced with two more challenging lines to bring into existence. These lines take the form of closed ovals, which are typically straightforward to draw in isolation. However, their placement on a curved surface adds an extra layer of complexity, requiring precision and attention to detail to execute correctly. Remember to ensure that these lines intersect at a precise 90-degree angle, much like the earlier lines, to maintain the overall aesthetic and structural integrity of the design.
Step 5: draw a curved line on the right

As you reach the culmination of this creative process, you’re likely to find yourself at a unique intersection of artistry and engineering. The last line, which mirrors the ones drawn earlier, takes on a distinct character thanks to its subtle curvature away from the edge. This gentle deviation creates an intriguing visual dynamic that deepens the three-dimensional illusion, further immersing your imagination in the world you’ve brought to life.
Step 6: add a logo or company name

When crafting a fictional basketball, it’s common to include visual elements like logos or brand names. For my illustration, I drew inspiration from the iconic Nike logo, but felt encouraged to think outside the box and get creative. Perhaps instead of a traditional logo, you might opt for the name of your favorite player or a unique design that reflects their personality or playing style. The possibilities are endless!
Add some color

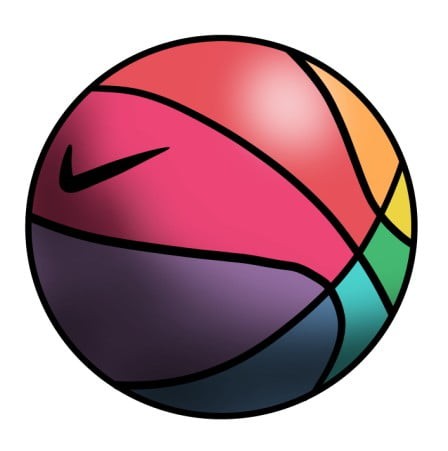
As you finally put the finishing touches on your basketball illustration, it’s time to bring it to life with color. A classic orange hue is a popular choice for many basketballs, so I started by coloring my first one in this vibrant shade. But then I let my childhood nostalgia take over and opted for a more eclectic approach for my second drawing, incorporating a variety of colors that hold special meaning to me. To add depth and dimensionality, don’t forget to include subtle highlights on one side and shadows on the other, giving your drawing a sense of three-dimensionality.
Drawing a basketball from different angles
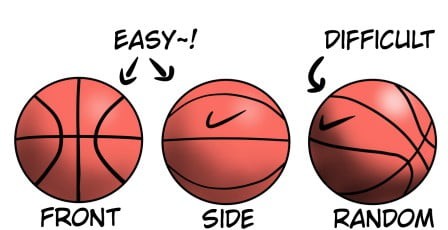
While the lines and design elements distinguish a basketball from other balls like soccer, volleyball, and tennis balls, its appearance can shift dramatically depending on the angle at which it’s viewed. Drawing a basketball from a straightforward perspective – think front-on or side-by-side views – is relatively straightforward. If you’re struggling to capture its shape and proportions, starting with these simpler angles might be helpful. For more complex angles or perspectives, referencing a real-life basketball or photograph can prove invaluable in achieving an accurate representation.
Want to draw more?
If you found this tutorial engaging, you may also appreciate exploring other creative avenues. We have an array of articles that cater to different artistic interests, including the steps to illustrate a candle, a palm tree’s serene silhouette, and the delicate beauty of a butterfly. These guides share a similar spirit of creativity and self-expression.