Cute And Easy Owl Drawings
If you’re eager to learn the art of drawing an owl, you’ve landed on the perfect page. These nocturnal birds are not only renowned for their remarkable intelligence, but also their striking features, including their oversized eyes that make them irresistibly adorable. Their majestic wings, too, are a sight to behold. In this tutorial, we’ll take it one step at a time and explore how to draw an owl in six easy-to-follow steps. The best part? You’re free to let your creativity shine by adding personalized touches or experimenting with vibrant hues.
Necessary materials
To get started with today’s tutorial, you’ll need just the basics: a pencil, some paper, and an eraser. If you’re looking to add some color to your owl design, consider gathering some colored pencils, art markers, or paint. Keep in mind that if you plan on using ink or paint, it’s essential to have special paper on hand to prevent any unwanted bleeding.
How to draw a simple owl
Step 1: draw a circle

Begin by sketching a loose, imperfect circle on your paper. This circular foundation serves as a guiding template for creating the overall shape of your owl. As you’ll be erasing this initial outline later, opt for very thin lines to ensure easy removal without disturbing the surrounding areas.
Step 2: add two ears
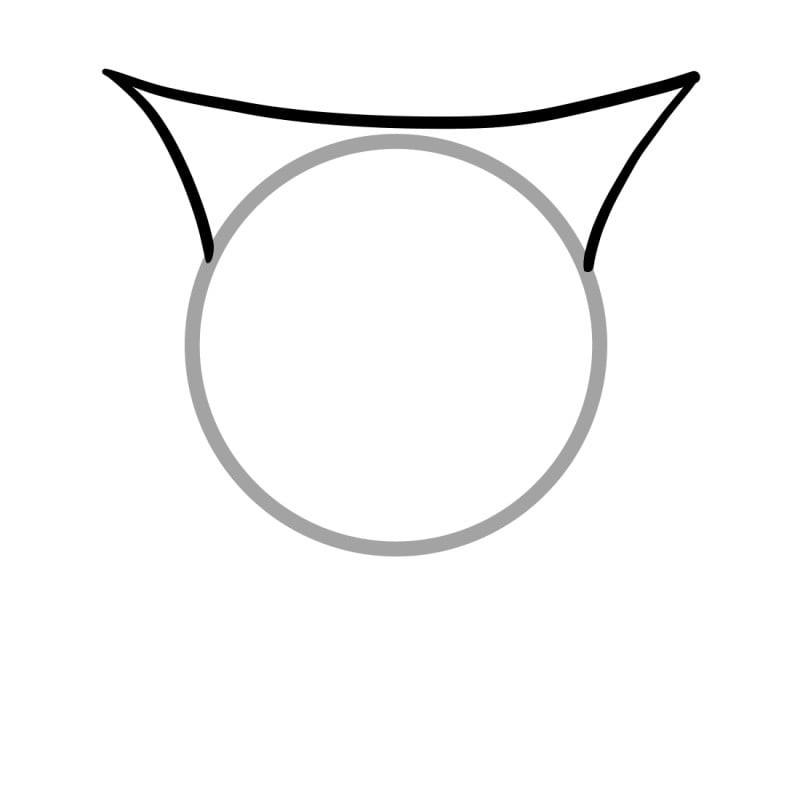
To begin crafting our cartoon character’s features, let’s start by drawing the ears. This aspect of facial anatomy is relatively straightforward, requiring only a few simple strokes. The ear consists of three distinct lines: a gentle horizontal curve above a circular foundation, and two diagonal lines beneath, forming an approximate 45-degree angle. To achieve harmony in our character’s design, it’s essential to ensure both ears are proportionate and equally sized, as unevenness can detract from the overall aesthetic.
Step 3: draw the body
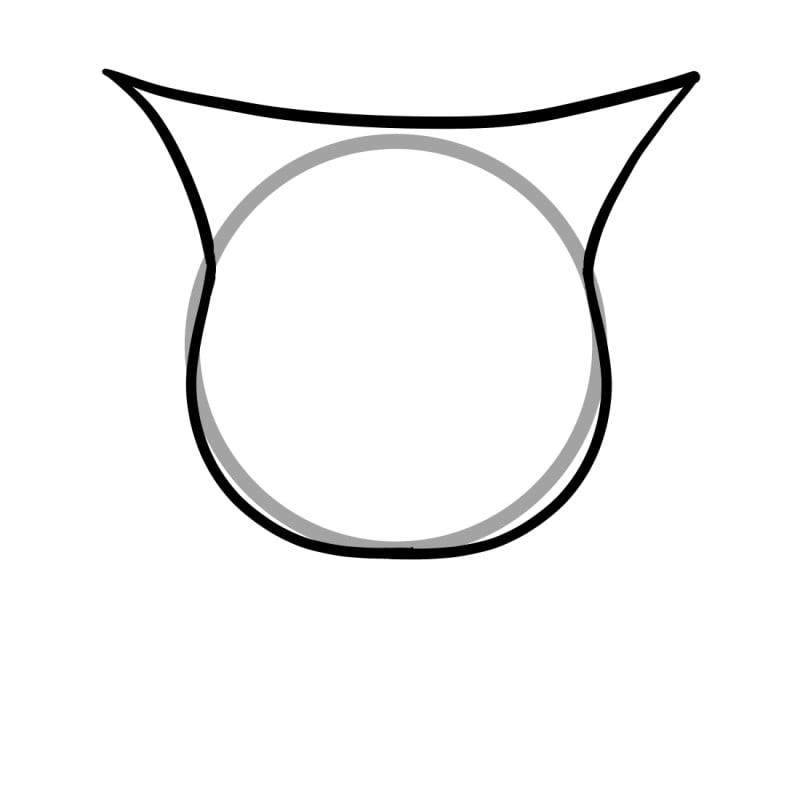
When crafting the owl’s body, envision a gentle U-shape taking form. If desired, you can slightly broaden the lower portion to create a more rounded, plump appearance. It’s not crucial for the body to precisely align with the original circle – instead, aim for a harmonious connection between the two.
Step 4: add the face
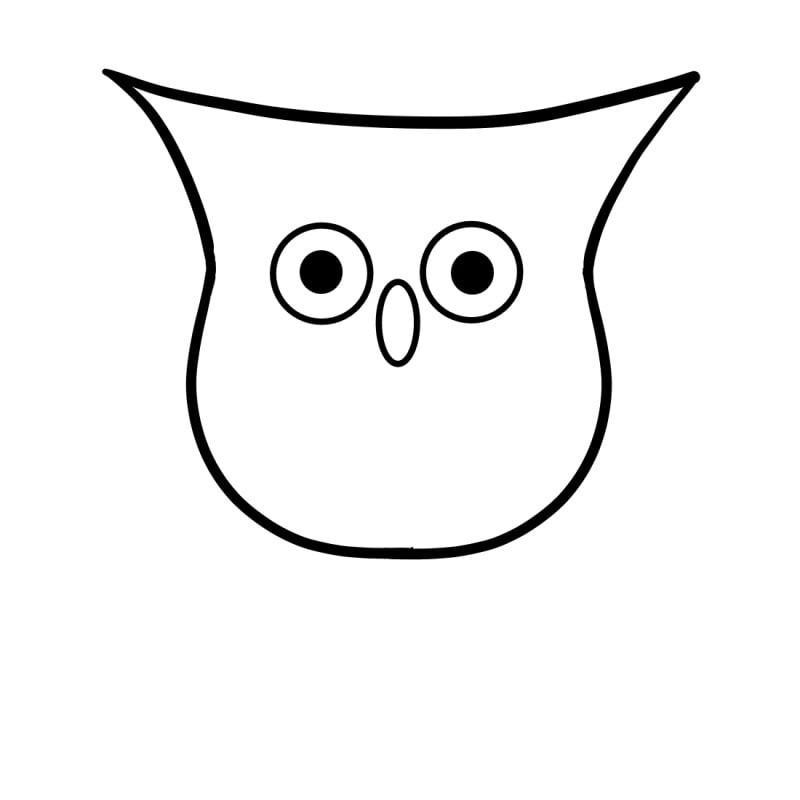
As we approach the final stages of our owl’s creation, let’s focus on bringing it to life with its most distinctive features: its piercing gaze and sharp beak. To do this, we’ll first need to remove the temporary circle that has served as our guide thus far. This might seem like a small step, but it’s actually crucial in ensuring the perfect alignment of our owl’s eyes. Each eye is comprised of two concentric circles, with the inner circle serving as the pupil. Achieving symmetry between these pupils can be a challenge, as even the slightest mismatch can give the illusion that your owl is gazing in different directions. Once you’ve mastered the art of creating symmetrical eyes, you can move on to crafting the beak, which can take the form of a small oval or triangle situated between the eyes.
Step 5: draw the wings and feet
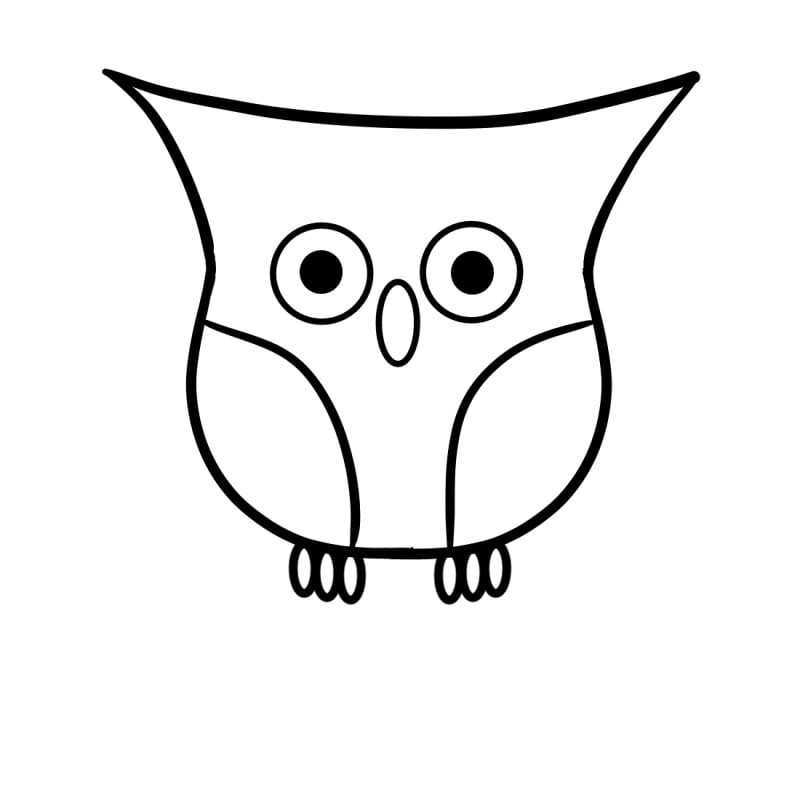
Crafting your dragon’s wings begins with two curved lines that form a partial circle, aiming for symmetry as you draw the pair. The foundation of these appendages is crucial, ensuring your dragon’s wings are proportionate and visually appealing. To complete the lower half of this mythical creature, attach three connected ovals to create the feet, positioning them in close proximity to each other.
Step 6: fill in the details
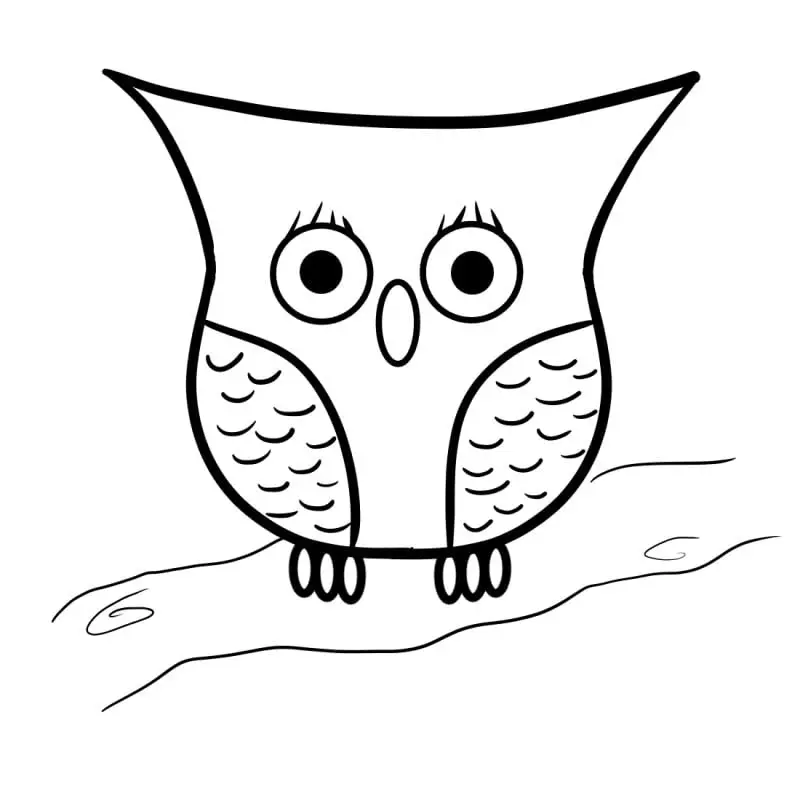
As the final step, bring your drawing to life by adding the finest details. This is where you can truly let your imagination soar and get creative. For my own owl creation, I added a fluffy texture to its wings using gentle strokes, a delicate twig branch for it to perch on, and even gave it a set of luscious eyelashes for an extra touch of whimsy. How will your unique owl look? Will it have a pair of goggles perched on its head or maybe a tiny backpack strapped to its back?
Be creative!

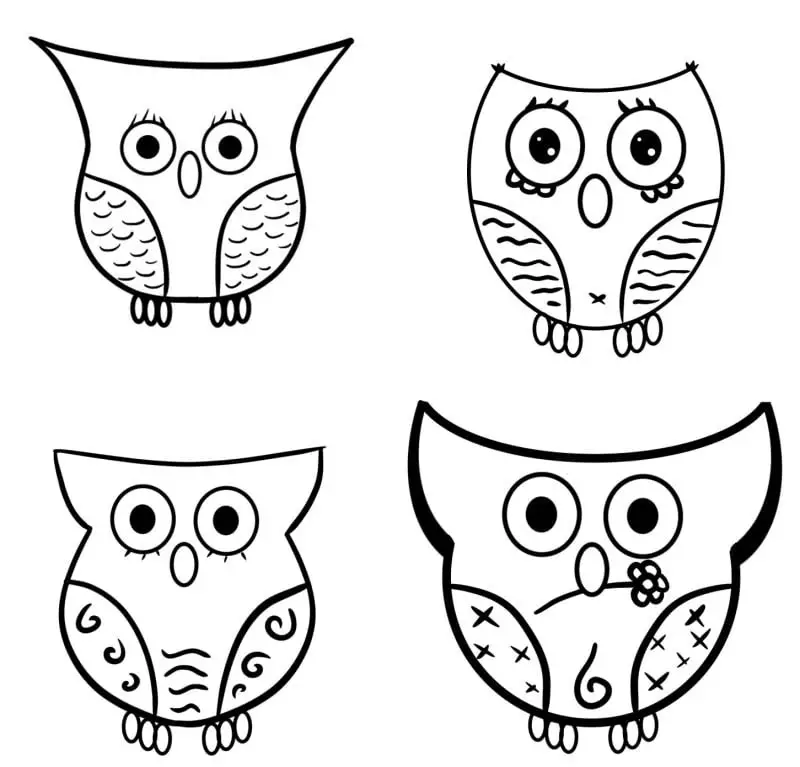
When crafting your owl’s personality, feel free to get creative and experiment with different characteristics. I’ve drawn several owls myself, each one showcasing distinct body shapes and details. One of my creations features slightly modified ear shapes and wing decorations, giving it a unique flair. Another owl boasts oversized ears, implying exceptional hearing abilities – perhaps he’ll be listening in on some romantic confession soon? The youngest of the group is a baby owl, with tiny ears and endearing eye highlights that make him look irresistibly adorable.
Want more?
Are you eager to unleash your artistic side and create something truly unique? If so, why not try one of the many fascinating how-to-draw tutorials available online? These step-by-step guides can help you master various skills, from capturing the essence of a cute bunny or butterfly to crafting captivating eyes that seem to sparkle with life. You might even discover your hidden talent for drawing straight lines or envisioning majestic cats in all their feline glory. Whether you’re a seasoned artist looking to refine your techniques or a complete beginner eager to get creative, there’s sure to be a how-to-draw tutorial out there tailored just to your needs.