How To Make A Mold Of Your Hand At Home [Easy Diy Project]
If you’re searching for a creative activity to share with family members or loved ones, consider crafting a homemade hand cast. This project not only fosters quality time but also yields a unique and lasting keepsake. With a simple kit, the process is straightforward, budget-friendly, and enjoyable for all involved. As a result, these three-dimensional hand sculptures make exceptional decorative pieces that hold sentimental value.
How to make a hand sculpture in 3 steps
To create a replica of your hand, you’ll need to start by crafting a hand mold using alginate, a common material used in dental impressions. Next, pour casting stone into the mold and allow it to set for several hours. Once hardened, carefully remove the alginate, revealing an exact replica of your hand.
What you need for your DIY hand mold
For those looking to get started with Luna Bean’s hand casting kit, you’ll need a few essential tools to ensure a successful and enjoyable experience. These include a whisk or spoon for mixing the moldable material, a measuring cup for accurately proportioning ingredients, and a disposable bowl for containing any mess that may occur. You can find these items by clicking on the provided link to purchase from Amazon.
Step-by-step instruction
1 Making a mold of your hand

image source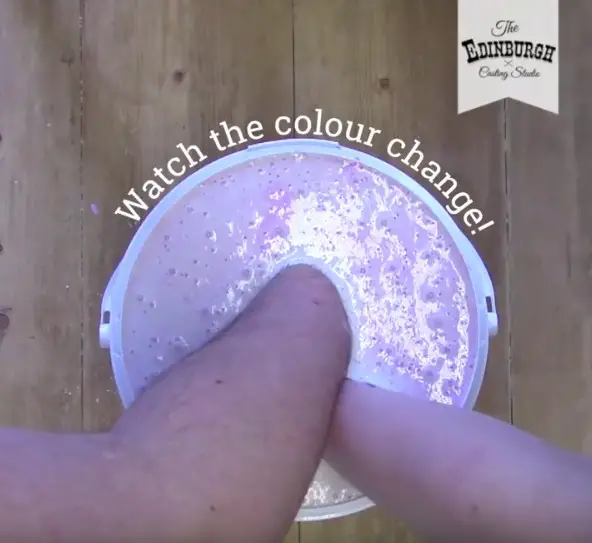
image source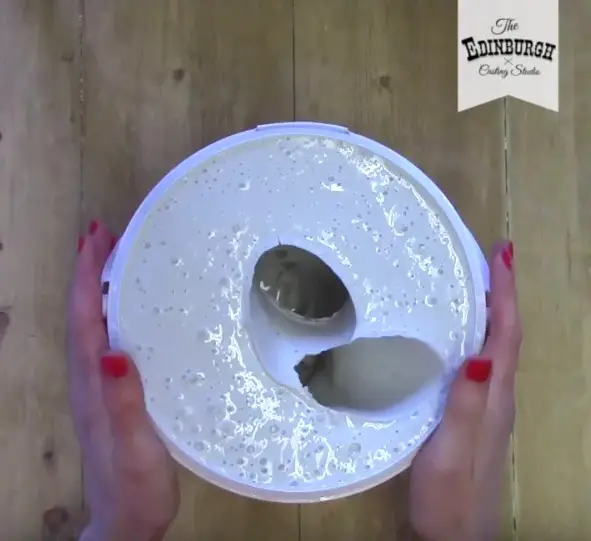
image source
To begin making a mold of your hand, start by combining the ingredients in a large bucket. Mix cold water from the kit with the molding powder, stirring well until they’re fully incorporated. You can use a whisk, spoon or blender to mix everything together, but be sure not to contaminate any cooking tools afterwards.As you mix, observe how the molding powder transforms from its original white color to a pinkish-purple hue upon contact with water. The mixture will gradually thicken and solidify, prompting you to quickly insert your hands. This kit should yield enough material for two adult hands or one adult with two child-sized hands.The possibilities are endless when it comes to hand molds, depending on how you position your hands during the molding process. To facilitate removal of your hands after the mixture has set, apply a thin layer of baby oil beforehand.Keep in mind that excessive immersion could cause the mixture to overflow. As a precautionary measure, consider performing this step outdoors or covering the area with newspapers for easy cleanup.Once you’ve inserted your hands, maintain stillness for 3-4 minutes as the mixture solidifies and regains its white color. Afterward, carefully remove your hands by applying gentle force to minimize the risk of creating small tears in the mold.
2 Making a cast of your hand


With your mold now prepared, it’s time to create the mixture that will eventually become a cast of your hands. In a separate bowl, combine cold water with stone powder, taking care to wear gloves while mixing to avoid the difficulties that come with cleaning up this stubborn substance once it’s been hydrated. As you mix, be mindful not to over-saturate the powder, as this can lead to an overflow when pouring the mixture into your mold. Once the mixture is ready, slowly pour it into the mold, taking care not to fill it too full and risk creating air bubbles. To remove any air that may have formed during the pouring process, gently tap the container several times.
Removing the mold from the cast
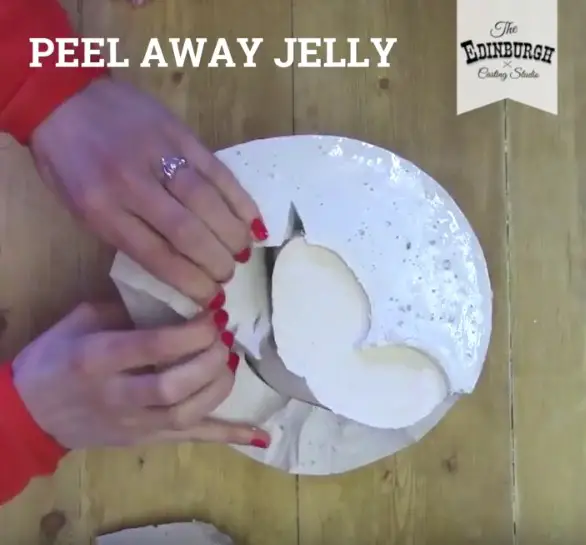
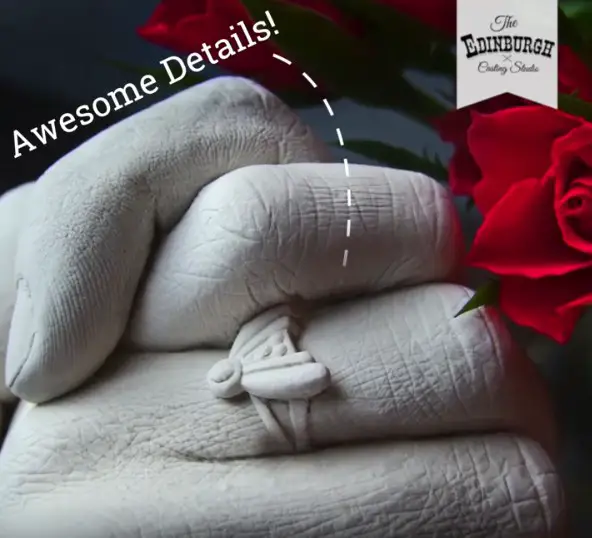
Once you’ve allowed the mixture to fully harden, carefully remove the mold from the bucket and gently peel away the mold’s surface. Be prepared for varying hardening times, as it may take anywhere from 20 minutes to an hour or more, depending on the specific mixture and environmental conditions. With patience, your homemade hand sculpture will be revealed, showcasing impressive levels of fine detail that you might not have expected.
Decorating Your Cast Hand Sculpture
When your sculpture has fully dried, you’re free to add a splash of color with acrylic paint, which tends to adhere well to the material. For a high-gloss finish, it’s advisable to prime the surface first. Alternatively, if you’re aiming for an antique bronze patina, we’ve got you covered. Check out our video tutorial to learn the steps involved in achieving this unique look.