How To Make Ceramic Animal Sculptures?
Ceramic animal sculptures have become increasingly popular over the years as a creative way to bring art and imagination to life. From simple cuties to elaborate life-like creations, working with clay allows artists to shape the animal kingdom in endless unique ways.
The tradition of creating ceramic animal sculptures and pottery spans centuries and many cultures around the world. Prehistoric animal figurines made of clay have been discovered dating back over 20,000 years. Some of the earliest ceramic animal art includes the famous terra cotta warriors and horses of ancient China, and goddess figurines with animal features found in ancient Mesopotamia and Egypt.
Today people handcraft ceramic animal sculptures depicting pets, wildlife, farm animals, mythical creatures, and more. Miniature animal figurines are commonly made as collectibles. Life-size or larger animal sculptures are also an impressive art form, whether made as lawn ornaments, decorative cache pots, or simply as standalone artworks. The imagination is the limit when deciding what ceramic animals to sculpt!
Needed Supplies
Here are the main supplies you’ll need to create ceramic animal sculptures:
Clay
Choose an appropriate clay for sculpting such as polymer clay, earthenware clay, or stoneware clay. Consider the clay’s texture, strength, plasticity, and firing requirements when selecting for your project.
Sculpting Tools
Gather a variety of sculpting tools like clay loop tools, wooden modeling tools, sculpting knives, sponges, and ribbers. These will allow you to shape, smooth, add texture, and create details in the clay.
Glazes
Select food-safe glazes to apply color and finish. Consider complementary glazes for the animal’s body and accents. Test compatibility if using multiple glazes.
Kiln or Other Firing Method
You’ll need a way to properly fire your clay sculpture such as a kiln. Alternatively, some air-dry clays can be hardened using an oven, food dehydrator, or air-drying technique.
Sculpting Techniques
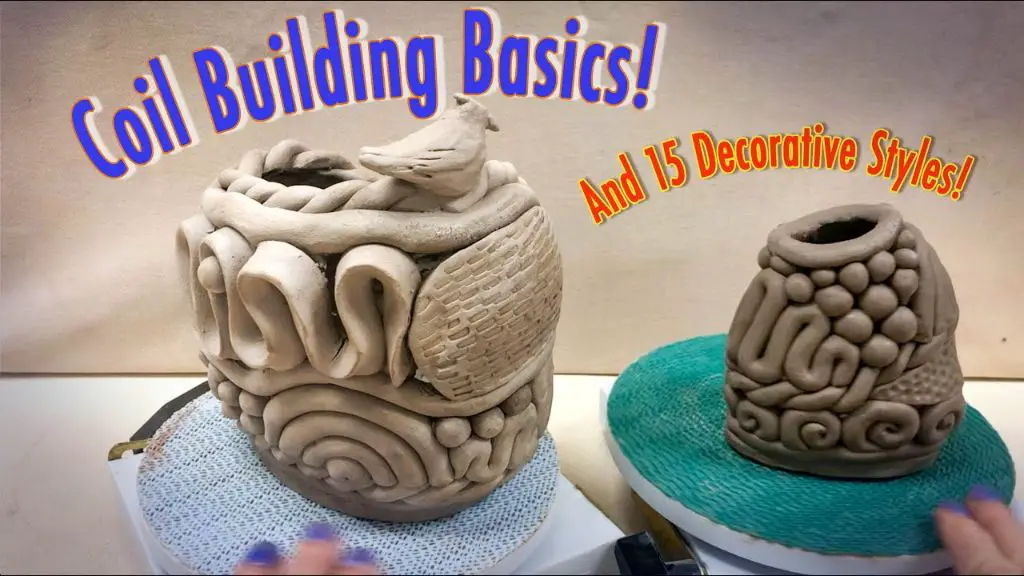
There are two main approaches to sculpting with clay: handbuilding and wheel throwing. With handbuilding, you sculpt entirely by hand using techniques like pinching, coiling, and slabbing. Wheel throwing involves using a pottery wheel to throw cylindrical forms that can then be altered into sculptures.
Handbuilding offers more direct control for sculpting intricate shapes and details. Common handbuilding techniques include:
- Pinch pots – Pinching clay into rounded forms
- Coil building – Rolling and stacking coils of clay
- Slab construction – Cutting and assembling flat clay slabs
Wheel throwing can quickly produce rounded, symmetrical forms that can then be carved, cut, and joined together. It offers versatility through the use of thrown components. Textures can be impressed into the clay by using tools, molds, or your hands. Clay sculpting tools like loop tools allow shaping concave areas and refining details.
Both handbuilding and wheel throwing take practice to master. For beginners, starting with handbuilding techniques like pinching and coiling can provide valuable experience working with clay before attempting wheel thrown forms. Focus on developing a feel for the clay, and don’t worry about perfection. Allow the clay’s characteristics to inspire new sculpting approaches.
Creating Animal Forms
When sculpting animal forms in clay, it’s important to have a basic understanding of animal anatomy so you can achieve proper proportions. Focus on the major forms and angles of the head and body. Look at photos and drawings of the animal from multiple angles to understand its structure.
Pay attention to the comparative sizes of the head, torso, limbs, etc. Use simple tools like wire armatures or proportional dividers to measure out the basic forms before adding clay. Keep refining the proportions as you work to capture the essence of that particular animal.
Consider how the animal’s muscles and bones influence its shape. Show this underlying structure in a simplified way in your sculpture. Add natural looking textures like fur, feathers, scales, etc. to bring life to the clay surface.
Work symmetrically and step back frequently to check proportions from all sides. Allow your work to evolve gradually using an additive/subtractive process. With practice and observation, you can create realistic animal forms that portray their energy and character.
Facial Details
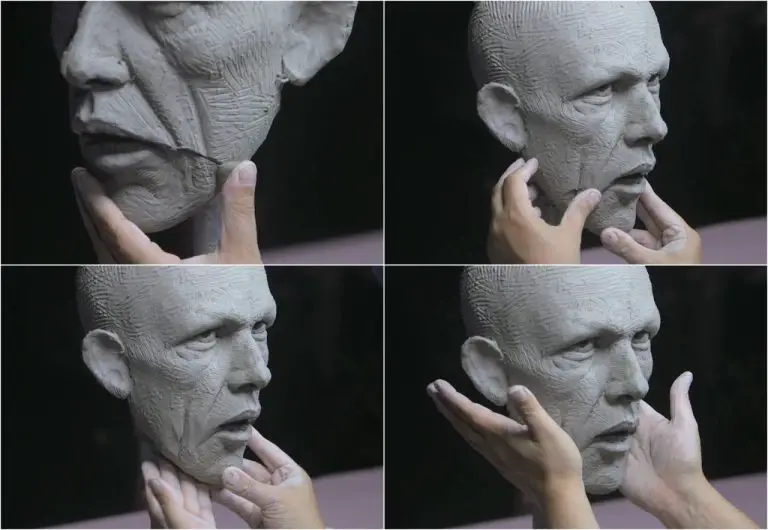
When sculpting animals out of clay, paying close attention to the facial details can really bring your creations to life. Proper placement of features like the eyes, ears, snout, and mouth will make your sculptures appear more realistic and expressive.
The eyes are a key focal point, so make sure to carefully sculpt them into the clay. Position them proportionately and with proper spacing. They can be molded by pressing gently with a spoon, then refined with sculpting tools. Avoid making the eyes too distorted or overly large, as this will give an unnatural look.
The ears also contribute greatly to facial expressions. Note where the ears sit in relation to the eyes on the animal you wish to portray. Ears that are placed too low or too high can detract from the realism. Take care to sculpt the shape and folds of the ears accurately as well.
For animals with snouts like dogs, wolves, or horses, pay close attention to the ridge of the snout and the shape of the nostrils. Use light scoring and shaping to mold the snout properly before adding finer details. The end result should not appear too long, short, wide or pinched.
Finally, the mouth can be used to convey different emotions – playful, aggressive, relaxed, etc. Consider what feeling you want your clay animal sculpture to give off, and mold the mouth accordingly. Reference photos are quite helpful when sculpting realistic animal faces.
Aim for an expressive face while avoiding distorted or unnatural looks. With some practice and attention to detail, you can create lively animal faces out of clay.
Surface Decoration
Decorating the surface of ceramic animal sculptures can really bring them to life. There are several options for adding color and design:
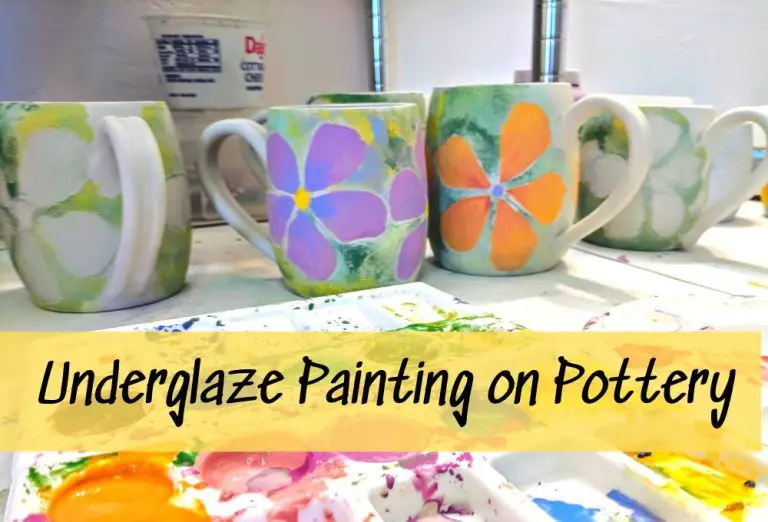
Painting directly on the bare clay with acrylics or ceramic glazes allows you to fully customize the color scheme. Look at photos of real animals for a realistic look or choose fun, bright colors for a whimsical effect. Use fine brushes for small details like eyes and noses. Outline major shapes first, then fill in with solid colors. Blend and shade as desired for a more 3D look.
Glazes provide shine and color in one step. Apply by dipping or brushing on. Layer different translucent glazes for dimensional effects. Go for solid glazes for a smooth finish or textured glazes with speckles or crackle patterns. Refer to a ceramic glaze color chart when selecting colors.
Stains are absorbed directly into unglazed terra cotta. They produce soft, natural earth tones like antique bronze, blue green, and brick red. Use stains alone or under a clear glaze. Distress areas with sandpaper for an aged, weathered look. Stain recessed areas darker and highlight protruding parts.
Special effects like wax resist, scraffito, or mishima can add beautiful patterns. Tape off areas and apply wax before glazing for clean dividing lines. Scratch designs through layers of glaze with metal tools. Use mishima techniques to draw fine lines through slip trailed over glaze. The options are endless for creative embellishment.
With good planning and technique, the surface design of ceramic animal sculptures can really enhance the character and artistry of the finished piece.
Firing and Finishing
Proper firing is essential for creating durable ceramic sculptures. Bisque firing should occur between cone 04 and cone 06, which corresponds to a temperature range of approximately 1,815-1,940°F (990-1,060°C). Slow bisque firing allows moisture to completely escape and hardens the clay body. For glaze firing, temperatures will vary depending on the type of glaze used, but often range from cone 4-6 (2,010-2,200°F / 1,100-1,205°C). Consider firing animal sculptures on stilts or refractory platforms to prevent glazes from sticking to kiln shelves.
There are many options for decorative glazes and stains that complement ceramic animal sculptures. Glazes with earthy tones and natural color variations help achieve an organic, lifelike appearance. Apply multiple thin coats of glaze for even coverage and vibrancy. Use wax resist techniques or masks during spraying for intentional color effects. Matt glazes tend to showcase fine sculpting details compared to high-gloss finishes.
After firing, animal sculptures may require protective sealants depending on the final surface and intended display environment. Water-based acrylic varnishes work for both indoor and outdoor applications. Outdoor sculptures in particular will benefit from UV-resistant sealants. Custom display stands crafted from wood, metal or acrylic add stability while allowing the artwork to be showcased. Integrate natural elements like stone or plants into the base for added authenticity.
Source: https://www.linkedin.com/in/mary-kenny-96616153
Troubleshooting Issues
Ceramic sculptures are prone to cracking, glaze problems, and firing mishaps. Cracking often occurs due to improper drying techniques or flaws in the clay body. To prevent cracking, build sculptures slowly and allow ample drying time between additions. Wrap damp sculptures in plastic to slow moisture loss. For minor cracks, fill with slip or commercial crack fillers like Kintsugi mix or Durham’s Water Putty.
Common glaze issues include crazing, crawling, blistering, and pinholes. Crazing occurs from too much clay shrinkage or thermal expansion. You can minimize crazing by matching the clay and glaze thermal expansion rates. Crawling results from contamination on the bisque or problems with the glaze chemistry. Ensure bisques are clean and reassess glaze ingredients or mixes. Blistering happens when gases get trapped, often from applying too thick a glaze layer. Use thinner, multiple glaze coats. Pinholes indicate air bubbles in the glaze; try a slower firing ramp or adding a deflocculant. For help diagnosing and fixing additional glaze defects, refer to this article.
Firing mishaps like scorching, cracking, or explosions can occur from incorrect programming or kiln problems. Double check firing schedules and thermocouple calibrations. Do test tiles with new glazes. For minor scorching, grind the surface smooth and reapply glaze. Severely damaged pieces may not be salvageable. Improve sculpting skills through practice and studying anatomy. Try small studies focusing on forms and textures before attempting large sculptures. Reference photos, life drawing sessions, or maquettes when sculpting animals.
Inspiration and Ideas
Looking at other ceramic artists’ sculptures can provide a wealth of inspiration when developing your own style and subjects. There are many talented ceramic sculptors working with animal forms from real life as well as fantasy creatures. Spending time looking through ceramic sculpture books, magazines, websites, and social media feeds can help generate ideas.
Studying wildlife reference materials is great for recreating accurate animal shapes and surface textures. Looking at your own pet or favorite animals can also spark interesting sculptures to create. Don’t be afraid to let your imagination run wild and develop unique fantasy creatures to sculpt. Combining features from different animals together can result in whimsical new creatures.
As you gain experience with ceramic sculpture, keep developing your own personal style. Think about what kinds of textures, shapes, and subjects you enjoy sculpting the most. Over time you will start recognizing features that define your style. Refer back to pieces you have created before for ideas on how to continue evolving your style.
Resources
When learning ceramic sculpture, it can be incredibly helpful to utilize resources like books, websites, classes, and online tutorials. Here are some top resources to check out:
Books
Some excellent books for learning ceramic sculpture techniques include:
- The Craft and Art of Clay by Susan Peterson
- Handbuilt Ceramics by Kathy Triplett
- Handbuilding with Clay by Suze Lindsay
These books cover topics like working with clay, sculpting methods, surface decoration, and firing/finishing.
Websites
Helpful websites like Ceramic Arts Network and Pottery Making Info offer a wealth of online tutorials, tips, and inspiration. You can also find ceramic sculpture videos on YouTube.
Classes
Taking a class at a local ceramic studio is a great way to learn techniques hands-on. Look for beginner sculpting or handbuilding classes in your area.
Online Tutorials and Communities
Online ceramics communities like Ceramic Arts Daily allow you to connect with other ceramic artists, watch video tutorials, participate in forums, and get feedback on your work.

