How To Make Cute Figures?
Making your own cute figures can be a fun and fulfilling hobby for both children and adults. With just a few simple supplies and techniques, you can create a wide range of adorable and artistic miniature sculptures. This hobby allows you to express your creativity, practice sculpting skills, and produce decorative pieces to keep or give as gifts. For many, it becomes a beloved pastime that brings joy both in the process and the end result. Miniature figures also make charming additions to model train layouts, fantasy gaming, and dollhouses. This guide will provide an overview of everything you need to know to get started with making your own cute figures at home.
Supplies Needed
To make cute figures, you’ll need the following basic supplies:
Clay – The most popular material for making small figures is polymer clay. Sculpey and Fimo are two widely available brands. Polymer clay is easy to work with, holds fine details, and bakes in a regular oven to cure. Avoid air-dry clays as they don’t achieve the smooth, durable finish of polymer clays.
Sculpting tools – You’ll need a variety of sculpting tools to shape, carve, blend, and texture the clay. Basic tools include sculpting knives, loop tools, ball stylus, toothpicks, and paint brushes. You can find sculpting tool sets tailored for polymer clay at most craft stores.
Paints – Acrylic paints work best for hand-painting figures. You’ll want a range of basic colors plus specialty acrylics like pearlescents and metallics. Water-based markers and pastels can also be used for adding details.
Glaze – An acrylic glaze can be brushed over baked polymer clay pieces to give them a glossy, glass-like finish. This helps smooth surfaces and provides durability.
Planning Your Figure
Before you start sculpting your cute figure, it’s important to spend some time planning it out. This will ensure your end result matches the image you have in mind. Here are some tips for the planning process:
Decide on a character or object – First, think about what exactly you want to make. Do you want to create an animal character, a figurine of a person, or an inanimate object? Get very specific – for example, decide if you want to make a cat, dog, bunny or other animal. Or for a human figure, consider their outfit, hairstyle, and any accessories.
Sketch out your ideas – Once you’ve decided on a specific character or object, start sketching. Draw your figure from multiple angles to visualize it as a 3D object. Think about proportions, shapes, and details. These sketches will be a guide as you sculpt, so make them as detailed as possible. You may want to go through several rounds of sketching to refine your concept.
Investing time in planning will pay off with a cute figure that matches your creative vision! Feel free to be imaginative during the planning process.
Sculpting Techniques
There are two main techniques for sculpting cute figures: hand sculpting and using molds. Hand sculpting allows for more creativity and customization, while molds create consistent results more quickly.
When hand sculpting, start with a solid armature or frame made from wire, foil or other materials. Slowly add pieces of clay, blending them into the existing sculpture. Use your fingers, sculpting tools and water to smooth seams and blend the clay. Take your time to achieve the shapes and details you want. Pay attention to the proportions and symmetry of the figure.
For added detail, use clay sculpting tools to etch lines for hair, clothing, feathers or scales. Carefully sculpt the face and expressions. Refine the shapes and textures as needed. Allow your creativity to guide the design.
Molds provide shortcuts for basic shapes like heads, bodies, accessories and more. Press clay into the molds, allowing slight overflow. Smooth the seams and refine the shapes. Combine molded parts with hand sculpted details for efficiency.
No matter which technique is used, work slowly and gently to achieve a cute, polished look. Let the clay cure fully before baking or painting.
Baking/Curing
Baking or curing your sculpted figure is a crucial step to ensure it hardens fully and retains its shape. The process differs slightly depending on the clay medium used.
Polymer Clay
Polymer clay requires baking in a conventional or toaster oven according to package instructions. Preheat your oven to the recommended temperature, which is typically around 130°C/275°F. Place your figure on a baking sheet lined with parchment paper or aluminum foil.
Bake for the suggested time, checking periodically to prevent overbaking. The clay should be firm but not burnt. Underbaking can result in a tacky surface or drooping shape. Let cool completely before handling.
Air Dry Clay
Air dry clay will harden naturally at room temperature over 24-48 hours. Ensure your figure is in a well-ventilated area as it dries. Rotating it periodically allows even curing. Placing it near a fan or heater can speed up drying time.
Resist the urge to handle or move the clay while curing, as this can lead to cracking or deforming. If needed, you can bake air dry clay at low temperatures (110°C/225°F) to accelerate hardening.
Avoid Cracking
Cool figures gradually after baking to prevent cracking from temperature shocks. Let polymer clay rest overnight before painting or handling roughly. If cracks do form, fill them in with liquid clay or UV resin for a smooth finish.
Painting
When it comes to painting cute figures, you have two main options for paint: acrylics or enamels. Each has their own pros and cons.
Acrylic paints are water-based and easy to thin and clean up. They dry fast, which can be good for quicker work but bad if you need more time to blend. Acrylics also tend to have a matte finish. The downside is that acrylic paint can start to peel or crack over time if the figure is played with or dropped a lot.
Enamel paints are oil-based and provide excellent coverage and durability. They take longer to dry but deliver a smooth, durable, glossy finish that stands up very well to play and handling. Enamels can be harder to work with since they require paint thinner for cleaning and dilution. Proper ventilation is a must when using enamel paints.
For brushes, look for those designed for miniature painting. Small round brushes with good tip control work best for details. Larger brushes will be needed for basecoating larger areas. The brush bristles should hold paint well but release it easily as you paint. Kolinsky sable is a preferred material.
No matter which paint you use, be sure to properly seal the figure when done. A clear matte spray sealant will protect the paint job and prevent chipping or peeling over time. Multiple thin coats are better than one thick coat when sealing.
Adding Details
Adding small details to your cute figures can really help bring them to life. Here are some ideas for additional details you can add:
Wigs: You can buy tiny wigs or make your own by taking a small amount of yarn, string, or faux hair and gluing it to the figure’s head. Cut and style the wig into your desired hairstyle. For best results, choose a wig material that matches the texture and style you want, like yarn for curly hair or string for straight hair.
Facial Features: Tiny additions to the face like eyelashes, eyebrows, and lips can be made from clay, polymer clay, or painted on with acrylic paints. Add eyelashes by making tiny eyelash shaped slightly pointed ovals. Brows can be drawn on with a fine paint brush. For lips, add a small line of red or pink clay.
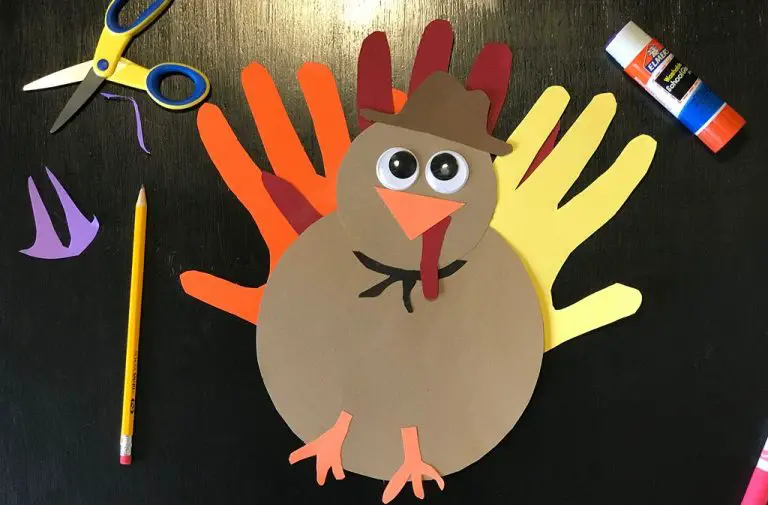
Accessories: Things like miniature glasses, hats, jewelry, purses and other clothing help personalize your figure. Make earrings by using small beads or jump rings. Necklaces can be made from string, chain, or beading wire with beads. Use faux leather, felt or fabric to make miniature hats, glasses or purses. Sew tiny clothing items from felt, fleece or small scraps of fabric.
Displaying Figures
Once you’ve created your cute figures, you’ll want to display them properly so they can be appreciated and admired. Here are some tips for effective figure display:
Stands
Small stands let you elevate your figure a bit so it can be viewed from all angles. Look for clear plastic stands with different height options. For more secure standing, opt for stands with wider bases or multiple prongs to hold the figure in place.
Cases
Display cases keep your figures safe from dust and damage. Acrylic plastic cases come in various sizes to fit anything from an individual figure to a collection. For more visibility, choose a clear case. Or pick a colored case to complement or contrast with your figure. Some cases allow you to rotate or light up your figure.
Shelves
Shelving lets you arrange and exhibit a collection of figures. For decorative display, choose open shelves. Enclosed cabinets provide more protection. Consider materials like glass, wood, or metal. Add accent lighting to highlight your figures. Arrange by theme, color, size, or subject for visual appeal.
With the right display options, you can proudly present your cute handmade creations for all to enjoy!
Selling Your Figures
Once you’ve created a collection of cute figures, you may want to consider selling them to earn some extra income. Here are some tips for selling your handmade figures:
Craft Fairs
Local craft fairs are a great way to get exposure and sell your figures directly to customers. Make sure to sign up early, as spots can fill up fast. You’ll want to rent a table or booth and create an eye-catching display. Have order forms available for custom orders. Talk to customers about your process and offer special deals.
Online Shops
Setting up an Etsy or eBay shop allows you to sell your figures to a broader audience. Take high quality product photos and write detailed descriptions. Price items competitively, but don’t undervalue your work. Promote your shop on social media and offer coupon codes. Ship items promptly and include a note thanking them for their purchase.
Pricing
Factor in the cost of materials plus your time and skill. Compare to similar handmade items. Price smaller or simpler figures lower, and larger or more complex designs at a premium. Offer deals like two for the price of one. Be flexible and willing to negotiate prices with potential buyers.
Advanced Techniques
Once you have mastered the basics of sculpting and painting cute figures, you may want to try some more advanced techniques to take your skills to the next level. Here are some tips for sculpting tiny details, making molds, and modeling anatomy accurately.
Sculpting Tiny Details
Adding tiny details like textures, jewelry, buttons, zippers, or embroidery can really bring a figure to life. To sculpt details at a very small scale:
- Use clay tools like needles and loop tools to etch in textures and patterns.
- Roll tiny balls or snakes of clay to model buttons, beads, pearls, etc.
- Use an X-Acto knife to cut clean lines and edges.
- Work under a magnifying glass for an enlarged view.
Take your time perfecting the small details – they may be tiny, but they can have a big visual impact!
Making Molds
Making molds allows you to reproduce identical casts of a sculpted figure. To make a basic one-piece mold:
- Create your original sculpture on an armature.
- Build a container around the sculpture, at least 1-2 inches bigger on all sides.
- Grease the sculpture so the mold material won’t stick.
- Pour silicone rubber mold material around the sculpture and let cure fully.
- Carefully extract the original sculpture from the mold.
- Brush mold release into the mold cavity before casting pieces.
For more complex molds, a two-part or multi-piece mold is needed. Take your time designing and aligning mold seams to preserve all of your sculpted details.
Modeling Anatomy
Studying anatomy will allow you to sculpt realistic, true-to-life figures. Useful tips include:
- Use reference photos of people and animals.
- Start with basic forms like spheres, boxes, cylinders to build up the body.
- Pay attention to the proportions and ratios between body parts.
- Focus on major muscle groups and how they attach and move.
- Add subtle curves and variations to avoid stiffness.
With careful anatomical study, you can create figures that are cute yet realistic at the same time.