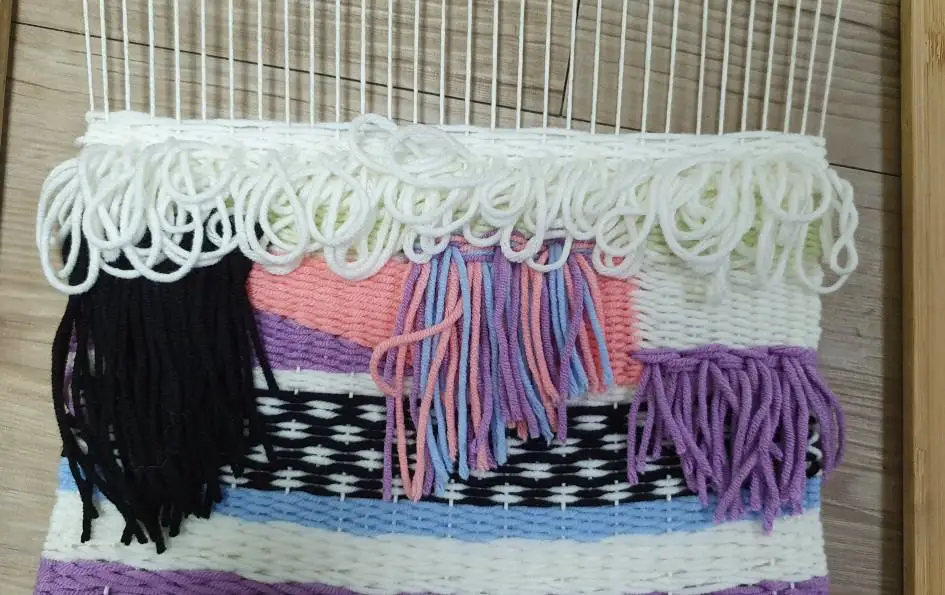
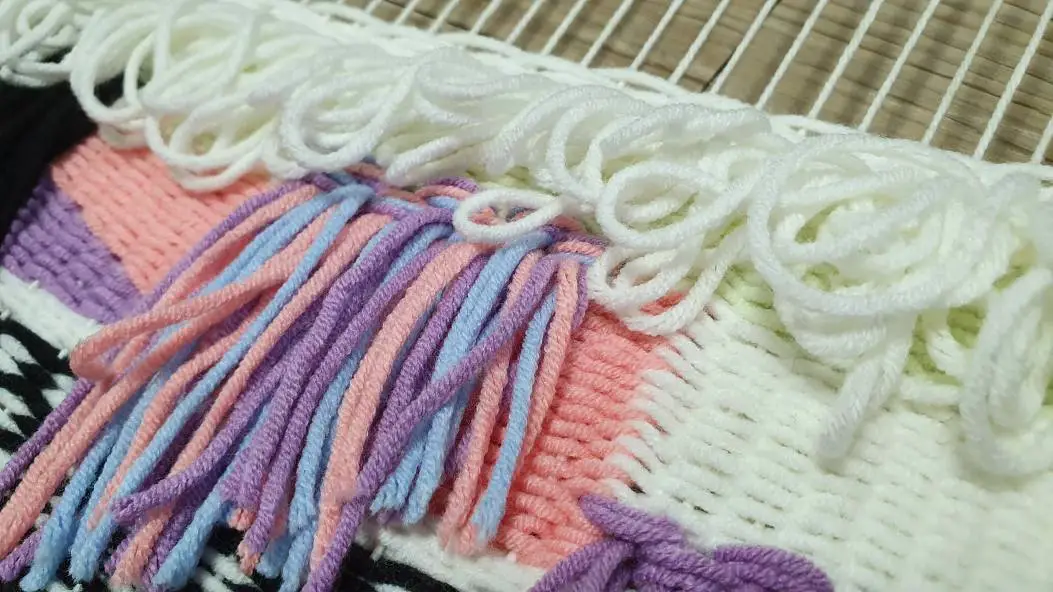
How To Make Rya Loops
One of the simplest ways to introduce a plush texture to your woven piece is by incorporating rya loops. I often weave multiple rows of these loops into my wall hangings because they add such a cozy touch. To create them yourself, let’s dive in and explore the process.
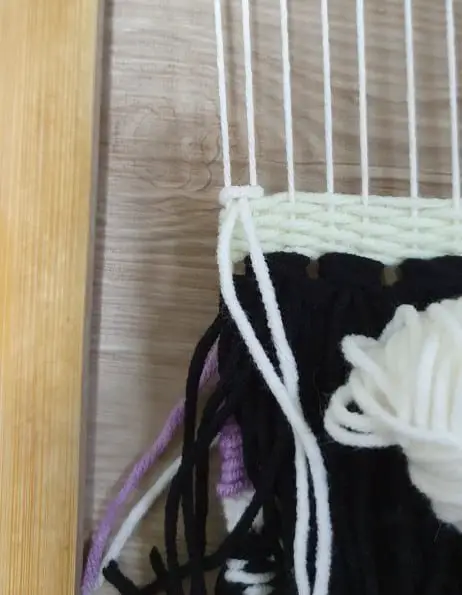
Place your weft yarn over the first two warp threads

To initiate the process, thread your yarn across the initial two warp threads. This marks the beginning of the first knot’s creation.
For optimal handling, consider winding one end of the yarn into a ball shape. This simplifies the passage of the yarn through the warp threads.
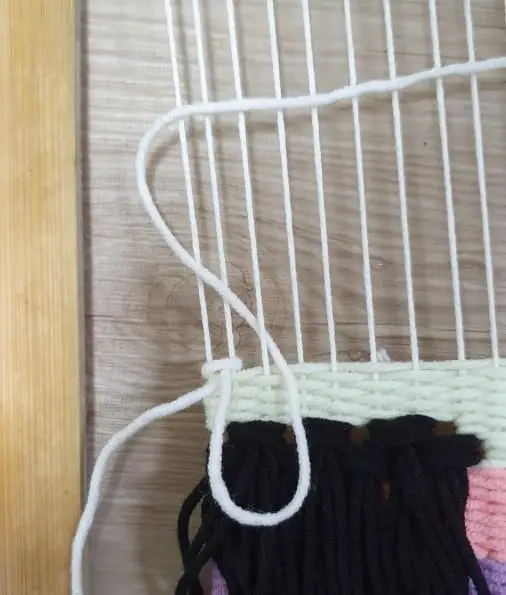
Wind the yarn around the two warp threads
To begin, wrap the yarn around the initial pair of strings, mimicking the process of creating a rya knot. However, instead of forming a traditional knot, aim for a distinct combination of short and long ends. As you wrap the yarn, pay attention to achieving this specific length difference between the two ends.
Pull down on both strings
To create a reliable foundation, grasp one string and pull it gently while holding the other string firmly in place with your non-dominant hand. This dual-action movement enables you to develop tension and form your initial knot securely.
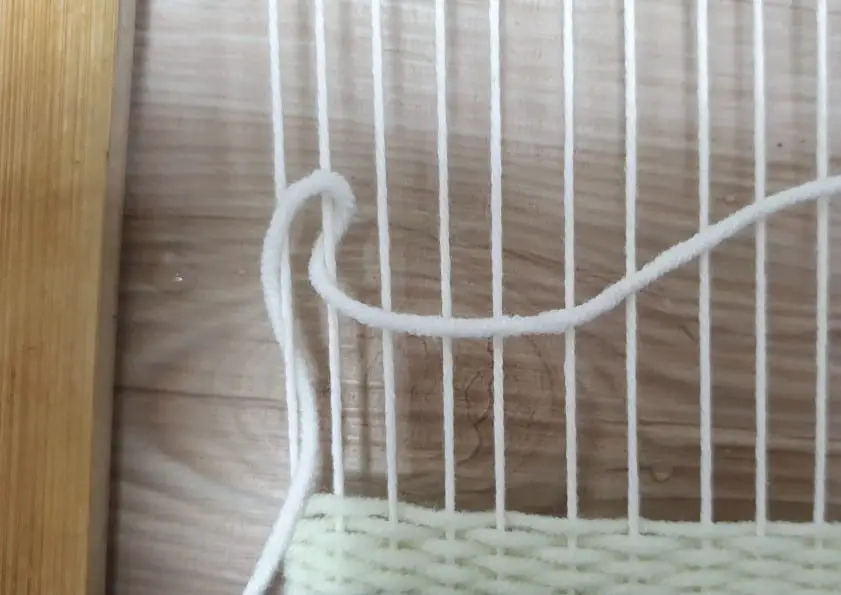
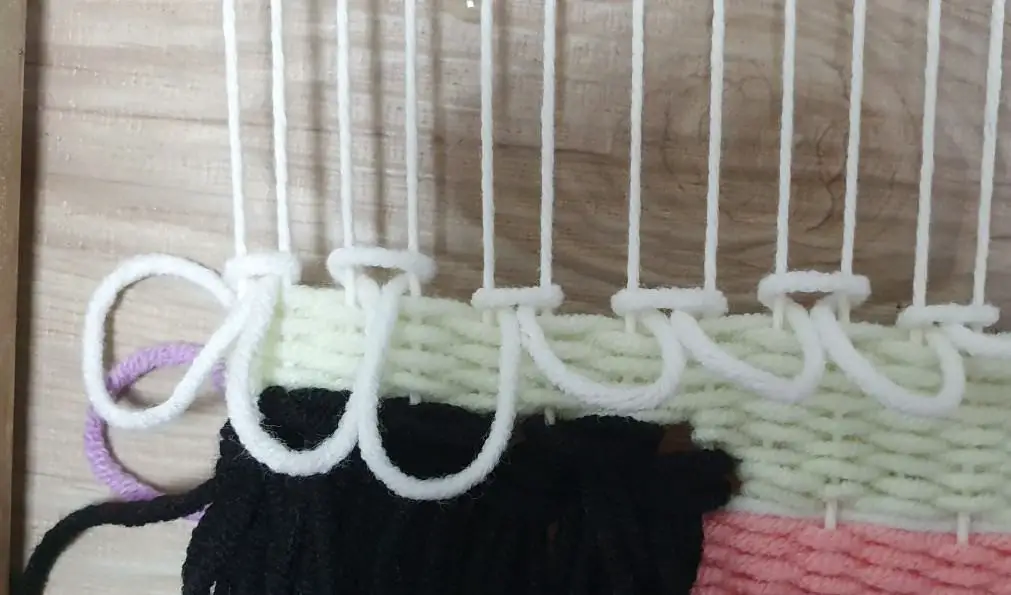
Wind the yarn around the next warp thread

To begin the knot, take hold of the yarn and bring it over the next available warp thread. From there, pass the yarn under the same warp thread, effectively creating the foundation for your knot. This initial step is crucial in setting the stage for the rest of the knotting process.
Go over the next 2 warp threads
As you navigate through the intricate process of weaving, it’s essential to maintain a smooth transition between each warp thread. With the third thread now in place, your attention turns to the next two threads – numbers three and four. A crucial step in this process is to ensure that you don’t pull the yarn too tight just yet. Instead, deliberately leave a small amount of yarn at the bottom to create the foundation for the loop. This deliberate pace allows for precision and control, ultimately resulting in a seamless and professional-looking finished product.
Go around the 2th warp thread

To form the second knot, take the yarn and pass it under and then over the fourth warp thread once more, repeating the same motion as before. This additional step will secure the first knot and create a sturdy foundation for the rest of your project.
Secure the second knot


As you progress in creating the second knot, gently draw the ball of yarn downwards while maintaining a firm grasp on your previously formed loop. It’s essential to keep this established loop in place as you work towards forming the next connection.
Prior to pulling down the yarn and securing the second knot, take a moment to adjust the size of your initial loop by gently tugging or pulling on it. This flexibility allows for greater control over the final product.
Repeat for one row
To fill each row with loops, simply follow steps 1 through 8. You’re free to vary the size of your loops, as this creates a more organic and natural appearance. Initially, your first row of rya loops might not impress you, but don’t worry – things will start to take shape after adding just two or three more rows.
Weave a row of plain weave
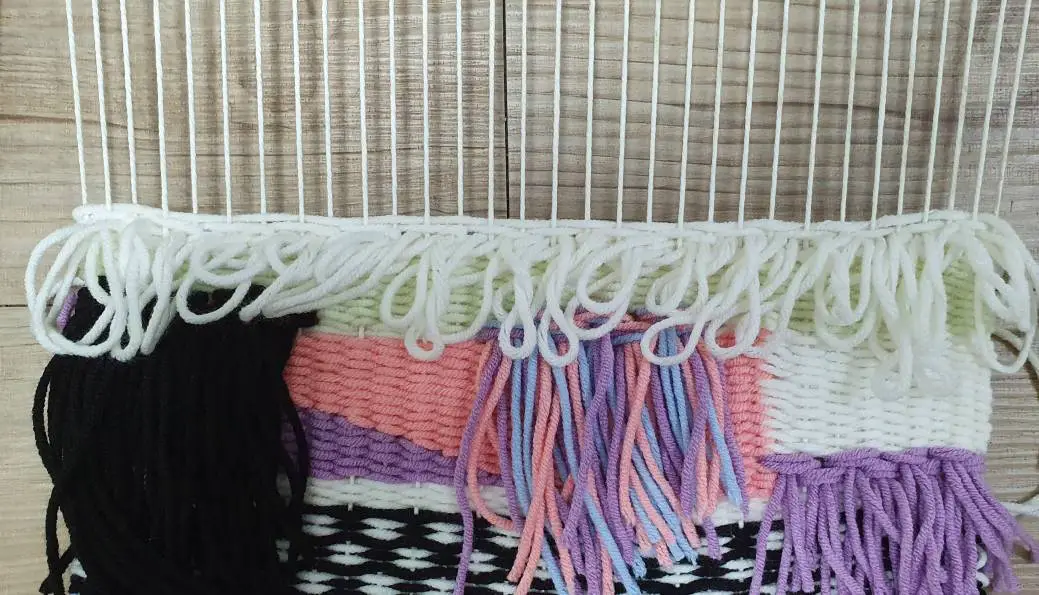
When crafting with rya loops, it’s essential to intersperse them with plain weave rows to maintain structural integrity and prevent the loops from becoming misshapen or detached. Aim for a ratio of 1-3 plain weave rows between each row of rya loops, as this will help secure the loops in place without compromising their appearance.
Repeat as many times as you like
When working with thin yarn, I typically aim for at least three rows of rya loops to achieve the desired effect. However, feel free to use as many or as few as you like, depending on your personal preference. Just be mindful that each row should be separated by a row of plain weave to maintain visual harmony.
What can take some getting used to is the process of creating rya loops themselves. It may seem counterintuitive at first, as you’ll need to pass the yarn over and under the same warp thread multiple times. But trust me, the end result is well worth the initial adjustment. A few rows of rya loops can truly bring a woven piece to life.
I encourage you to follow along with my steps and give making these rya loops a try at home.