Starting Out With Clay: A Beginner’S Handbook
Clay is a type of fine-grained natural soil material that develops plasticity when mixed with the proper amount of water (Source 1). It contains minerals like kaolinite that allow it to be molded into shape and then hardened through heating. Clay has been used by humans for thousands of years to create pottery and ceramic objects.
The oldest evidence of clay usage dates back over 20,000 years to ancient China where it was used to create simple pots and sculptures (Source 2). Since then, clay has been an integral material for human civilization. Clay allowed early humans to store and transport food and water safely. It was also used in ancient religious rituals and ceremonies.
Clay became a vital technology that paved the way for more advanced human societies. Pottery created with clay enabled new methods for cooking food, storing grains, and fermenting beverages. Clay tablets were also used as an early form of writing in Mesopotamia and Egypt (Source 3).
Today, clay remains an important and extremely versatile material. It is valued for its plasticity, workability, and ability to be fired into ceramic at high temperatures. Clays come in many varieties, each with unique properties that make them suitable for different applications, from pottery to construction materials.
Types of Clay
There are several types of clay that are commonly used in pottery. The three main types are earthenware, stoneware, and porcelain. Each type has different properties and is suited for different uses.
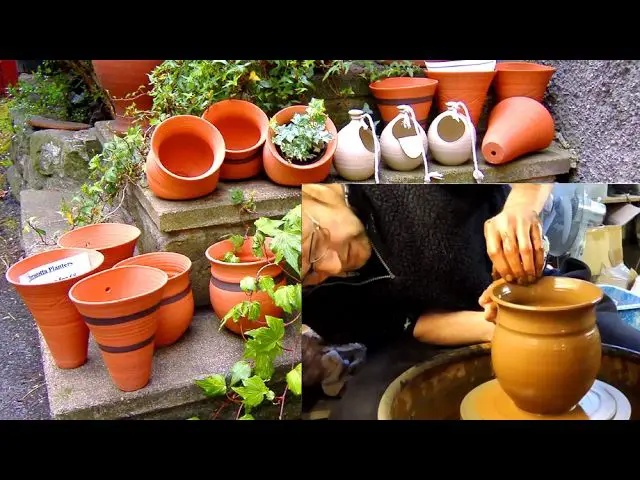
Earthenware is a soft, porous clay that fires at lower temperatures, typically between 1750°F – 2150°F. It can be easily scratched and is more fragile than stoneware and porcelain. Earthenware absorbs water and is not commonly used for functional wares. It’s better suited for decorative pieces and flower pots (https://thepotterywheel.com/types-of-clay-for-pottery/).
Stoneware is stronger and less porous than earthenware due to higher firing temperatures between 2200°F – 2400°F. It can hold water without leaking, making it suitable for mugs and other functional items. The clay has high plasticity and can be used for hand building or wheel throwing techniques (https://thepotterywheel.com/types-of-clay-for-pottery/).
Porcelain is the strongest type of pottery clay. It fires at very high temperatures up to 2648°F. The finished product is white, translucent, and highly vitrified. Porcelain has very low porosity, making it ideal for tableware and artware (https://thepotterywheel.com/types-of-clay-for-pottery/). However, it can be more challenging to work with than other clays.
Clay Tools
Having the right tools is essential for any beginner potter. Here are some of the basic tools you’ll need to get started:
Potter’s wheel – This spinning wheel allows you to center and shape clay into symmetrical forms. An essential tool for throwing pots and bowls. Consider an electric wheel versus a kick wheel for ease of use as a beginner (Fowler’s Clayworks).
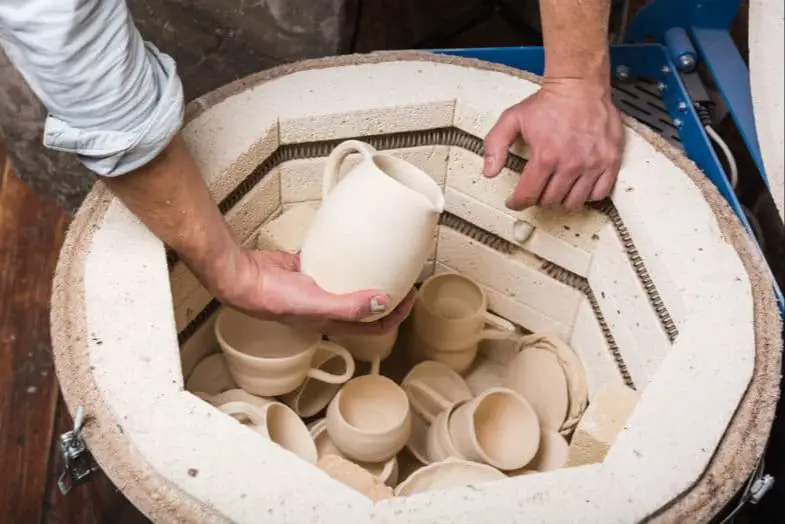
Kiln – Kilns fire clay to high temperatures to permanently harden and set the clay. You’ll need access to a kiln to properly finish your creations. Look for a small hobby kiln as a beginner (Susan Ohanlon Pottery).
Modeling tools – These wood and metal tools are used to shape, scrape, carve, and smooth soft clay. Basic tools include ribs, loops, sponges, knives, and various sculpting implements. Buy a starter set to get an assortment (Fowler’s Clayworks).
Cutting wires – Stainless steel wires are used to cleanly cut and trim slabs of soft clay. A pottery wire tool with wood or plastic handles is an essential starter tool.
Additional handy tools include sponges, towel, apron, calipers, and various sculpting and shaping implements. Consider buying tools individually or in starter sets aimed at beginners.
Preparing Clay
Properly preparing your clay is an important first step before starting any clay project. Clay straight from the bag often contains air bubbles and inconsistencies that need to be worked out through wedging or kneading. According to How to Prepare Clay for Pottery, “If your clay is so wet that it’s become liquid, the best way to prepare it for pottery is to spread it out on a plaster slab.”
The main goals when preparing clay are to achieve an even consistency throughout the clay and remove any air pockets. This is done through wedging and kneading techniques. Start by cutting off a workable amount of clay from the larger block. Then, on a clean surface, push into the clay and roll it away from you. Apply body weight and fold the clay back towards yourself. Repeat this wedging process, alternating directions, until the clay feels smooth and elastic. Avoid overworking the clay as too much wedging can introduce air bubbles.
The consistency of clay is a personal preference based on the project at hand. For handbuilding techniques, a thicker, drier clay is often desired. Wheel throwing requires a more pliable consistency. Test the prepared clay and continue wedging and kneading until the desired smoothness is reached. Allow time for the clay to rest before starting any projects.
Clay Handbuilding Techniques
Handbuilding with clay encompasses several techniques to manually form clay into different shapes and objects without the use of a pottery wheel. The three main handbuilding techniques are pinch pots, coils, and slabs.
Pinch Pots
Pinch pots are a simple handbuilding technique that involves pinching and pulling the clay to form a basic pot shape. To make a pinch pot, start with a ball of clay and press your thumb into the center, then pinch and pull the clay walls upward from the inside and outside. Pinch pots are one of the easiest ways to get started handbuilding with clay.
Coiling
The coiling technique involves rolling out and stacking coils of clay on top of each other to build up vessel forms. To make coils, roll clay into long sausage shapes. Start with a base disk of clay, then attach coils along the outer edge, blending each coil into the one below. Coiling allows you to gradually build taller, thinner pieces.
Slabs
Clay slabs are flat sheets that can be cut into shapes and joined to construct free-standing sculptures or hollow forms. To make slabs, roll out clay to an even thickness using a rolling pin. Let the clay firm up slightly, then cut shapes using templates. Score and slip the edges, then join slab pieces together. The slab technique is very versatile for making intricate shapes.
With practice and creativity, pinch pots, coils, and slabs allow for infinite possibilities handbuilding with clay! See this guide for more on getting started with clay handbuilding techniques.
Wheel Throwing Basics
Wheel throwing is a technique used to shape clay into symmetrical forms by spinning the clay on a pottery wheel. Getting started with wheel throwing requires learning the parts of the wheel, how to center the clay, open up the clay, and pull up the walls to create your form.
The main parts of the pottery wheel are the flywheel, wheel head, splash pan, and foot pedal. The flywheel spins the clay, the wheel head sits on top and holds the clay bat or ware board, the splash pan catches water dripping down, and the foot pedal controls the speed of the wheel rotation.
Centering the clay involves placing a ball of clay on the wheel head and using pressure between your hands and the clay to center it. Center the clay before opening it up. Use your thumbs to push straight down into the center of the clay to create an opening. Apply even pressure with your hands to push the clay downward and outwards to expand the opening.
Once the clay is centered with an opening, you can begin pulling up the walls. Place one hand inside the base of the cylinder and apply pressure outwards against the clay. Your other hand rests just outside the rim, slowly pulling the clay upwards with a pinching motion. Go slowly and evenly to raise the clay into an even cylindrical shape.
With practice of these basics, you’ll be able to center clay and throw even, symmetrical forms on the pottery wheel in no time. Check out this informative guide for more details on wheel throwing basics.
Drying and Firing
Proper drying is crucial to prevent cracking and ensure your finished pieces hold together. When working with clay, always start by wedging it to remove air pockets. For handbuilding, aim for an even, leather-hard consistency—soft enough to manipulate but firm enough to hold its shape. For throwing on the wheel, use a more plastic consistency with some slight stickiness.
After sculpting or throwing your clay pieces, allow them to air dry slowly at room temperature. Dramatic temperature changes can cause cracks as the clay dries. Place pieces on a heat-resistant surface, not directly on metal or stone. Cover with plastic wrap or a towel to slow moisture loss. Allow at least a few days up to a week for thorough drying time. Check for cracks and repair with slip before bisque firing. Refer to this guide for more tips on even drying.
The bisque firing prepares the clay before glazing by hardening the pieces at a relatively low temperature, around cone 04-06 (1800-2100°F). Use a kiln or pit fire method, heating slowly no faster than 200°F per hour. Bisque firing ensures your work won’t slump or melt when fired again at higher temperatures with glazes. After bisque firing, pieces are porous and ready for glazing.
Glaze firing hardens and seals the glaze surface on top of the bisque clay form. Use a kiln and heat to the temperature recommended for your specific glazes, generally between cone 6 and cone 10 (2200-2350°F). Heat at around 200°F per hour. The glaze melts and fuses with the clay body to create a glossy impermeable finish. With proper firing, your clay objects will be water-resistant and durable for years of use and enjoyment.
Glazing and Finishing
Glazes are vitreous coatings applied to bisqueware pottery to color, decorate, strengthen, and waterproof the clay surface before firing. There are many types of glazes to explore as a beginner including transparent, opaque, satin matte, and glossy glazes. Popular glaze options include celadon, temmoku, ash, porcelain, and crawling glazes. When shopping for glazes, look for premixed liquid glazes, dry glaze mixes, underglazes, overglazes, and specialty glazes like lusters and stains.
There are several techniques for applying glazes including dipping, pouring, brushing, and sponging. For dipping, fully submerge the bisqueware piece into the glaze bucket. For pouring, carefully pour glaze over the surface. Use soft bristle brushes to brush on glazes. Sponging involves dipping a sea sponge into glaze and dabbing onto the surface. Allow proper drying time between coats. Use wax resist or tape to create design elements. Remember to always follow manufacturer instructions for glaze application and firing.
In addition to glazing, there are many decorative finishing techniques to further enhance your pottery pieces. Try techniques like sgraffito where you scratch through layers of colored glazes to reveal patterns. Use underglazes,decals, stamps, or stencils prior to glazing for added design elements. Consider applying mother of pearl, gold, silver, or copper lustres over glazed surfaces. The options are endless when finishing your handmade clay creations!
According to https://www.classpop.com/magazine/glazing-pottery, key tips when glazing as a beginner include: test glaze combinations on bisqueware tiles first, apply glazes in thin, even coats, allow proper drying time between layers, and follow manufacturer instructions for firing glazed pieces.
Troubleshooting Common Issues
There are several common challenges that potters and ceramic artists face during the creation process. Some of the most frequent issues involve cracking, warping, and glaze errors.
Cracking
Cracks can occur during drying or firing due to uneven shrinkage of the clay. Sudden temperature changes, over-drying, or thermal shock are common causes of cracking (source). To prevent cracking, work in a consistent environment, allow adequate drying time, follow firing schedules, and avoid rapid cooling. Cracks can sometimes be repaired with adhesives or by filling them with slurry or mortar.
Warping
Warping happens when stresses build up unevenly in a clay piece leading it to bend or deform. The clay walls may become thinner or thicker in places. Factors like inconsistent throwing, improper drying, too-rapid firing, and overloading kiln shelves can cause warping. Allowing gradual drying, maintaining even walls, and firing at a slow ramp rate helps reduce warping (source).
Glaze Errors
Glaze defects like crawling, crazing, pitting, and shivering are often due to issues in glaze chemistry or application. Factors like thickness, clay body, firing temperature, and contamination can be causes. Test glazes thoroughly on the intended clay body and at the correct temperature range to avoid glaze errors (source). Careful mixing, application, and firing help prevent glaze mishaps.
Next Steps and Resources
Once you have developed your clay skills through practice and experimentation, there are many ways to take your pottery to the next level. Here are some recommendations for resources to further grow your ceramic arts journey:
Recommended Books
Reading books focused on techniques and processes can expand your knowledge on key pottery topics. Some top books for advancing skills include:
- Mastering the Potter’s Wheel: Techniques, Tips, and Tricks for Potters by Ben Carter (2016) – Focuses on expanding wheel throwing abilities.
- Simon Leach’s Pottery Handbook: A Comprehensive Guide to Throwing Beautiful, Functional Pots by Simon Leach (2012) – Features comprehensive guidance on all aspects of pottery.
- Practical Pottery by Jon Schmidt (2020) – Offers techniques and tips for mastering both wheel and handbuilding.
Online Resources
The internet provides a wealth of pottery information through videos, tutorials, forums and more. Useful online resources include:
- Ceramic Arts Network – Articles, videos and podcasts on ceramic topics https://ceramicartsnetwork.org/
- Clayflicks – YouTube channel with throwing demos and tips https://www.youtube.com/@clayflicks
- Reddit Pottery Community – Connect with other potters and get advice https://www.reddit.com/r/Pottery/
Classes & Clubs
Taking classes at local studios and joining ceramic clubs lets you learn from professional artists and other passionate potters. Check for options such as:
- Community college ceramic courses
- Workshops at art centers or pottery studios
- Local ceramic guilds or pottery co-ops