What Can I Make Easy With Clay Ideas?
Clay crafts have surged in popularity in recent years as an easy, fun DIY hobby. From simple clay magnets to elaborate clay sculptures, working with clay allows both kids and adults to express their creativity in a tactile, hands-on way. Clay is an incredibly versatile material that can be molded, shaped, textured, painted, and baked to create an endless array of fun and functional crafts. Best of all, clay crafts require minimal supplies, tools, skills and artistic experience. With just a few balls of clay, basic shaping tools, and some paint or glaze, anyone can create beautiful works of art from the comfort of home. The simple joy of molding and manipulating clay in your hands taps into a childlike wonder and sense of play. Plus, clay crafts provide a wide range of benefits related to creativity, fine motor skills, sensory stimulation, and mindfulness.
Basic Clay Shapes
The most basic and essential clay shapes to learn are balls, snakes, and pancakes. These simple forms are the foundation for making more complex clay creations.
To make a ball, simply roll the clay between your palms. Apply even and firm pressure as you roll so the ball remains smooth and rounded. The more you roll and compress the clay, the more dense and tightly formed the ball will become. Increase or decrease the size as desired.
For snakes, roll clay between your palms into a cylindrical rope shape. You can make snakes of various lengths and thicknesses. Snakes work great for adding details like arms, handles or textured patterns to other pieces.
To make a pancake or flat disc, press a ball of clay between your palms or roll it out evenly using a rolling pin on a flat surface. Adjust the amount of pressure to achieve the desired thinness. Pancakes make excellent bases for handmade beads, buttons or figurines.
Learning to make uniform and consistent balls, snakes, and pancakes from clay allows you to then assemble and combine shapes to create complex and creative works of art. For beginners, mastering these fundamental forms develops essential techniques and skills for future clay projects. Refer to this online clay course for tutorials on basic clay shapes.
Clay Magnets
Making your own clay magnets is an easy, fun DIY project. All you need is some modeling clay, magnetic strips, and acrylic paint or glitters to decorate them.
Start by conditioning your clay until soft and pliable. Roll pieces into basic shapes like circles, squares, hearts, stars etc. Make the shapes about 1/4-1/2 inch thick.
Cut your magnetic strip to size using scissors. Place the strip onto the back of the clay shape and firmly press it in the center.
Use acrylic paints to decorate the front side of your magnets. You can paint designs, add polka dots, stripes, or fully coat them in glitter. Get creative with colors and patterns!
Once decorated, bake the magnets according to the clay manufacturer’s instructions, usually around 130°C for 15 minutes. Allow to fully cool before handling.
The painted clay will now magnetically stick to refrigerators, lockers, and more! Make magnets for yourself or give them as gifts.
Clay Jewelry
Clay is a fun, inexpensive material to use for making jewelry. It’s easy to shape into beads, pendants, earrings and more. Polymer clay is especially popular for jewelry-making as it cures into a hard, durable finish after baking.
Some ideas for clay jewelry projects include:
- Sculpting clay beads in different shapes like rounds, cubes or tubes. Add texture by imprinting designs into the clay.
- Making colorful pendants by layering and mixing clays. Cut shapes with cookie cutters.
- Crafting clay charms like hearts, stars or animals. Make them tiny for charm bracelets.
- Rolling thin coils of clay for ring bands or chokers. Intertwine colors for patterned effects.
- Molding clay flowers, leaves or other nature-inspired shapes for earrings.
- Pressing faux gems or beads into clay to make jeweled pieces.
When baking polymer clay, follow package instructions carefully. Let jewelry pieces cool completely before wearing or applying finishes like glaze or varnish. With endless options for shaping,texturing and coloring, clay is one of the most versatile and enjoyable materials for DIY jewelry-making.
For more clay jewelry ideas and inspiration, check out: Pinterest – Easy Clay Jewelry
Clay Coasters
Clay coasters are one of the easiest items to make. Their small size and flat shape requires only basic clay skills. Some simple design ideas for clay coasters include:
- Shapes – Cut out geometric shapes like circles, squares or triangles to decorate the coaster surface. Overlap the shapes for interest.
- Patterns – Make patterns like stripes, zigzags, dots or waves using clay tools, cookie cutters or your fingers.
- Prints – Press items with texture like lace, leaves or coins into the clay to transfer the pattern.
- Textures – Roll the clay with a rolling pin to create fun textures. Try criss-cross, wavy or diagonal patterns.
Clay coasters can be left solid colored or painted with acrylics once baked for a pop of color. Add a protective sealant once paint has dried to protect the coaster. For inspiration, see these beautiful stamped clay coasters: https://www.pinterest.co.uk/pin/873487290204817622/
Simple shapes, patterns and textures make clay coasters easy, beginner-friendly projects. Let your creativity shine with these miniature canvases.
Clay Buttons
Making clay buttons is a fun and easy craft to do with air dry clay. Clay buttons can be used as decorative accents on clothing, bags, craft projects and more. Here are some tips for turning clay into unique buttons:
Start by rolling small balls of clay, slightly flattened, to make the button base shape. Add details by imprinting designs into the clay using household objects like bottle caps, straws, toothpicks, etc. Let the imprinted clay buttons dry completely according to package instructions.
Once dried, buttons can be painted in any color scheme using acrylic paints. Add dimension by layering paint colors.Outline buttons with a paint pen or metallic paint like gold or silver. Add further details like dots, stripes or doodles. Seal painted clay buttons with a acrylic varnish to protect the paint. Drill holes in the buttons before varnishing for attaching later with thread or string.
For inspiration, check out these colorful DIY Clay Buttons. With some clay, simple tools and acrylic paints, you can create unique decorative clay buttons for clothing and crafts.
Clay Figurines
Clay is a versatile medium that allows you to sculpt miniature clay figures of your favorite characters and subjects. Making small clay figurines and sculptures can be a fun way to turn lumps of clay into amusing little characters from your imagination.
Some ideas for easy clay figurines to make include:
– People – Sculpt simple clay heads, bodies, or full figures of people you know or fictional characters. Refine facial expressions and add details like hair or clothing.
– Animals – Make little cats, dogs, horses, or farm animals. Sculpt chubby pandas, silly giraffes, or majestic lions. Add details like eyes, tails, and textured fur or feathers.
– Fictional characters – Recreate characters from movies, books, cartoons, or video games through clay. Make cartoon characters, superheroes, princesses, action figures, or monsters.
– Mythical creatures – Sculpt dragons, unicorns, mermaids, fairies, wizards, and other fantasy subjects. Let your imagination run wild.
The great thing about clay is that if you don’t like your creation, you can simply mush it up and start over until you sculpt the perfect miniature clay figure. Start simple and don’t worry about perfection. The fun is in the creating.
Clay Plaques
Creating clay plaques is an easy and fun way to make personalized keepsakes, gifts, and wall decor. With some clay, tools, and creativity, you can inscribe words, names, quotes, and designs into clay plaques. Here’s how to make clay plaques with inscriptions:
To start, roll out an even slab of clay about 1/4 to 1/2 inch thick. Use a rolling pin on a flat surface to get a smooth, level shape. Cut the clay into plaque shapes using cookie cutters or a knife.
Next, use clay carving tools, toothpicks, chopsticks, or pencils to etch designs or write words into the clay. Work slowly and gently so you don’t tear the clay. Write in cursive or print, carving just deep enough to leave an impression. You can write names, initials, dates, quotes, and more.
Avoid thin lettering or tiny details that may get lost when baked. Decorate the edges with decorative stamps or soften them by smoothing with your fingers. Allow the clay plaques to dry completely before baking so the clay doesn’t warp.
Follow package directions for baking, then remove to cool completely. Once cooled, you can paint or seal the plaques if desired. Add a ribbon or hook to hang your finished clay plaque as meaningful wall art or give as a heartfelt gift.
Clay Bowls
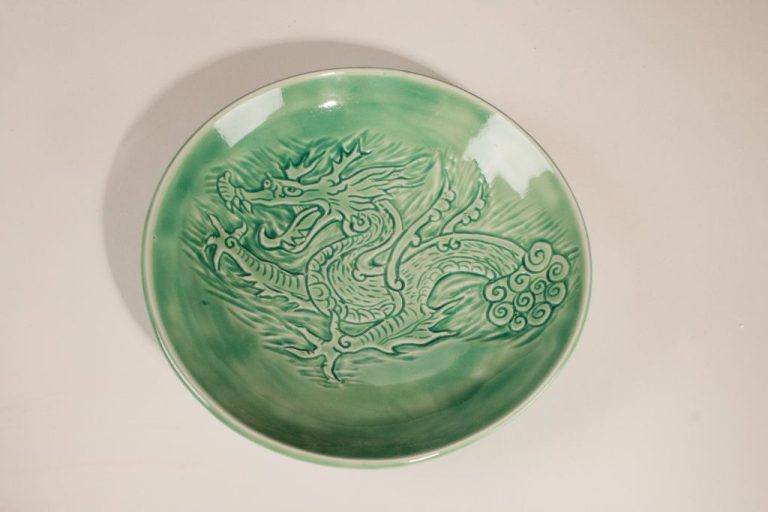
Clay is the perfect material for crafting bowls, cups, and plates using simple techniques. Coil building is an easy method where you roll clay into long ropes, or coils, then stack them to form the sides of a bowl. Pinching is another technique where you press your thumb into a ball of clay to make a bowl shape. Slabs are flat pieces of clay that you can drape over a mold to create smooth bowls and curved plates.
When making bowls, it’s important to score and slip the seams where coils or slabs meet. This ensures a good bond so pieces don’t separate when drying and firing. Bowls also need an even thickness to avoid cracking and warping. Add decorative elements like stamps, texture, or cut outs for visual interest. Glazing completes the bowl with color and a smooth, watertight finish. With simple techniques like coiling, pinching, and slabbing, clay is an accessible material for DIY bowls and tableware.
For inspiration on shaping clay bowls, see this tutorial on coil bowls from The Art Teacher: [url removed]
Conclusion
Clay is such a fun and versatile material for beginner crafters. From simple clay magnets to decorative clay buttons, there are tons of easy clay craft ideas to try. Some of the easiest clay crafts covered in this article include clay jewelry, clay bowls, clay plaques, and clay figurines.
Clay is an extremely forgiving material, so don’t be afraid to get creative and try making your own unique clay crafts. Add paints, beads, seashells, or any other embellishments you like to personalize your clay creations. We hope this article has inspired you to try your hand at some fun and easy DIY clay crafts!


