What Can You Make With Fused Glass?
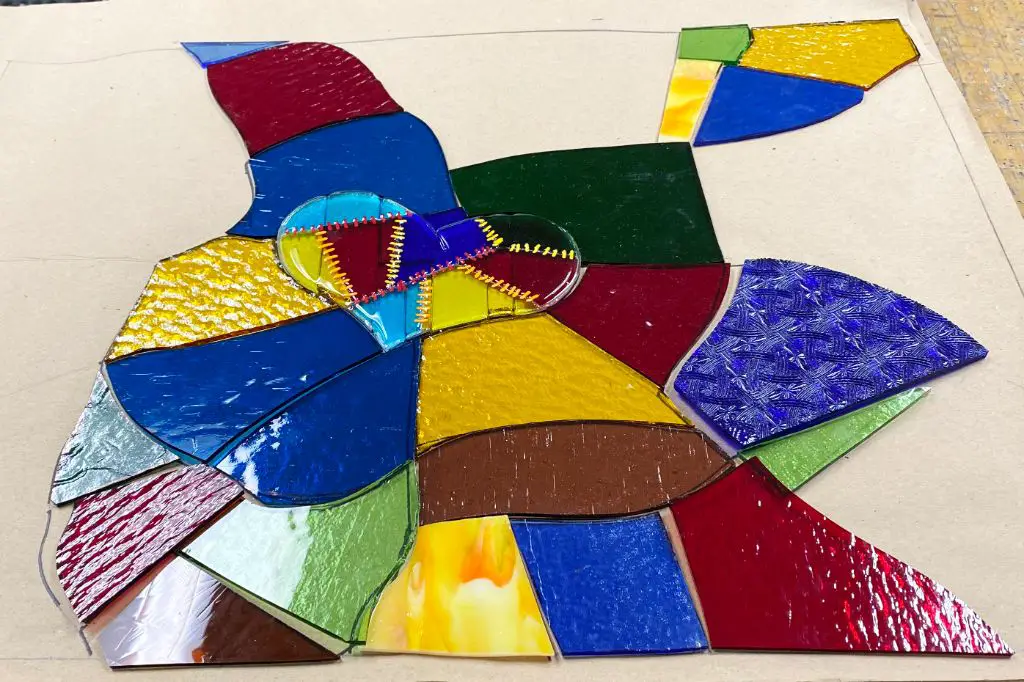
Fused glass is a type of art glass created by fusing pieces of colored glass together in a kiln. The glass is heated just enough to tack the pieces together without completely melting them into one piece. This allows the individual colors and textures to remain somewhat distinct while creating a cohesive whole. Fusing can create two-dimensional panels or three-dimensional sculptures.
The basic process involves arranging pieces of glass in a design, then firing them in a kiln. The initial firing, known as a tack fuse, heats the glass to around 1482°F. This causes the glass pieces to stick together just enough to maintain the design’s integrity. Further firings at higher temperatures result in a more thoroughly fused piece. Other techniques like slumping over a mold or adding powders, stringers, or frit can create more complex effects.
The origins of fused glass date back over 3,500 years to ancient Egypt. Glass artisans along the Nile River discovered that heating glass could shape and adhere it (1). The ancient Romans later innovated new glassworking techniques, with fused glass mosaic tiles found in Pompeii and other Roman sites. Over the centuries, stained glass artisans continued to experiment with fusing techniques. But fused glass emerged as its own art form in the 20th century, pioneered by artists like Erwin Eisch (2). Today it remains a popular medium with glass artists and hobbyists alike.
(1) https://houseofuglyfish.com/history-of-fused-glass-art/
(2) https://fusiologyglassart.sumupstore.com/
Types of Glass Used
There are two main types of glass used for fusing projects: COE90 and COE96 glass. As explained by The Fusing Shop, “COE stands for Coefficient of Expansion, which refers to the rate at which glass expands when heated and contracts when cooled” (https://thefusingshop.com/glass-fusing). COE90 and COE96 glass have similar expansion rates, allowing them to be combined in fusing projects.
COE90 glass is often used for small items like jewelry or coasters. According to Rainbow Art Glass, COE90 glass is “durable, chemical resistant and can withstand thermal shock” (https://www.rainbowartglass.net/home/glassfusing). It is available in a wide variety of colors and textures.
COE96 glass is commonly used for larger fused glass projects like plates, bowls and wall art. As explained by The Fusing Shop, COE96 glass “flows better at fusing temperatures allowing more unique shaping and draping options.” It also comes in many colors, transparencies and finishes for creative projects.
Equipment Needed
To get started with fused glass, there are some essential pieces of equipment you’ll need. The most important is a kiln – this is an oven that can reach the high temperatures required to fuse glass together. You’ll want a kiln designed specifically for glass fusing, which can reach a temperature of at least 1500°F. There are many kiln brands and models to choose from, such as Paragon, Skutt, and Olympic. Consider size, interior depth, and features like a digital controller. A good starter size is around 12″ x 12″ x 10″ deep.
You’ll also need a glass cutter to cut glass pieces to size before fusing. Glass cutters have small wheels and score lines in the glass surface. Then the glass can be snapped cleanly along the score line. A carbide glass cutter is a durable and sharp option. Other useful tools include grippers to hold the glass while cutting, and a fiberglass board for a smooth cutting surface.
Finally, invest in some safety equipment – at a minimum wear safety glasses to protect your eyes from glass shards, and consider an apron and heat-resistant gloves. Proper ventilation around the kiln is also important. Refer to the following articles for recommendations on setting up a glass fusing studio with the right equipment:
[https://www.hazelrockhouse.com/how-to-set-up-a-fused-glass-studio-fused-glass-equipment/]
[https://www.pinterest.co.uk/pin/how-to-set-up-a-fused-glass-studio-fused-glass-equipment–401594491774389220/]
Techniques and Processes
There are several key techniques and processes involved in creating fused glass projects. Proper cutting of the glass is crucial to get clean edges and precise shapes. According to sources, some important steps when cutting glass include using the right glass cutter, applying even pressure, and sometimes using glass nippers for small details or interior cutouts [1]. The glass pieces can then be arranged on the kiln shelf in the desired design.
The fusing process itself involves heating the glass in a kiln to high temperatures so the pieces fuse together. Firing schedules vary, but typically the glass is taken up to around 1500°F. Firing too quickly can cause cracks or breaks, so proper ramp up and cool down rates must be followed. The glass softens and forms a homogenous mass upon heating. The firing process allows the colors to blend and fuse based on the coefficient of expansion of each type of glass used [2].
Some other techniques like slumping or tack fusing may require slightly different firing approaches. But the basic principles of careful glass cutting, design arrangement, and proper kiln firing are core to most fused glass projects.
Beginner Fused Glass Projects
Making beautiful fused glass projects is easier than you think, even for beginners. Here are some of the most popular starter projects to try with minimal equipment and skills required:
Coasters
Coasters make for great beginner fused glass projects. They are small, simple shapes that can be decorated with scraps of colored glass, stringers, frit, and more. To make fused glass coasters, cut glass pieces into a 4-5 inch square, layer them in your desired pattern, then fuse according to the glass manufacturer’s instructions. Add some rubber feet on the bottom, and you’ve got some stylish custom drink coasters!
For inspiration, see this example of stained glass coasters: https://www.pinterest.com/pin/222576406574108866/
Magnets
Small fused glass magnets are another easy project for beginners to start with. Simply cut colored glass into the desired magnet shape, layer pieces, and fuse. Then glue a magnet backing onto each piece. Make a few to decorate refrigerators, filing cabinets, and more. Here’s an example of how to make stained glass magnets: https://www.pinterest.com/pin/222576406573175338/
Sun Catchers
Fused glass sun catchers allow you to get creative with shapes, textures, and colors. Cut colored glass into fun designs like flowers, birds, or abstract patters. String a hanging loop before fusing so the piece can dangle in a window. The light shining through a finished sun catcher makes for beautiful effects. For inspiration, check out: https://www.pinterest.com/pin/222576406573687168/
Jewelry Pendants
For beginners looking to make wearable art, fused glass pendants are a great starter jewelry project. Simply cut a small piece of glass into your preferred shape, drill a hole before fusing, add a loop or bail, and attach to a cord. Here is an example of a stained glass pendant using stringers: https://www.pinterest.com/pin/222576406574108815/
Intermediate Fused Glass Projects
Once you have mastered the basics of fused glass through beginner projects, you can move on to more intermediate works to continue honing your skills. Some popular intermediate fused glass projects include bowls, plates, vases, and boxes.
Bowls and plates are great intermediate projects because they allow you to practice shaping and molding glass through slumping. You can create simple round bowls or more unique shaped bowls. Plates can be rounded or have straight edges. Experiment with layering colors and patterns in your bowls and plates.
Handcrafted fused glass vases make wonderful gifts. At the intermediate level, consider square or rectangular slab vases. These allow you to fuse a flat piece of glass and then shape it into a 3D vase form through slumping. You can create stunning designs on the exterior of the vase.
Boxes and lidded containers are intermediate projects that incorporate another fused glass technique called tack fusing. This partially fuses the glass together while retaining its shape. Construct the box pieces out of tack fused glass and then adhere them together with glue or frit. Decorate the box with your unique patterns and designs.
As you take on these intermediate projects, don’t be afraid to experiment and put your own creative spin on traditional pieces. Continually challenge yourself to take your fused glass abilities to the next level.
Advanced Fused Glass Projects
For those with more experience working with fused glass, there are many exciting advanced projects to consider. Some popular advanced fused glass projects include:
Sculptures – Fused glass sculptures allow for immense creativity, as glass can be shaped and molded into 3D artworks. Glass sculptures may depict abstract shapes and forms or more concrete representations of people, animals, and objects. Sculptures often incorporate multiple glass pieces fused together.
Wall art – One of the most common uses for fused glass is stunning wall art, from abstract designs to landscapes. For more advanced wall hangings, artists can use techniques like tack fusing, slumping, draping, etching, and sandblasting to create textures and dimensional effects.
Lampshades – Fused glass lampshades bathe a room in color and artistry. Advanced lampshade projects may use more intricate patterns, textures, and shaping techniques. The glass pieces can be fused onto a metal framework. As seen here, examples include Tiffany-style lampshades with nature motifs.
Mirrors – Fused glass mirrors add an artistic flair to any space. Advanced techniques like tack fusing, etching, and sandblasting allow for intricate mirror designs. The glass can be fused to the mirror’s surface or used as a frame surrounding the mirror.
The possibilities for innovative fused glass art are endless. With practice and mastery of advanced techniques, fused glass artists can bring their creative visions to life through one-of-a-kind sculptures, wall art, lampshades, mirrors, and more.
Tips and Tricks
Avoiding cracks during the firing process is one of the most common challenges for beginner fused glass artists. According to experts at Glacial Art Glass (https://www.glacialartglass.com/pages/tips-and-tutorials), controlling the rate of temperature increase and decrease is key. Raising the kiln temperature too quickly can result in cracks due to thermal shock. Allowing proper annealing time for the glass to cool down slowly after firing is also essential.
Achieving smooth finishes starts with proper glass cutting and grinding. According to fused glass tutorials on Pinterest (https://www.pinterest.com/debrawakefield/fused-glass-tips-and-techniques/), it’s important to have quality glass cutting tools and use proper techniques. Grinding edges smooth with a diamond pad and washing away glass dust ensures proper fusing. Using kiln paper or shelf primer also helps prevent rough textures.
Troubleshooting issues like bubbles, scratches, and warping requires an understanding of firing schedules and glass properties according to experts (https://www.youtube.com/playlist?list=PLTPwdrShWAOvVKK5emBo_f9l4AvjiVlSv). Adjusting temperature ramp speeds, annealing times, glass thickness and compatibility can help overcome common problems.
Safety Considerations
Working with glass requires taking proper safety precautions. Three key areas to focus on are proper ventilation, handling broken glass, and kiln safety.
Proper ventilation is crucial when working with glass. The fumes released when melting glass can be dangerous if inhaled, so using a vent hood or working outside is recommended. Wearing a respirator is also advised.
Broken glass can easily cut skin, so wearing protective gloves and clothing is a must. Carefully clean up any broken glass right away and dispose of it properly to avoid injury. Be especially careful when removing items from the kiln, as rapid temperature changes can cause breakage.
Kiln safety entails keeping the kiln area clear and free of combustibles. Ensure the kiln has proper ventilation and do not leave it unattended when firing. Allow sufficient time for cooling before accessing the interior. Kilns can become extremely hot and cause severe burns if touched when firing, so use extreme caution.
By following basic safety practices in these areas, glass fusing can be an enjoyable and hazard-free activity.
—–
Conclusion
In summary, there are a wide variety of items that can be made through fused glass techniques, from jewelry and household decorations to larger art pieces. The process allows for immense creativity, as glass can be combined in infinite ways to produce unique effects. The basic techniques are also relatively accessible even for beginners to explore. With some basic equipment and safety precautions, fused glass provides an engaging artistic medium open to crafters of all levels.
As we’ve explored, fused glass allows makers to create elegant artworks, personalized gifts, and distinctive home decor ranging from coasters to entire window panels. Even those without much prior glass experience can begin by making simple pendants, dishes, or garden stones with pre-cut glass pieces. For intermediate to advanced crafters, more complex multi-layered bowls, platters, lamps, and wall art can be constructed through careful glasscutting and firing processes. The possibilities are endless.
The beautiful effects achieved through precise glass selection, arrangement, and melting techniques make fused glass a beloved and satisfying craft. With proper safety measures and some creativity, both devoted artists and casual crafters can find enjoyment in heating and shaping glass into imaginative new forms. Fused glass provides an accessible entrypoint to working with glass that opens up a world of artistic potential.
—–

