What Can You Make With Modeling Clay?
Modeling clay is a versatile material that has been used for creative expression and fun for thousands of years. The earliest known figurines made from clay date back to 24,000 BCE. Ancient cultures around the world shaped clay into statues, dishes, and decorations. Modeling clay continues to be a popular artistic medium today thanks to its malleability, bright colors, and non-toxic composition.
Modern modeling clay is made from a non-hardening oil-based compound, usually a mixture of waxes, colorants, fillers, and softeners. It has a smooth, doughy texture that is easy to shape by hand. Modeling clay does not harden when exposed to air and retains its consistency. Unlike natural clays like potter’s clay, modeling clay can be reused again and again which makes it a fun, creative material for artists of all ages.
Types of Modeling Clay
There are several types of modeling clay, each with their own characteristics and uses. Some of the main types include:
Oil-based clay – Made from petroleum and mineral oils, oil-based clays like Plastalina and Roma Plastalina keep their workability and never fully harden. However, they can leave oily residue on hands and surfaces (Source).
Polymer clay – Made of PVC resins, liquid plasticizers, and pigments, polymer clays like Sculpey and FIMO harden when baked in a regular oven. They come in a wide variety of colors and enable fine detailing for jewelry, miniatures, and more (Source).
Homemade clay – Recipes combining ingredients like flour, salt, cream of tartar, and oil can create air-dry modeling clay. While inexpensive and safe, homemade clay is less durable and takes longer to harden.
Water-based clay – Clays like Crayola’s Model Magic are made of cornstarch, glue, and other additives. They air-dry smoothly and retain vivid colors, but may become brittle over time.
Tools and Supplies
When working with modeling clay, having the right tools and supplies can make the process easier and help you create higher quality projects. Here are some of the basic tools and supplies you’ll want to have on hand:
Hands – Your own hands are the most important clay shaping tools you have. Using your fingers allows you to really feel and manipulate the clay.
Clay tools – While hands work well, dedicated clay tools allow for more intricate detailing and consistency. Basic clay tools include loop tools, knives, sculpting tools, texture tools, cutters, and rollers. Florida adviser
Work surface – Choose a smooth, non-stick surface like glass, marble, or plastic for rolling out and working with clay. This prevents the clay from sticking and makes cleaning up easier.
Storage – Modeling clay dries out quickly when exposed to air. Store unused clay in an airtight container or bag to maintain pliability between projects.
Making Simple Shapes
Modeling clay is very versatile, and can be shaped into all kinds of simple forms. Here are some of the basic shapes you can make:
Coils
Roll pieces of clay between your hands or against a flat surface to create long coil shapes. Coils can be used to make rings, bracelets, bowls, vases, and more. Pinch the ends together to form loops or attach multiple coils together.
Balls
Roll clay between your palms or use a roller to make smooth, rounded balls. Balls are great for making beads, eyes, noses, and round decorative details. You can stack balls to make snowmen or creatures too.
Pinch Pots
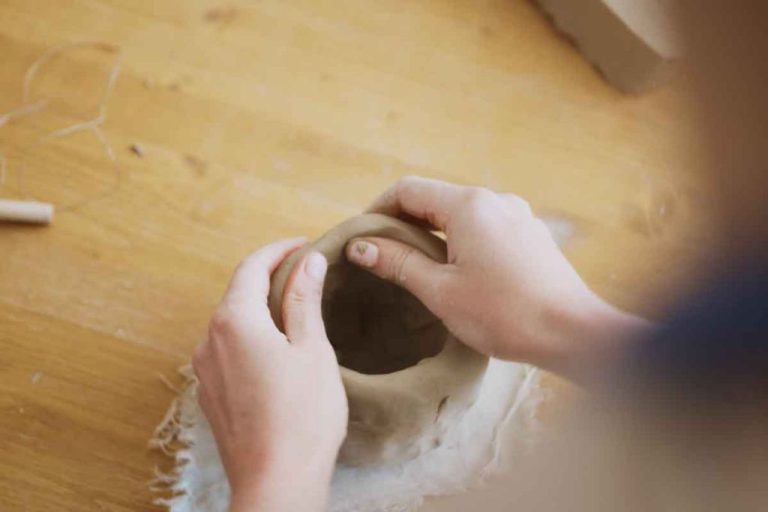
Start with a ball of clay and pinch around the edges while rotating to form a basic pot shape. Poke your thumbs in the center to hollow out the inside. Pinch pots are easy to make and good for beginning modelers.
Slabs
Roll out a flat, even sheet of clay using a rolling pin over a smooth surface. Cut shapes out of the slab using cookie cutters or a knife. Or drape slabs over molds to make bowls, vases and other objects. Let slabs air dry partially before handling.
Sculpting Figures
One of the most popular subjects for sculpting figures with modeling clay are people, animals, and fictional creatures. Sculpting figures takes practice, but with the right techniques, even beginners can create impressive works of art.
When sculpting people or animals, it’s important to first sketch the basic body shapes and proportions before adding details. Look at photos or anatomy references to understand how the muscles and bones fit together. Start with larger masses of clay for the main body sections like the torso, head, limbs etc. Then slowly refine the shapes and add smaller details like eyes, nose, fingers (1).
Use clay sculpting tools like loop tools and rubber shapers to smooth surfaces and create textures like fur or scales on creatures. Add clay ropes or balls for features like tails or ears. Bake polymer clay figures in a low temperature oven to harden them when finished (2).
Sculpting figures takes patience but allows for lots of creativity. Try making cartoon characters, mythical beasts, or your own unique creatures. Capture people and pets in fun poses. With practice over time, you can create amazing, lifelike figures from clay.
(1) “Sculpting Figures with Clay for Beginners.” TikTok, 25 Jun. 2023, https://www.tiktok.com/discover/sculpting-figures-with-clay
(2) “[Help] Youtube Sculpting Channels for Newbies?” Reddit, 5 Jul. 2019, https://www.reddit.com/r/Sculpture/comments/cjz883/help_youtube_sculpting_channels_for_newbies/
Building Miniatures
One of the most popular uses for modeling clay is to build miniature versions of everyday objects. This allows for creativity and fun without needing a large amount of clay or space. Some ideas for miniatures made from modeling clay include:
Cars – Modeling clay can be shaped and molded to create miniature model cars. Details like wheels, windows, and accessories can be added. Model cars made from clay allow for customization in paint colors and designs (Source).
Houses – Clay is an ideal material for crafting tiny model homes. Walls, roofs, chimneys, and other architectural features can be sculpted from clay. Different styles like beach houses or log cabins can be modeled (Source).
Furniture – Miniature clay furniture like couches, chairs, tables, and more can be made to furnish model houses. Details can be added like legs, arms, cushions, and drawers (Source).
Creating miniature models and scenes from clay allows for creativity on a small scale. Fine details can be sculpted to make realistic looking miniatures.
Creating Jewelry
Making jewelry with polymer clay is a fun and creative way to produce unique, handmade accessories. Polymer clay is an excellent material for crafting jewelry pieces like beads, pendants, rings, earrings, and more.
To make beads, you can simply roll pieces of conditioned clay into the desired shapes and sizes. Let the beads bake according to package directions to harden them before stringing. Adding patterns, textures, and colors creates visually interesting beads. You can also embed other materials like beads, charms, or sequins into the clay beads before baking for further decoration.
Pendants can be crafted by flattening clay and using cookie cutters or freehand tools to cut shapes. Imprint designs into the clay or layer colors and patterns. Attach a finding or bail with jump rings after baking to turn a polymer clay pendant into a necklace or bracelet charm. According to the article “33 Polymer Clay Jewelry Ideas – Best of the Best” on the Treasurie blog https://blog.treasurie.com/polymer-clay-jewelry-ideas/, pendants can also be modeled in 3D using sculpting techniques.
To make rings, roll ropes of clay and cut them to size. Twist together strands of different colors to form patterned bands. For adjustable rings, attach the cut rope ends with liquid clay. Once baked, rings can be sanded smooth and polished. The book “How to Make Polymer Clay Jewelry Projects Using New Techniques” also provides tips for successfully crafting rings with polymer clay https://www.amazon.com/Polymer-Clay-Art-Jewelry-Techniques/dp/1440235171.
Making Home Decor
Modeling clay is a fun and creative way to make beautiful home decor items like bowls, vases, and wall hangings. With just a few simple tools and some clay, you can craft elegant decorative pieces to display around your home.
Clay bowls are easy to make and can be customized in endless ways. Roll out a flat slab of clay and use a bowl, cup, or other circular object to trace a shape. Cut around the edges with a craft knife or clay cutter. Then simply curl the edges up slightly to form the sides of the bowl. Add decorative elements like ridges, patterns, textures, or cut-outs. Bake according to package directions.
For vases, roll coils or slabs of clay and attach them to form the basic vase shape. Smooth the coils together and refine the shape as desired – tall and thin, short and curved, or anything in between. Consider making a matching lid. Add interest by imprinting designs, attaching cut-out shapes, or painting when dry.
Wall hangings can be made by layering thin rolled sheets and pieces of clay to create abstract artwork. Cut clay into geometric patterns or nature shapes. Use cookie cutters or stencils to make repeating motifs. Add hanging holes before baking so your creation can be mounted and displayed.
The possibilities are endless when making home decor items out of modeling clay. Let your imagination run wild to create statement pieces that show off your personal style.
DIY Clay Projects
Modeling clay is wonderful for little hands to make fun crafts and imaginative DIY projects. Some popular clay projects are homemade ornaments, magnets, and games.
Kids can get creative making holiday ornaments out of clay. Simple shapes like balls or stars can be painted and decorated. Clay ornaments make great homemade gifts. Dip the finished ornament in liquid clay or clear glaze to give it a smooth, shiny finish.
Refrigerator magnets are another classic clay craft. Roll the clay flat and cut into shapes using cookie cutters. Bake the shapes according to package directions. Glue a magnet onto the back when cool. Make alphabet letters, animals, or Pokémon characters.
Clay can also be used to create DIY board games. Make game pieces like checkers or chess pawns by sculpting and baking small clay shapes. Roll flat slabs of clay to make game boards, impression mats, or playing cards. Get creative dreaming up your own clay board game.
With just a little clay, kids can sculpt and build an endless variety of fun and colorful projects. Clay crafts encourage creativity, fine motor skills, and hands-on learning. From ornaments to magnets to games, clay offers many possibilities for DIY projects.
Tips and Tricks
When working with modeling clay, there are some useful tips and tricks to help create smooth finishes and durable sculptures. Here are some key techniques for working with clay:
To smooth clay and eliminate fingerprints, use a drop of rubbing alcohol on your fingertips. Gently rub the clay, blending away imperfections. Let dry before continuing to work (Source).
When joining two pieces of clay, scrape away a thin layer from both sections first. Apply a drop of liquid clay or diluent, then press the pieces together firmly. Let dry completely for the strongest bond (Source).
Before baking polymer clay, check the manufacturer’s instructions for curing times and temperatures. Under-baked clay will be sticky, while over-baked clay can scorch. Allow sculptures to cool fully before handling to prevent damage.
Give clay creations a finished look by sanding, buffing, or applying acrylic paints or varnishes. Start with coarse sandpaper and work up to finer grits for a smooth surface. Remove dust before finishing or painting.


