What Clay Do You Use For Hand Building?
Handbuilding with clay refers to shaping clay using only your hands and simple tools, without the use of a pottery wheel. It is one of the oldest and most accessible clay working techniques. Handbuilding allows for lots of creativity and experimentation with texture, form, and surface decoration.
Some of the most popular clays for handbuilding are low-fire earthenware clays, mid-range stoneware clays, and porcelain. Earthenware clays are very soft, smooth, and moist, making them ideal for handbuilding. Stoneware clays are stronger and densier, allowing for more detailed shaping. Porcelain is smooth, fine, and responsive for refined handbuilt work.
Properties of Clay
Clay has several important properties that make it suitable for handbuilding pottery and ceramics. These include plasticity, smoothness, absorbency, drying time, and strength. The most critical property is plasticity, which refers to the ability of clay to be shaped or molded without cracking or crumbling.
Plasticity is greatly affected by the amount of water mixed into the clay. Adding water lubricates the clay particles so they can slide over each other when manipulated. Highly plastic clays, like many earthenware and stoneware bodies, take water well and become very smooth and flexible when wet. This makes them ideal for handbuilding techniques like pinching, coiling, and slab rolling.
The smoothness and overall texture of clay also impacts its suitability for handbuilding. Very smooth, refined clays are easier to manipulate by hand without adding water. However, coarse clays with natural grog, sand, or fiber may provide greater strength when building larger pieces.
Absorbency determines how quickly clay dries. Porous, open clays absorb water faster and dry more quickly. Dense, tightly packed clays take longer to dry evenly. Slow, even drying is important to prevent cracking and warping when handbuilding.
Finding the right balance of properties allows handbuilders to shape clay effectively while minimizing cracking and drying issues. Test firing clay to the intended temperature also reveals how much it shrinks and its finished strength.
Low-fire Clays
Low-fire clays, also known as earthenware clays, mature at lower temperatures typically below 2,200°F (cone 04). Earthenware clays are some of the most popular for handbuilding because they are smooth, versatile, and easy to work with. Some common types of low-fire clays good for handbuilding include:
Earthenware – A basic clay that fires up to cone 04/05. It has good plasticity making it easy to wedge and shape. Earthenware comes in a wide range of colors like red, brown, buff, and gray. Red earthenware is one of the most popular clays for handbuilding.[1]
Terracotta – A type of earthenware clay that fires to a red-orange color. Terracotta has high plasticity and red firing color that makes it ideal for sculpting and handbuilding. It can be left unglazed.[2]
Redart – A versatile, red-firing clay by Clay Art Center that is smooth and easy to handbuild with. It has good dry strength and fires from cone 04-6. Redart works well for creating pottery, sculptures, tiles, and functional pieces.[3]
Mid-range Fire Clays
Mid-range fire clays are very versatile and a popular choice for handbuilding. These clays fire between cone 4 and cone 7 at temperatures between 1945°F – 2282°F. The two main types of mid-range fire clays are stoneware and porcelain.
Stoneware is one of the most common clays used for handbuilding. According to Best Clay for Handbuilding – Tips on Choosing Pottery Clay, stoneware is an excellent choice because it is strong, durable, and easy to handbuild with. Stoneware becomes vitreous and water-tight at mid-range temperatures. It exhibits moderate shrinkage and can be smooth or textured. Popular mid-range stoneware clays include Laguna’s WC-400, Highwater’s NC-4, and Standard’s 211.
Porcelain is a mid-range clay that fires to a bright white color. It is less plastic than stoneware but very strong when fired. Porcelains are made of kaolin clay and become fully vitrified and non-porous around cone 6. According to Clay Reference Guide, porcelains are ideal for handbuilding delicate forms that require strength. Common mid-range porcelain clays are Laguna’s Babu Porcelain and Highwater’s Porc-4.
High-fire Clays
High-fire clays are typically fired between cone 8 and cone 10 (2232°F – 2381°F). The high temperatures make them extremely strong and durable. Two common types of high-fire clays used in handbuilding are porcelain and specialty clays like raku.
Porcelain is highly prized for its white color and translucency after firing. It can be challenging to work with as it’s less plastic than other clays. However, it becomes very strong when fired to maturity. Porcelain is ideal for intricate handbuilt sculptures and functional ware. Some good porcelain clays for handbuilding include Sheffield Brown Porcelain and Grolleg Porcelain.
Specialty clays like raku are formulated for specific firing techniques. Raku is low-fired in a hot kiln then removed and cooled rapidly to produce unique crackled glaze effects. While notoriously temperamental, raku can produce stunning artistic results. Some clays suited to raku handbuilding include Laguna Raku Clay and Sheffield Raku.
Clay Bodies
There are a variety of clay bodies to choose from for handbuilding that have different properties and firing temperatures. Two of the main categories are pre-mixed clays and custom clay recipes.
Pre-mixed clays offer convenience and consistent results. Many potters recommend using stoneware or earthenware with grog added for handbuilding. Some popular pre-mixed options include:
- Amaco White Stoneware Clay No. 38 (https://potterycrafters.com/best-pottery-clay-for-beginners/)
- Laguna B-Mix (https://thepotterywheel.com/best-clay-for-handbuilding-pottery/)
- Amaco Moist Stoneware Clay (https://potterycrafters.com/best-pottery-clay-for-beginners/)
Mixing your own custom clay recipe allows you to control the properties. A standard starting recipe is 50% clay, 25% pottery plaster and 25% grog. You can adjust the amounts of each to achieve your desired plasticity, dry strength, shrinkage and more. Custom recipes take more effort but let you fine tune the clay to your preferences.
Considerations
When choosing clay for handbuilding pottery, there are several key factors to consider:
Desired finished look – The type of clay body impacts the final appearance. Porcelain has a smooth, white finish while stoneware can have more texture. Consider whether you want a matte or glossy surface after firing.
Firing temperature – Low-fire clays like earthenware are fired at lower temps (up to 2,200°F) while stoneware requires higher temps (2,200-2,400°F). Make sure your clay matches your kiln’s capabilities. As referenced from https://potterycrafters.com/best-pottery-clay-for-beginners/
Cost – Some specialized clay bodies are more expensive. For beginners, an affordable clay like stoneware is recommended until you refine your skills. Consider how much clay you anticipate using for your projects.
Availability – Common clays like stoneware and porcelain are widely available. Rare or specialty clays may need to be special ordered. Check with local ceramic suppliers or online retailers about availability.
Tips for Handling Clay
Proper handling of clay is crucial for successful handbuilding. Here are some tips:
Clay needs to be kept moist during handbuilding to prevent cracking and ensure it remains malleable. Wrap unused clay in plastic bags or damp cloths. While working, cover unfired pieces with plastic when not being handled. If clay starts to dry out, spritz lightly with water or olive oil. Always keep clay covered and work quickly to avoid excessive drying.
To avoid cracks, handle clay as little as possible and with care. Don’t knead or wedge clay more than necessary. Smooth clay by pressing gently instead of pulling or dragging. Pay attention to attachments between pieces – score and slip well to bind sections firmly.
Work on a smooth, nonporous surface like canvas or drywall to prevent clay from sticking. Avoid working directly on wood or metal. Cover your work area to keep it clean and dust-free. Use slip trailing bottles instead of brushes for slip. Clean tools after each use.
Proper clay handling requires patience but makes the handbuilding process easier and prevents frustrating breakage or cracks.
Sources:
Shaping Techniques
There are three main techniques for shaping clay by hand: pinching, coiling, and slab building. Each technique allows the clay artist to create unique forms.
Pinching
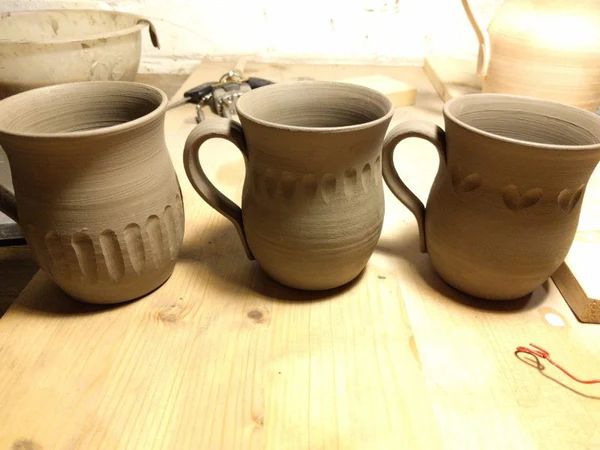
Pinching is one of the most basic handbuilding techniques. It involves taking a ball of clay and pinching it between the fingers and thumb to form different shapes like bowls, cups, and vases (The Crucible). Pinch pots have a simple, organic look with finger indentations and uneven sides. To create pinch pots, start with a ball of clay and push your thumb into the center while pinching the sides upward. Rotate the clay and continue pinching until you achieve the desired shape.
Coiling
The coil technique involves rolling out “snakes” of clay into coils and then stacking or connecting the coils to build up forms (Lakeside Pottery). Coils can be used to create bowls, vases, cups, and more. To make coils, roll clay between your palms or use a slab roller. Stack coils on top of each other, smoothing and blending between layers. Coiling creates ceramics with visible spiral seams.
Slab Building
Slab building involves rolling out flat “slabs” of clay and then cutting shapes that can be assembled into sculptural or functional works. Slabs can be stacked, folded, and joined to create almost any form. To make slabs, use a rolling pin or slab roller to flatten clay to an even thickness. Let slabs stiffen slightly before cutting shapes with wire, knives, or cookie cutters. Score and slip slab edges before joining.
Conclusion
When choosing a clay for hand building, it’s important to consider the clay’s properties, intended firing temperature, and your desired outcomes. Low-fire clays like earthenware are porous, soft, and suitable for items like tiles or pots. Mid-range stoneware clays are stronger, denser, and good for functional pieces. High-fire porcelains are extremely strong and can be thinly rolled, but require higher temperatures. Many clays are sold as premade clay bodies that specify properties and intended firing range. It’s also possible to mix your own clay body to achieve specific characteristics. Proper clay handling, like wedging, aging, and storing with plastic wrap, improves workability. Basic hand building techniques like pinch, coil, and slab building allow creating an array of forms with practice.
For beginners, starting with an inexpensive low-fire earthenware allows learning the fundamentals without a big investment. Focus on a few basic techniques and experiment with texture, shape, and decorating methods. Take detailed notes on clay bodies, firing temperatures, and outcomes to hone your knowledge and skills over time. Most importantly, enjoy the creative process and the limitless possibilities of hand building with clay.

