What Do You Put In Pinch Pots?
Pinch pots are one of the most basic and ancient forms of pottery making. They are made by pinching and shaping a ball of clay with your fingers and thumbs, without the use of any tools like a pottery wheel. Evidence of pinch pottery dates back thousands of years to ancient cultures like the Minoans in Crete and Mayans in Mesoamerica.
Pinch pots are considered a handbuilding technique in pottery. According to thepotterywheel.com, handbuilding involves manipulating clay into the desired shape using only your hands and simple tools. Other common handbuilding techniques include coil pots and slab pots.
Pinch pots are one of the easiest ways to get started working with clay. All you need is some clay and your own two hands. It’s an accessible way for beginners and children to start exploring the possibilities of sculpting and shaping clay into functional or decorative pieces. Pinch pots can be left simple or decorated with textures, patterns, and embellishments. They can also be made into lidded jars, cups, bowls, small sculptures, and more.
Clay Types for Pinch Pots
There are several different types of clay that can be used to make pinch pots. The main categories are air dry clay, polymer clay, and pottery clays like stoneware and earthenware.
Air dry clay is one of the easiest clays to work with for beginners. As the name suggests, it dries and hardens at room temperature without needing to be fired in a kiln. Some popular brands of air dry clay are Crayola Model Magic and Activ-Clay. The benefit of air dry clay is that it’s very lightweight and easy to shape by hand. However, pieces made from air dry clay are fragile and not waterproof. Best clay for pinch pots? : r/Pottery
Polymer clay is another option that doesn’t require firing. It cures or hardens when baked at a low temperature in a standard oven. Sculpey and Fimo are two well-known polymer clay brands. Polymer clay can be conditioned to make it very soft and pliable for handbuilding. The finished pieces will be durable. A downside is that polymer clay is more expensive than some other clays.
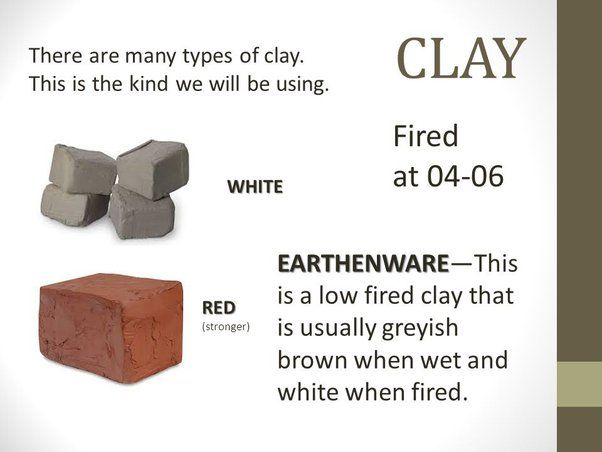
Pottery clays like stoneware and earthenware need to be fired in a high temperature kiln but produce ceramic strength and durability. These clays can be used for functional pots and dishes that are food safe and waterproof. However, they require more skill to wedge and shape the clay consistency appropriately. New clay pots are great for pillars : r/Minecraft Typical pottery clays work well for handbuilding techniques like pinch pots.
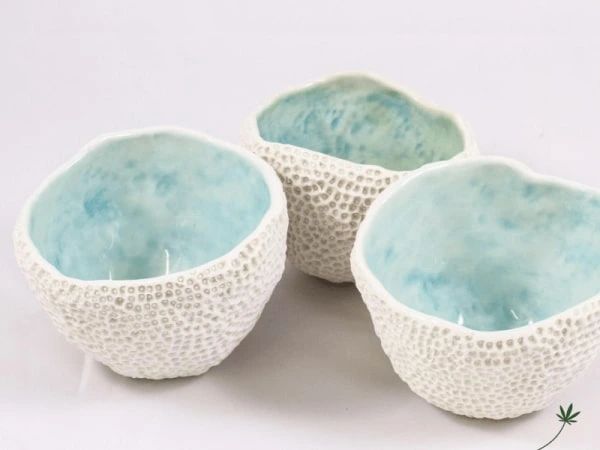
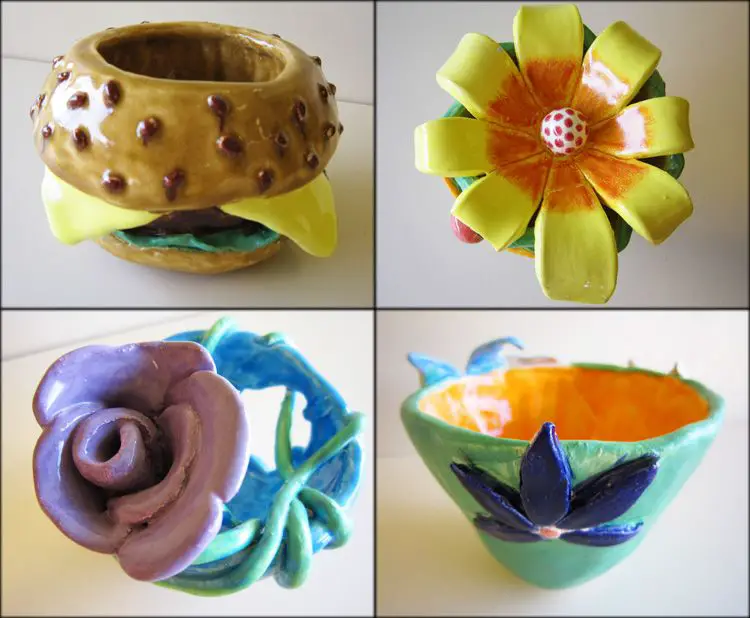
Textures and Designs for Pinch Pots
Adding interesting textures and designs is a great way to make your pinch pots unique. You can impress patterns into the clay for visual interest, or create different surface textures like smooth, bumpy, or lined. Geometric patterns like diamonds, zigzags, or polka dots work well. Nature themes with leaves, flowers, trees, or animals are also popular design choices.
To add texture, you can use everyday household objects like rolling pins, cookie cutters, forks, or rubber stamps. Pressing these lightly into the soft clay will leave an imprint. You can also use clay sculpting tools to carve patterns or add lines. Items from nature like leaves or feathers can be pressed in to transfer their shape.
For geometric patterns, cut out paper shapes and use them as stencils on the clay. Try alternating smooth and textured sections for visual contrast. Add fun accents like spirals, dots, or wavy lines with clay tools. The options are endless when impressing designs into pinch pots!
Some ideas for pinch pot textures and patterns include:
- Leaf prints
- Animal prints like fish or bird shapes
- Smooth, bumpy, or lined sections
- Geometric shapes – squares, circles, triangles
- Zigzag or wave patterns
- Polka dots
- Diamond or hexagon shapes
- Spirals
- Fork tool impressions
With some creativity, you can make your pinch pot designs truly unique. The textures and patterns you choose will bring your pottery to life!
Items to Put Inside
One of the most creative aspects of making pinch pots is deciding what to put inside them. Fillings add visual interest, sound, and texture to pinch pots. Some popular items to put inside pinch pots include:
Seeds – Try putting different types of seeds, beans, or grains inside pinch pots to create natural rattles. Popular options are rice, lentils, and split peas.
Beads – Glass or gemstone beads in assorted colors make a pretty filling. Arrange beads to create designs.
Bells – Tiny bells can create a pleasant jingling sound when pinch pots are shaken.
Glitter – For sparkling fillings, try fine glitter in bold or pastel hues.
Sand – Colored craft sand can mimic the texture of beach glass. Opt for neon or metallic shades.
Small rocks – Tumbled stones, pebbles, and crystals add natural texture.
Sticks – Tiny twigs or wooden beads complement natural themes.
Feathers – Delicate feathers make soft, airy fillings.
Pom poms – Fluffy pom poms in bright colors create fun, textured interiors.
Googly eyes – Add personality with goofy googly eyes.
Finishing Techniques
After the pinch pot has been fired or air-dried, there are several options for finishing and decorating the surface. Popular techniques include:
Painting
Acrylic paints work well on fired or air-dried clay. Make sure to use paint formulated for ceramics, as other paints may not adhere properly. Acrylics allow you to add color while still seeing the texture and form of the clay. Paint pens can add finer details.
Glazing
Glazes provide a glass-like coating and can create vivid colors and effects. Glazes are applied before a final firing. Different glazes work best at specific temperatures. Glazes pool in crevices and lead to unique accentuation of the clay’s natural texture.
Staining
Stains are absorbed into the surface of the clay to provide rich, earthy colors. Multiple layers and blends can be used to achieve depth. Stains highlight the natural look and feel of clay.
Sealing
A sealant like polyurethane can be used to finish an air-dried clay piece with a protective coating. This helps prevent staining and damage. Sealants work well for a natural look.
Leaving Natural
The clay’s original surface can be left as-is for an earthy, rustic appearance. Avoid finishing techniques that may detract from the natural beauty of the clay.
Creating Lidded Pinch Pots
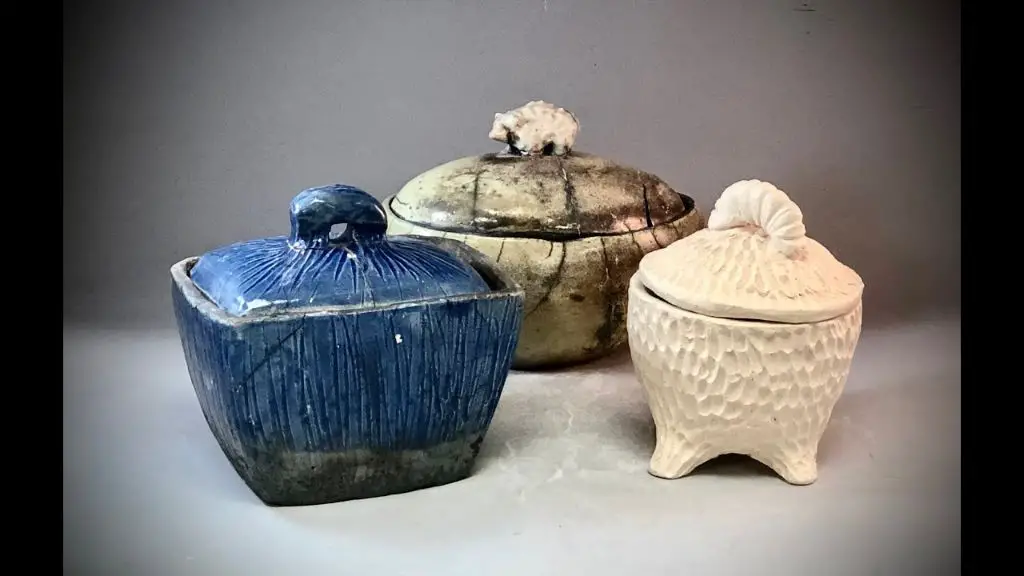
One fun way to use pinch pots is to create a lidded vessel. This allows you to hide small treasures inside your pot. Here’s how to create a pinch pot with a lid:
Start by making the base of the pot using the pinching method. Create the walls and shape as desired. Make sure to leave the thickness even for a good fit with the lid.
Next, create a flat circular slab to be used for the lid. This should be slightly wider than the opening of the pot. Smooth and refine the edges of the slab.
Attach a coil “hinge” to the lid and pot. This will act as a hinge to attach and pivot the lid. Blend the coil into the pot and lid seamlessly.
Allow both pieces to firm up a bit before attaching the lid. Test fit the lid and refine as needed for a good fit. Allow to dry completely before bisque firing.
Decorate the exterior of the pot and lid as desired before glazing. Apply glaze to the interior of the pot and underside of the lid.
After firing, you’ll have a unique pinch pot vase with a closing lid. You can hide small secrets or gifts inside for someone to discover.
Making Pinch Pot Animals
One fun way to use pinch pots is to shape them into animals or creatures. This allows kids to get creative and make imaginary animals or sculpt their favorite real-life animals. Here are some techniques for making successful pinch pot animals:
Start with a basic pinch pot base using an oval or round shape. Then gently press and pinch the clay to extend legs, tails, heads, wings, etc. Use small pieces of extra clay to add details like eyes, ears, noses, scales or feathers. Let kids use toothpicks or clay tools to add textures or patterns to the animals.
Make sure to make any appendages thick and sturdy so they don’t crack or break off easily. Attach any extra pieces like tails firmly to the body. Consider using slip (liquid clay) to join pieces smoothly.
Allow the pinch pots to air dry completely or dry slowly in the oven. Avoid overly thick or thin areas which may crack. Apply paint when dry using acrylic craft paints. Allow kids to get creative painting their pinch pot animals!
Some fun animal ideas include dogs, cats, turtles, snakes, pandas, elephants, dinosaurs and mythical creatures. Let kids make a habitat or scene for their animal using extra pinch pots for things like trees, bushes, rocks, etc. The possibilities are endless!
Sources: https://www.pinterest.com/artmommie/pinch-pot-animals/
Troubleshooting Issues
Pinch pots can sometimes develop issues during the making process that need troubleshooting. Here are some common problems and solutions:
Cracking
If cracks start forming in the clay, it usually means the clay is too dry. To prevent cracking, keep the clay moist by spraying it with water and covering it with plastic wrap or a damp towel when not working on it. If cracks do form, scrape some slip (liquid clay) over them to “glue” the clay back together. Small cracks can fill in completely during firing.
Thicker clay slabs are also less prone to cracking. Roll out the clay to 1⁄4 inch or thicker. Go slowly when shaping to avoid stretching and thinning the clay walls (source: https://www.facebook.com/gouldcait/videos/pinch-pot-problems-and-their-solutions-number-3-slumping-form-if-you-find-that-g/1284105648462821/).
Not Sticking Together
If the clay slabs won’t stick together when joining, add some slip to the edges to help them bond. Score or roughen the clay surface first so the slip has something to grip onto. Press the edges firmly together as you smooth over the seam (source: https://www.reddit.com/r/Ceramics/comments/wcp71k/pinchpot_problems/).
Drooping Forms
Pinch pots with thin walls can sometimes slump or droop out of shape while drying. To prevent drooping, maintain an even wall thickness of 1⁄4 inch or more. If the form does start to slump, gently push it back into shape with your fingers and let it slowly stiffen before moving it.
Avoid very thin bases, which are prone to drooping. Pinch up the bottom thicker than the sides. Place droopy pots over a generous amount of dry rice or crumpled newspaper to support their shape as they dry (source: https://www.facebook.com/gouldcait/videos/pinch-pot-problems-and-their-solutions-number-3-slumping-form-if-you-find-that-g/1284105648462821/).
Fixing Mistakes
Don’t be afraid to re-work areas as needed while sculpting. Let the clay firm up slightly between adjustments so it doesn’t get overworked. Scratch away unwanted clay and add new where you want more. Smooth over cracks, fingerprints, etc. The clay stays pliable for quite awhile before drying fully.
For major changes, clay can be wedged and reclaimed as long as it hasn’t dried out. Rewet very dry clay before wedging. Don’t try to reclaim clay that is already cracking – it has dried too much.
Pinch Pot Inspiration
Pinch pots offer endless possibilities for creative designs. Here are some inspiring ideas to spark your imagination:
Make adorable animals like snakes, turtles, and insects. Shape the basic pinch pot then add legs, tails, eyes and other details. Let your imagination run wild with magical creatures too!
Impress friends with a pinch pot mobile, hanging delicate pots from strings. Or make a pinch pot plant stand by poking holes in the bottom and inserting fake plants or succulents.
Get crafty with textures using toothpicks, straws, forks or other tools to create patterns. Add ridges, dots, swirls and more for visual interest.
Craft beautiful jewelry like beads and pendants by rolling tiny pinch pots. Make matching earrings by shaping two pots the same. Add paints or glaze for color.
Fashion lidded jars for holding trinkets and more. Pinch a second smaller pot for the lid and let dry before attaching. Decorate the lid and jar to match if desired.
Let kids make pinch pot magnets as custom fridge art. Simply glue a magnet to the bottom before drying and baking.
For more inspiration, browse these creative pinch pot projects:
https://playideas.com/25-pinch-pot-ideas-for-kids/
Using Pinch Pots for Crafts and Decor
Pinch pots have a variety of uses around the home and make great handicrafts and gifts. Here are some popular ways to use finished pinch pottery:
Gifts – Small pinch pots make wonderful gifts for any occasion. Make a set of tiny pinch pots to give as party favors or stocking stuffers during the holidays. Customize them with recipient’s initials or names. Give mini pinch pot planters planted with a seedling or succulent as a housewarming or birthday gift.
Decorations – Use pinch pots of various sizes and shapes as decorative accents around the home. Paint or glaze them in coordinating colors and display them on shelves, tabletops, window sills, and more. Make lidded jars for holding trinkets, or create a set of vases in different heights.
Paperweights – Pinch pottery makes charming and useful paperweights for the home or office. Make flattened rounds and ovals, or add whimsical details like animal faces. Finish with a glossy glaze or bright colors.
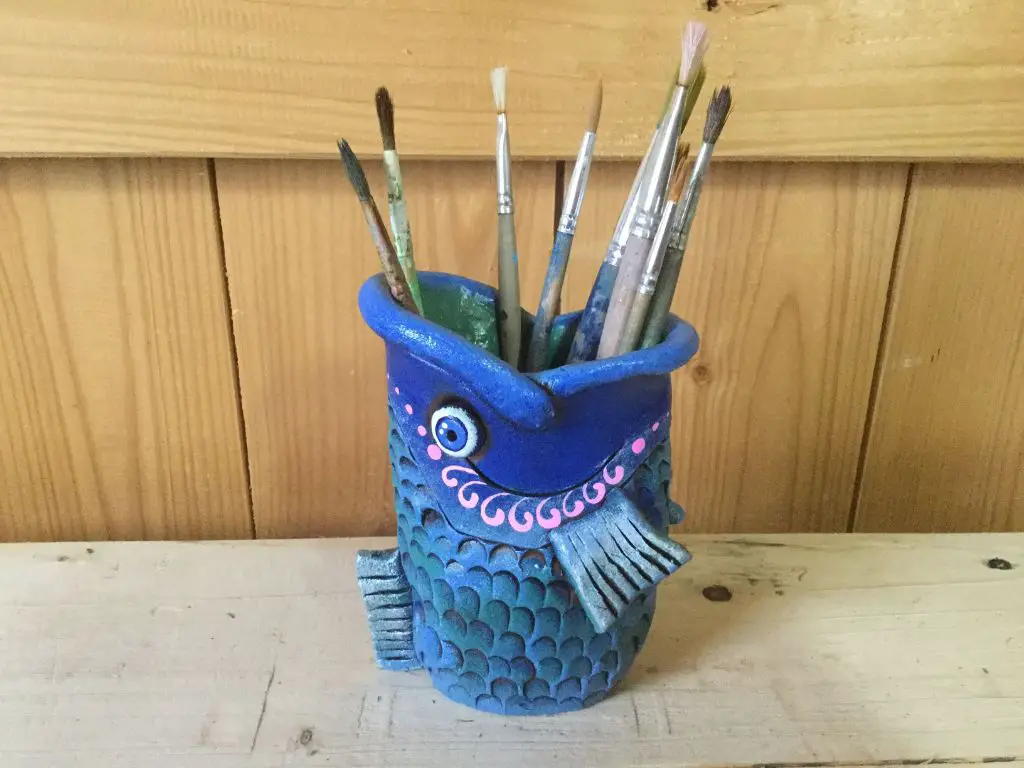
Pen Holders – Turn simple pinch pots into a custom pen holder. Use cylindrical shapes and add holes or slits for holding writing utensils. Decorate them with fun patterns to brighten up an office space.
Planters – Plant small houseplants or seedlings in handmade pinch pot planters. Make sure there is a drainage hole at the bottom. Decorate the planters with glazes, etched designs, or polymer clay embellishments.
Money Banks – Wide-mouthed pinch pots decorated like animals or characters make sweet money banks for kids. Add a coin slot and seal the bottom before firing for a watertight bank.