What Is The 6Mm Rule For Glass Fusing?
What is Glass Fusing?
Glass fusing is a technique for joining pieces of glass together by heating them in a kiln. The glass pieces are placed in a kiln and heated to around 800-900°C. At this temperature, the glass softens and fuses together into a single piece as the molecules within the glass start to bond together. The glass is then allowed to cool slowly back down to room temperature. The result is a solid piece of fused glass.
The history of glass fusing dates back thousands of years. Archeological evidence suggests the Egyptians were familiar with the technique as early as 2000BC. The Romans are also thought to have used glass fusing to create mosaics and other decorative glass objects (Jazkatglass.co.uk, 2023). In more recent centuries, artists have used glass fusing to create stained glass windows, mosaics, jewelry and other works of art.
When pieces of glass are fused together, they become one solid piece. The fusing process allows the artist to combine colors, textures, and patterns to create unique designs and effects. It’s an extremely versatile technique that allows for a great deal of creativity. The finished fused glass can be left as-is or further shaped, slumped, or sculpted.
The 6mm Rule Explained
The 6mm rule is an important principle in glass fusing that states that when glass is heated to a full fusing temperature, it will naturally flow until it reaches an approximate thickness of 6mm regardless of its original thickness (Warm Glass). This is because when glass is heated, its viscosity decreases, allowing it to spread out more easily. If the original glass piece is thinner than 6mm, it will thicken, and if it is thicker than 6mm, it will thin out during the firing process.
Understanding and following the 6mm rule is critical for a successful glass fuse. If glass components are substantially thinner than 6mm at the full fusing temperature, they risk becoming extremely distorted or even disappearing entirely as they flow together to reach the 6mm thickness. This can lead to holes, tears, and unintended effects in the finished piece. Similarly, glass thicker than 6mm may bubble or crack as it tries to thin out (Glasstips).
To avoid issues, most glass fusers try to start with components that are close to 6mm thick. Typical options are 3mm and 4mm glass which will thicken up to the 6mm range when fired. Carefully controlling glass size and shape is key to creating the intended design after the firing. The 6mm rule shows that glass has a natural state it wants to return to at high heat, so managing glass thickness is an essential skill in kiln forming (Crafts Stack Exchange).
Recommended Glass Thicknesses
When selecting glass for fusing projects, it’s important to choose the right thickness for the design you have in mind. There are several common thicknesses used in glass fusing, each with their own advantages and disadvantages.
Some of the most frequently used glass thicknesses include:
- 1/8″ (3mm) – Very thin and lightweight glass, good for small items like jewelry or coasters. Prone to breaking if overfired. Source
- 3/16″ (5mm) – A popular thickness for many fused glass projects. Provides a good balance of strength and flexibility. May bow or slump if fired too long. Source
- 1/4″ (6mm) – The standard thickness recommended for most fused glass pieces. This thickness adheres to the 6mm rule for stability. Durability increases with thickness. Source
- 3/8″ (10mm) – A heavy, durable glass for large platters, plates or structural projects. Requires longer firing times. Adds significant weight to projects. Source
When starting out, it’s generally best to use 1/4″ (6mm) glass to follow the 6mm rule. As you gain more experience, you can experiment with thinner glass for jewelry or thicker glass for platters and plates.
How to Measure Glass
Precisely measuring glass is critical for a successful fused glass project. There are a few key tools and techniques to ensure you get accurate measurements:
A ruler or measuring tape is essential for measuring the length and width of glass pieces. Metal rulers are best since they won’t warp or bend like plastic ones. Measure glass on a flat surface for the most accuracy.
Calipers, either digital or manual, allow you to precisely measure the thickness of glass sheets. This is important when stacking multiple layers of glass. Calipers can measure to the nearest millimeter for precision.
When measuring curved or irregular shapes, use template plastic to create an outline pattern. Trace the pattern onto glass then cut along the lines. This transfers even complicated shapes accurately.
Weigh pieces of glass on a kitchen or jewelry scale when an exact size is needed. Figure out the weight per square inch of a glass sample, then weigh out the amount needed for a project. This gives very precise sizing.
References:
https://janecameron.co.uk/blog/how-to-calculate-how-much-glass-you-need-for-a-fused-glass-pot-melt-or-screen-melt-or-glass-casting/
https://warmglass.com/phpBB3/viewtopic.php?t=4200
Cutting Glass
Cutting glass is an essential step in preparing pieces for fusing. There are several tools that can be used to cut glass to the desired shape and size:
A glass cutter is the most common tool. It has a small wheel on the end that scores the glass when rolled along a straight line. Pressure is then applied along the score line to break the glass. A standard glass cutter works well for straight cuts. A pistol grip cutter gives you better leverage and control for cutting curves or circles.
Glass nippers can be used after scoring to nibble away extra glass. This allows you to shape curves or create clean corners in your cut glass pieces.
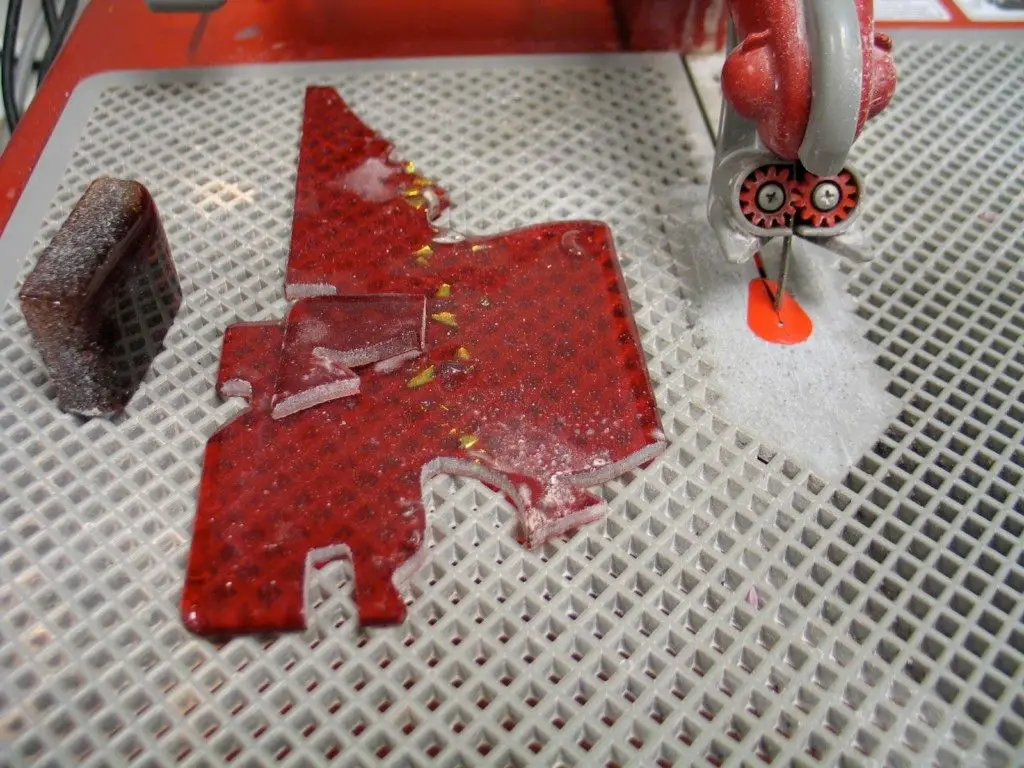
A glass ring saw is great for cutting precise curves and holes in glass. The glass piece is placed on a rotating platform and lowered onto a diamond encrusted blade to cut any shape you trace. According to this forum discussion, a ring saw makes curved cuts much easier.
Once glass is cut, the edges should be smoothed with a lapidary wheel or diamond pad. This prevents any sharp edges from scratching or cutting you during the fusing process.
Proper tools and methods are important for getting clean and accurate cuts in glass prior to fusing. With practice, intricate and creative glass pieces can be achieved.
Preparing the Kiln
Properly preparing the kiln is a crucial step before fusing any glass. Here are some tips for getting your kiln ready:
First, make sure the kiln is completely clean. Any contaminants or debris left over from previous firings can affect your project. Use a damp rag or kiln wash to wipe down the interior walls, floor, lid, and shelves (The Crucible).
Check that the kiln shelves are level and stable. Shelves that wobble or tilt can cause an uneven fuse. Replace any cracked or damaged shelves. Apply a fresh coat of kiln wash on the shelves to prevent the glass from sticking (The Crucible).
Pay attention to shelf placement. The shelves should be spaced far enough apart to accommodate the size of your project. Having shelves too close together or too far apart can lead to an improper fuse.
Make sure the kiln elements are clean and functioning properly. Built up residue on the elements can affect heat distribution. Check for any damaged coils and replace if needed.
Program the kiln with the appropriate firing schedule for the type and thickness of glass you are using. It’s important to follow the manufacturer’s instructions for ramp rates, hold times, and annealing cycles (JP Kilns).
Once the kiln is prepared, you are ready to safely fuse your glass project!
Firing Glass
Firing glass is one of the most important steps in fusing to ensure proper melting and shaping of the glass. When firing glass, you need to bring the kiln up to temperature slowly, hold it at certain temperatures, then allow it to cool down gradually.
For COE 96 glass, a typical firing schedule would be:
- Heat at 300°F per hour from room temperature to 1300°F
- Hold at 1300°F for 30 minutes to even out the temperature
- Heat at 600°F per hour to 1480°F (the fusing temperature)
- Hold at 1480°F for 12-20 minutes depending on the project
- Heat at 9999°F per hour (as fast as possible) to 960°F
- Hold at 960°F for 30-60 minutes for annealing
- Cool at 600°F per hour to room temperature
The initial slow heating stage is important to allow the glass time to adjust to the increasing temperature. Rapid temperature changes can cause cracks or breaks. Holding at 1300°F helps even out any hot or cold spots. Heating rapidly to the fusing temperature puts the glass into a viscous state where it can fuse together smoothly. The annealing hold allows the glass to stabilize and any internal stresses to relax as it cools (source). Slow cooling prevents renewed cracking or stress.
Firing schedules can vary depending on the COE of the glass, thickness of the pieces, and desired effect. Always fire in accordance with the glass manufacturer’s recommendations.
After the Fuse
Once the kiln has completed the firing schedule, it’s time to remove your fused glass project. This step requires care and patience. When removed too soon, the glass can crack or break. According to Lisa Vogt, it’s best to wait until the kiln has cooled to 150°F before removing fused glass pieces.
To remove the glass, carefully open the kiln and use heat-resistant gloves to lift out the shelf or slumping mold. Place it on a heat-proof surface to finish cooling. Never put hot glass directly on a cold, wet, or conductive surface as rapid cooling can cause breakage. Allow the glass to cool fully before attempting to remove it from the shelf or mold.
If the glass piece is stuck, do not force it. Reheating may help release the glass by expanding the metal. Place the shelf back in the warm kiln for 5-10 minutes. Vinegar or lemon juice can also help release stuck glass when brushed on the edges, according to fused glass experts on Warm Glass Forum.
Once removed, inspect the piece for any defects like trapped air bubbles. Use grinding or sanding tools to smooth any rough edges. Clean carefully with soap and water to remove firing residue. Apply a sealant if desired to finish the glass for display or use.
Troubleshooting Issues
When working with glass fusing, there are some common issues that can arise. Being aware of these potential problems and how to address them can help improve results.
Devitrification
One of the most frequent issues with fused glass is devitrification, which is when the glass loses its glossy finish and develops a cloudy, matte appearance. This is caused by the formation of tiny crystals in the glass when it is heated to the wrong temperature. To avoid devitrification, it’s important to closely follow the manufacturer’s instructions for ramp speeds and target temperatures. Quick ramps up to the full fuse temperature can help discourage crystal growth. Choosing compatible glasses that have similar COEs is also recommended, according to this glass fusing guide (http://devitrie.blogspot.com/2015/11/).
Stress Cracking
Another common problem is stress cracks forming in the glass. This occurs when incompatible glasses with different COEs are fused together. The differing expansion rates cause internal stresses, resulting in cracks. Always check the COE of any glass you plan to combine and only fuse glasses with the same COE. Proper annealing is also key to relieving internal stresses. Follow the recommended anneal hold time and cooling rate for the particular glass you are using (https://www.facebook.com/groups/310729685946114/posts/1053263431692732/).
Shattered Glass
Sometimes glass can completely shatter or explode during firing. This is often due to thermal shock from improper heating or cooling rates. Make sure to program the kiln with the appropriate ramp speeds, target fusing temperatures, and hold times. Allow thicker glass adequate time to soak at temperature. After firing, anneal the glass properly and let it cool slowly. Avoid opening the kiln too early in the process. With care and patience, shattering can be avoided.
Tips for Success
When fusing glass, following best practices and expert advice can help ensure success. Here are some key tips:
Cleanliness is critical. Make sure your glass is free of oils, dust, and contaminants before firing. Wipe down glass with a lint-free cloth or glass cleaner like CRL Glass Cleaner (http://www.crlaurence.com).
Compatibility is key. Choose compatible COE 96 glass from reputable suppliers. Mixing incompatible glass can cause stresses and cracks (https://learnglassblowing.com/can-you-use-a-regular-oven-for-glass-fused-art/). Stick to sheet glass; avoid using plate, window, or tempered glass.
Mind the 6mm rule. No single piece of glass should be more than 6mm thick to allow even heating and fusing. Measure carefully and split overly thick pieces if needed.
Fire slowly. Heat at 300°F per hour up to 1450°F-1480°F. A slow ramp up and down prevents thermal shock. Let cool overnight before removing from kiln.
Use kiln wash on shelves. Apply a thin, even coat of kiln wash like Primo Primer to kiln shelves before each firing for proper glass release. Reapply as needed.
With care and practice, glass fusing can produce amazing results. Follow these tips from experts for best outcomes (https://www.craftcourses.com/courses/glass-fusing-workshop-at-ransom-s-pavilion-hitchin-9-00am-11-30am).

