What Is The Name Of The Pottery Machine?
Introducing the Potter’s Wheel
A potter’s wheel is a machine used in the shaping and forming of clay into round ceramic ware and pottery.
The main component of a potter’s wheel is a rotating horizontal disk called the wheel head, tablet, or batt attached to a vertical shaft. The potter places a lump of clay on the wheel head and shapes it into the desired form as the wheel spins at varying speeds.
Potter’s wheels allow potters to efficiently and consistently produce symmetrical pottery and round shapes. The spinning momentum of the wheel head allows the clay to be evenly shaped and formed into ceramics such as bowls, cups, vases, plates, and other vessels with thinner walls than could be easily created by hand.1
Potter’s wheels are an iconic symbol of the ceramic arts and pottery. They have been used for thousands of years across many cultures to skillfully shape clay into both functional pottery and artistic works.
History of the Potter’s Wheel
The origins of the potter’s wheel can be traced back over 5,000 years to ancient Mesopotamia, where the earliest known potter’s wheels were developed around 3500-3000 BCE. The earliest wheels were simple devices made of wood, stone, or clay and were rotated by hand. As civilizations advanced, so did pottery wheel technology.
By 1500 BCE, the fast pottery wheel was developed in Mesopotamia and Egypt. This two-wheeled device used a flywheel to keep rotational inertia, allowing the potter to rotate it quickly with a stick or handle. The fast wheel enabled thinner walls and more uniform shapes than handbuilding or slower wheels.
The kick wheel emerged around 500 BCE in China, allowing the potter to rotate the wheel using their feet while keeping their hands free for shaping. The kick wheel then spread west through the Silk Road to the Near East and Mediterranean.
Starting in the Middle Ages, treadle wheels became popular in Europe and Asia. The potter operated the wheel by pumping a foot treadle that turned a crankshaft, providing more control over speed than kicking. By the 18th century, momentum wheels with a spinning flywheel mechanism were prevalent, eliminating the need for continuous kicking or peddling.
The potter’s wheel was revolutionized again in the 19th century with mechanization and the invention of the electric-powered wheel, bringing pottery production into the modern industrial era. Today, while both electric and kick wheels are commonly used, the core principle of the pottery wheel remains unchanged from its ancient Mesopotamian origins.
How a Potter’s Wheel Works
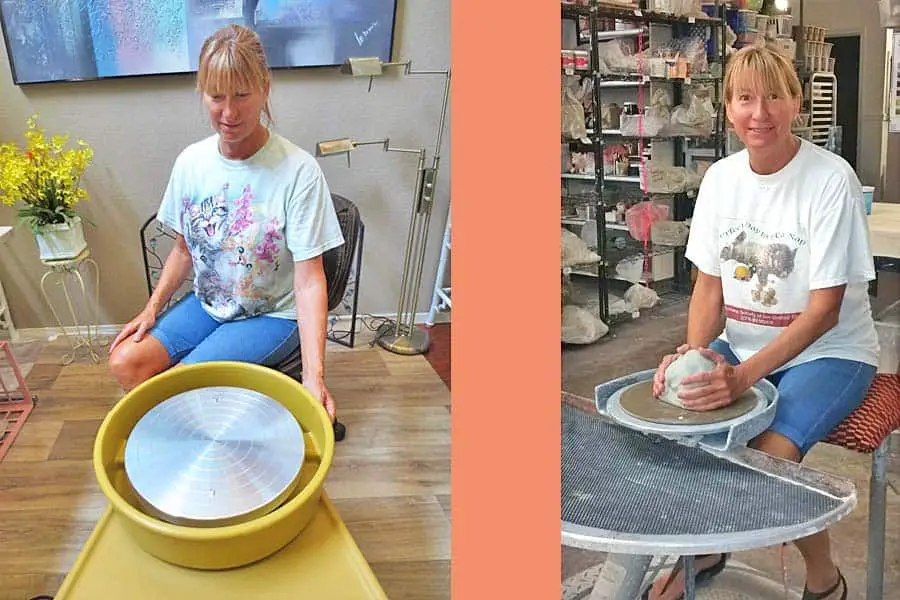
A potter’s wheel works through a combination of centrifugal force and the potter’s skill in controlling the clay. At its basic level, a potter’s wheel consists of a circular platform or wheel head that spins around a central axis. The wheel sits on a base which houses the motor and gears or drive belt to power the spinning motion.
As the potter kicks the pedal or hits the switch to activate the motor, the wheel head begins to rotate at a set speed, typically between 60-120 RPM. The centrifugal force created by the spinning motion causes the clay placed in the center of the wheel to spread outward and flatten against the wheel head surface. This allows the potter to center the clay and form the basic shape.
While the wheel spins, the potter uses their hands to apply pressure inward and upward from the sides and base of the rotating clay form. This combined inward and upward pressure shapes the clay into the desired pottery piece as excess clay is trimmed off by the potter’s tools and recycled back into the clay body. The potter controls the clay through muscle movement in their hands and arms rather than the spinning force of the wheel itself. It is this learned technique that allows the skilled potter to raise and shape the vertical sides of pots and bowls (source).
Types of Potter’s Wheels
There are several different types of potter’s wheels available. The main types include:
Kick Wheels
Kick wheels are pedal-powered wheels that rotate from the potter pushing a kick wheel with their foot. They consist of a rotating wheel head powered by a foot pedal and flywheel 1. Kick wheels are simple, low-cost, and do not require electricity. However, they can be tiring to use for long periods and do not rotate as smoothly as electric wheels.
Electric Wheels
Electric potter’s wheels use an electric motor to power the rotating wheel head. They provide smooth, consistent rotation at a customizable speed. Electric wheels are less physically demanding than kick wheels. Many electric wheels allow adjusting the height, speed, and torque 2. Electric wheels range from small tabletop models to large industrial wheels.
Momentum Wheels
Momentum wheels utilize the momentum of a heavy flywheel to sustain rotation. The potter initially ‘kicks’ the wheel to get it spinning, then the momentum maintains the rotation for a period of time. Momentum wheels do not require electricity. They provide smooth rotation for longer periods than kick wheels before needing to be re-kicked.
Using a Potter’s Wheel
Using a potter’s wheel requires coordination and practice to master. Here are some key steps for beginners learning to use a wheel:
1. Prepare the clay. Wedging or kneading removes air pockets. Place a ball of clay in the center of the wheel head and press down firmly to secure it.
2. Start the wheel spinning slowly. Apply water for lubrication. Center the clay by gently pressing into a cone shape with both hands.
3. Open the clay by gently pressing thumbs into the top, widening the cone into an even cylinder. Apply pressure outwards from center to shape sides.
4. Form the basic pot shape by gently pushing clay upwards with left hand while right hand supports the rim. Create an even thickness throughout the sides.
5. Refine the shape by trimming excess clay and smoothing sides. Create decorative elements like pulled handles, pressed textures, or carved lines.
6. Use a wire tool to cut excess clay from the base when desired shape is achieved. Allow your creation to firm up before removing it from the wheel.
With practice, using a potter’s wheel becomes an intuitive process. Don’t be discouraged by flaws in early attempts. Perfect centering, opening, raising, and trimming techniques take time to master.
Making Pottery on a Wheel
Making pottery on a wheel involves several key steps to center, shape, and refine clay into a finished piece. With practice, potters can create a wide variety of items like mugs, bowls, vases, and more using this traditional technique.
Follow this beginner’s guide to learn the basics of making pottery on a wheel:
1. Center the Clay
Place a ball of clay firmly on the wheel head and apply pressure while slowly spinning the wheel. Use your fingers to nudge the clay towards the center until it is centered properly.
2. Shape the Clay
Wet your hands and press your thumbs into the centered clay to open it up. Apply pressure with your fingers and palm to form the interior shape as the wheel spins.
3. Refine the Shape
Use various tools like ribs, loop tools, and trimmers to refine the shape, thickness, and curves of the piece as desired.
4. Dry and Trim
Allow the shaped piece to partially dry before using a wire tool to trim excess clay from the base. Cut cleanly to leave an even surface.
5. Decorate and Glaze
Once leather hard, the piece can be decorated with stamps, carvings, or slip. Apply glaze and fire the finished pottery in a kiln.
With practice over time, potters can create a wide variety of pieces using the basic wheel throwing steps. Refer to online tutorials like this one for more in-depth instructions and tips.
Common Potter’s Wheel Terms
There are many specialized terms used in pottery wheel work that are good to know. Here are some of the most common pottery wheel terms and their definitions:
Bat – A pottery tool made of wood, plaster, or plastic that attaches to the head of the pottery wheel. It provides a smooth surface for attaching clay work. 1
Centering – The process of molding a ball or lump of clay into a symmetrical form in the center of the wheel head before beginning to shape it. Good centering allows for even wall thickness while throwing. 2
Foot – The base of a thrown pottery piece, which has been trimmed and shaped on the wheel.
Ghost – Traces of a previous thrown pot that remain in the clay surface of the wheel head.
Greenware – Unfired pottery that has dried to a solid state and is ready for the first firing.
Kick wheel – A manual pottery wheel that is spun by kicking a weighted wheel. 1
Leather hard – The stage when pottery contains about 15% moisture and can be handled without deforming, but is not fully dried.
Slurry – A suspension of clay particles in water, which can be used to join pieces of pottery.
Throwing – The process of shaping clay on a pottery wheel.
Trim – To refine or alter the foot, shape, or thickness of a thrown pot using specialized trimming tools.
Wedging – The process of kneading clay to remove air pockets and create an even, workable consistency.
Potter’s Wheel Maintenance
Proper maintenance is crucial for keeping a potter’s wheel in good working condition. Here are some tips for cleaning, storage, and repair of a potter’s wheel:
Regularly remove any dried clay from the wheel head, pan, and surrounding areas using a plastic scraper. Avoid metal tools which could scratch the wheel surface. After scraping, wipe down with a damp sponge and plain water. For a deeper clean, use a 50/50 vinegar and water solution to dissolve clay and hard water deposits. Rinse and dry thoroughly after cleaning.
Check belt tension and re-tension if loose according to manufacturer guidelines. Worn drive belts should be replaced. Lubricate wheel head bearing with light machine oil if wheel doesn’t spin smoothly.
After each use, cover the wheel head with plastic when not in use to prevent dust buildup. Store the wheel in a cool, dry area away from direct sunlight.
For wheel wobble, first check that the wheel is sitting level and all feet/stands are adjusted properly. If wobble persists, check for loose bolts in the wheel assembly and tighten if needed. Severe wobble may require replacement of worn bearings.
Refer to manufacturer instructions for wheel-specific maintenance and repair guidance. With proper care, a quality potter’s wheel can provide many years of smooth throwing.
Potter’s Wheel Safety
Working with a potter’s wheel requires caution as it poses some safety risks. Being aware of the potential hazards and taking proper precautions is key to avoiding injuries and accidents when using a potter’s wheel.
Some of the main safety concerns when operating a potter’s wheel include the following:
- Flying clay debris – Clay spinning at high speeds can break off and be flung from the wheel, striking the potter or nearby people.
- Slips and falls – Wet clay residue on the floor around the wheel can create slippery conditions leading to falls and injuries.
- Contact with moving parts – Fingers or hands can get caught in the spinning wheel head resulting in bruises, cuts or broken bones.
- Silica dust exposure – Sanding and trimming dried clay creates fine silica particles that can be inhaled.
- Muscle strain – Improper posture during long pottery sessions can lead to back, neck or shoulder pain.
Some basic safety measures include:
- Wear safety goggles to protect eyes from flying clay.
- Use splash guards around the wheel to contain stray clay.
- Keep floor clean by immediately wiping up spills.
- Tie back long hair and avoid loose clothing that could catch in wheel.
- Position hands safely away from moving wheel head.
- Take regular breaks during prolonged use.
- Use localized ventilation or masks when sanding.
Being attentive and using common sense precautions goes a long way in keeping potters wheel users safe while throwing clay. For more specific safety guidelines, refer to this reference on potter’s wheel safety from Memphis University https://www.memphis.edu/ehs/pdfs/operating_potters_wheels_sop.pdf.
Notable Innovations
The potter’s wheel has undergone many notable innovations and improvements over thousands of years of use and refinement:
Some of the earliest potter’s wheels were simply a flat disk that was spun by hand or foot. Around 3500 BCE, the first turntable wheels emerged in Mesopotamia, such as the “kick wheel” design that used the potter’s feet to spin the wheel [1]. This allowed for smoother, faster, and more consistent spinning compared to hand-spinning.
Around 1500 BCE, the flywheel was introduced, allowing momentum to sustain the spinning once the wheel was set in motion. This innovation greatly improved control and ease of use [2]. Weights were also added to some wheels as flywheels to help maintain momentum.
In the Middle Ages around 1000 CE, the kick wheel evolved into the “kick-and-lever” wheel design. This allowed the potter to use a lever-arm mechanism to provide greater torque and control over the spinning [1].
In the 18th century, treadle wheels were invented, allowing the use of continuous motion from the feet to drive the flywheel. This provided smooth, consistent spinning without the need to repeatedly kick the wheel after each thrown pot [2].
Finally, in the 19th and 20th centuries, electric motors were introduced to automate the spinning of pottery wheels. This allowed for precise control over wheel speed and freed up the potter’s feet during throwing.
While the basic wheel-and-flywheel concept has remained unchanged, these incremental innovations have made pottery wheels much more functional, efficient, and user-friendly over time.
[1] https://www.smith.edu/hsc/museum/ancient_inventions/potterwheel2.html
[2] https://www.colorado.edu/classics/2018/06/15/potters-wheel

