What Is The Spinning Thing With Clay?
Introducing the Pottery Wheel
The pottery wheel, sometimes called the potter’s wheel, is a round, rotating disk that potters use to shape and raise a clay pot. It enables the potter to quickly form symmetrical round pots as the clay spins on the wheel.
The earliest known use of the pottery wheel dates back to 3500-3300 BCE in ancient Mesopotamia. The earliest potter’s wheels were probably made of wood and turned by hand. Over time, the wheel design evolved to add features like a kick wheel for momentum and rotation speed control.
How a Pottery Wheel Works
A pottery wheel is a device that spins around to shape wet clay into symmetrical pottery forms. It consists of several main components that work together to rotate the clay.
At the center of the wheel is a rotating circular platform or wheel head that the clay sits on top of. This platform connects to an axle or drive shaft powered by an electric or kick motor that spins the wheel head at adjustable speeds, typically ranging from 0 to over 300 rpm.
Underneath the wheel head is the flywheel, a heavy circular weight that provides momentum to keep the wheel spinning smoothly. On electric wheels, the motor spins the flywheel continuously. On kick wheels, the flywheel stores rotational energy when kicked and continutes spinning between kicks.
Surrounding the wheel head is the splash pan, a bowl that catches excess water and clay trimmings. The pan can be removed for cleaning. Some wheels raise and lower the pan to adjust working height.
At the base of the wheel is a stable platform with rubber feet that prevent the wheel from moving while spinning. A foot pedal or kick bar controls the speed of the electric or kick motor to speed up, slow down, or stop the wheel.
Together, these components allow potters to center and shape clay into pottery while the piece spins at high speeds. The centrifugal force provided by the spinning wheel aids in lifting, opening, and smoothing the clay.
Types of Pottery Wheels
There are two main types of pottery wheels: electric and manual. According to Pottery Crafters, electric pottery wheels are powered by electricity and have a motor that rotates the wheel head. Manual wheels, also known as kick wheels, are operated by the potter kicking a foot pedal to turn the wheel head.
Some key differences between electric and manual wheels are:
- Electric wheels provide consistent rotation speed and torque. Kick wheels require more physical effort from the potter to keep momentum.
- Electric wheels allow for variable speed control. Kick wheel speed depends on how fast the potter can pump the foot pedal.
- Electric wheels are heavier and less portable. Kick wheels are lightweight and easily transported.
- Electric wheels tend to be more expensive. Kick wheels provide a more affordable option.
Within electric and manual categories, there are wheel heads designed for different purposes. Options include wheels optimized for throwing large pieces, small intricate items, or sculpture work. Wheels also come in a range of sizes from miniature to industrial.
Some popular pottery wheel models and brands include Shimpo, Brent, Amaco Brent, and Creative Industries.
Using the Pottery Wheel
Using a pottery wheel takes practice and skill to master the techniques for centering, opening, pulling, shaping, and trimming clay. Here are some tips for beginners learning to use a pottery wheel:
First, make sure the wheel is properly set up and secured to a sturdy table or stand. Sit in a comfortable position with your elbows resting on the knees or table for stability. Prepare a mound of clay by wedging it to remove air bubbles and center it on the wheel head. Use water to lubricate the clay and wheel surface.
To center the clay, place both hands around the sides and gently push and squeeze the clay downward as the wheel spins slowly. Do not force the clay or clutch it too tightly. Apply even pressure and allow the centrifugal force to center the clay into a cone shape. Use the fingers to gently shape the cone into a cylinder as it spins.
Once centered, place one hand inside the cylinder opening and the other on the outside to gently pull the clay upward into new shapes. Open the mouth by pulling up the walls into a bowl form. Use fingers on the inside to support the shape as the other hand pulls and presses the clay exterior. Refine the curves and texture as desired.
Go slowly, keep the hands lubricated, and make gradual refinements to avoid distorting or collapsing the form. Pay attention to wall thickness. Add water when needed to keep the clay workable. Allow pieces to firm up partially before altering shapes.
When complete, use a wire tool to carefully separate the shaped clay from the wheel. Trim excess clay from the base with a loop tool. Allow drying before firing. With practice, using a pottery wheel becomes an intuitive and immensely gratifying process. Patience and persistence pay off in achieving beautiful finished ceramic pieces.
Source: https://www.soulceramics.com/pages/how-to-use-a-pottery-wheel-for-beginners
Centering the Clay
Centering the clay properly on the pottery wheel is one of the most important fundamentals for successful wheel throwing. It involves placing a ball or clump of clay in the center of the wheel head and applying even pressure to form it into a symmetrical cone shape.
To center the clay:
- Start with around 2-3 lbs of clay and form it into a ball. Use your hands to press it into a rough cone shape on the wheel head.
- Wet your hands and the clay slightly to prevent sticking.
- Start the wheel spinning at a moderate speed. Apply even pressure with both thumbs and index fingers on the sides of the clay cone to gently compress it into a symmetrical shape.
- Avoid squeezing too hard or the clay will flatten out. Apply just enough pressure for the clay to center itself under the spinning motion.
- Stop the wheel periodically to check the shape. Adjust as needed until the cone looks evenly centered.
- When properly centered, the clay should spin smoothly without wobbling from side to side.[1]
Patience and practice help develop the skill to center clay quickly and efficiently. Having properly centered clay makes the rest of the throwing process much easier.
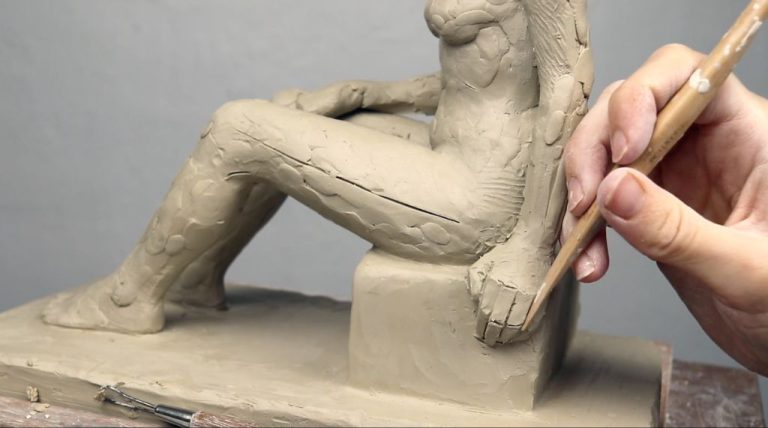
Shaping and Throwing
Once the clay has been centered on the pottery wheel, the next step is to shape and throw the clay to form the desired vessel. Throwing refers to the process of using the momentum of the spinning pottery wheel to pull the clay up and shape it into vertical walls.
To start throwing, the potter places both hands on either side of the centered clay mound. Applying steady pressure downwards and inwards, the potter squeezes the clay between their hands and the wheel head to form the base. The potter then uses their fingers to further shape the base into a concave surface.
With one hand on the inside and one on the outside, the potter gently pulls up the walls of the clay, raising it vertically as the wheel spins. The centrifugal force provided by the spinning wheel helps prevent the vertical walls from slumping. Using thumbs and fingers, the potter carefully shapes the clay into an even cylinder or tapered shape as desired.
As the potter pulls up the walls, their hands slide up continuously, never losing contact with the clay. The inside hand supports the forming shape, while the outside shapes and refines the exterior surface. Water can be used as needed to lubricate the clay. The potter must maintain a consistent pressure and use the ideal amount of clay to reach the target height without thinning the walls excessively.
Once the initial throwing is complete, the potter can further refine the shape by gently compressing or curving the walls. Decorative elements like ridges, grooves or handles can also be added. The throwing process requires skill, coordination and a sensitive touch to handle the clay without overworking it or causing cracks and deformities.
Trimming and Finishing
Once a piece has been thrown on the pottery wheel, there is often excess clay that needs to be carefully trimmed off to refine the shape and finish the surface. Trimming is done using a special trimming tool while the wheel is turning at a slower speed. The trimming tool allows removing clay from the bottom to flatten it, slimming walls, sharpening edges, and defining details like lips and feet.
Trimming takes practice to learn the right amount of pressure and angle to slice off clay without taking off too much. It’s important to frequently stop the wheel to inspect progress. The goal is to open up the form, eliminate irregularities, and achieve symmetry while preserving the integrity of the shape.
After trimming, pieces can be further finished by techniques like scraping, sponging, and burnishing. Scraping with a metal rib compresses and smooths the surface. Sponging with a damp sponge gives a uniform look. Burnishing with a smooth stone polishes the surface to a shine. Extra decoration can also be added at this stage.
Proper trimming and finishing transforms a rough thrown form into a complete pottery piece ready for drying, firing, and glazing. It takes patience but is rewarding to see the finished wares emerge.
Check out these examples of trimming and finishing pottery pieces on the wheel:
Trimming excess clay
Sharpening edges
Common Projects
The pottery wheel is a versatile tool that allows potters to shape a wide variety of objects out of clay. Some of the most common projects thrown on the wheel include bowls, vases, mugs, plates, and jars.
Bowls are one of the simplest and most ubiquitous projects made on the pottery wheel. From small salad bowls to large serving bowls, the circular motion of the wheel makes it easy to shape bowls with smooth, rounded sides and bases. Bowls can be left simple or decorated with textures, carved patterns, or glazed finishes. Sources for bowl project inspiration include this Pinterest board and this pottery wheel tutorial video.
Vases are another common pottery wheel project, allowing potters to create functional vessels with slim necks and wider bases. The wheel’s centrifugal force makes it easy to shape and stretch tall vase forms. Vases can be minimalist and elegant or decorated with colors, patterns, and textures. Some vase inspiration can be found at this beginner pottery project list.
Mugs, cups, and glassware are popular projects for the pottery wheel. The cylinder shape of mugs is straightforward to throw, then handles, lips, and spouts can be added. Sources for mug project ideas include this tutorial video and this Pinterest board.
Plates, platters, and dishes are commonly thrown on the pottery wheel, utilizing the wheel’s spinning motion to shape round, flat bases. Rims can be left simple or decorated with patterns like scalloping or faceting. Some examples of plate projects are at this video tutorial and this Pinterest pin.
Jars like canisters, honey pots, and storage jars are easily thrown on the wheel then decorated, lidded, or sealed for functional use. Sources for jar inspiration include this list of projects and this tutorial video.
Tips and Tricks
When first learning how to use the pottery wheel, it can feel challenging to center and shape the clay properly. However, there are helpful techniques and advice for beginners to make the process easier.
Some key tips include:1
- Use clay that is soft and moist so it moves smoothly under your hands
- Apply only light pressure at first when centering – let the wheel do the work
- Keep your elbows tucked in and wrists flexible when centering and throwing
- Start with basic cylindrical forms before attempting more complex shapes
- Use a rib tool to smooth the walls and compress the clay
- Work methodically and repeat the processes to build muscle memory
- Maintain consistent speed and pressure as you shape the clay
With regular practice and by following fundamental techniques, beginners can progressively gain competence and confidence using the pottery wheel to make quality ceramic pieces.
History and Impact
The potter’s wheel was first developed around 3500-3300 BCE in ancient Mesopotamia (Iraq and Syria) and then spread to other regions like ancient Egypt, the Indus Valley, and China1. Before the invention of the wheel, pottery was made by hand forming techniques like pinching, coiling, and slab construction which limited the size and shape of vessels. The potter’s wheel revolutionized ceramic production by enabling potters to produce rounder, thinner-walled, and more uniformly sized vessels.
The introduction of the wheel significantly increased ceramic production capacity and efficiency. While handmade pottery was quite labor intensive and limited, the wheel enabled faster shaping of clay into more refined and delicate forms2. This allowed potters to produce utilitarian vessels like bowls, jars, cups as well as more artistic pieces like vases and sculptures in larger quantities.
Over centuries, potters innovated and improved wheel design leading to developments like flywheels for momentum and kick wheels operated by the foot. Pottery wheels eventually spread around the world becoming an indispensable tool for ceramic production globally. Even with some modern mechanization, potters today continue using the traditional momentum wheel which stands as an enduring and influential innovation.