What Kind Of Clay For Beginners Pottery?
Pottery involves shaping clay into artistic or functional objects using various techniques. It has remained a popular hobby and craft for thousands of years across many cultures. According to Statista, the global market value for ceramics is forecast to grow to nearly $360 billion by 2030, indicating the continued popularity of pottery and ceramics as both decorative and practical items.
Pottery appeals to beginners due to the satisfaction of molding and shaping clay into a functional or decorative object using one’s own hands. It allows for immense creativity as well as development of fine motor skills. Additionally, working with clay can provide relaxation and stress relief. As a versatile and forgiving medium, clay is an ideal starting point for trying one’s hand at sculpting and crafting.
Different Types of Clay
The three main types of clay used in pottery are earthenware, stoneware, and porcelain. Each type has different properties and is fired at different temperatures. Understanding the differences between the clays can help beginners choose the right one for their needs.
Earthenware
Earthenware is a low-fire clay that matures at lower temperatures, typically between 1,800°F to 2,000°F. It is very porous and absorbs water easily. Earthenware clay tends to be sticky, flexible, and suited for hand-building techniques. Common types of earthenware clay include terracotta and red clay. Due to its porous nature, earthenware pieces need to be glazed to make them waterproof. Earthenware is a good choice for beginner potters because it is inexpensive, readily available, and forgiving to work with. Key traits: porous, low-fired, suitable for hand-building.
Stoneware
Stoneware clays are mid-range firing clays, maturing between 2,200°F to 2,300°F. Stoneware has better strength and durability than earthenware. It is less porous, but still absorbs some water. Types of stoneware include porcelain-like and grogged clay. Stoneware works well for hand building and throwing on the wheel. It holds fine details well. The pieces can be left unglazed to showcase the natural clay color or glazed for decorative effects. Stoneware is a step up for beginners ready to move beyond basic earthenware. Key traits: stronger, tighter, good for hand-building and wheel-throwing.
Porcelain
Porcelain is a high-fire clay, reaching maturation around 2,300°F to 2,400°F. It is very strong, durable, and fully vitrified, meaning it becomes non-porous at high temperatures. Porcelain has excellent plasticity for throwing thin-walled pots on the wheel. It is also popular for sculpting intricate figures. Types include soft-paste, hard-paste, and bone china. Porcelain can be tricky for beginners to center and throw successfully on the wheel. It is also prone to chipping if mishandled. Key traits: non-porous, strong, excellent for throwing, challenging for beginners.
Properties of Clay
The properties of clay determine how it handles and what kinds of pottery it is best suited for. The key properties of clay are plasticity, drying time, firing temperature, and color.
Plasticity refers to how easily clay can be shaped and molded without cracking or becoming misshapen. More plastic clays, like stoneware and porcelain, are great for throwing on the potter’s wheel. Less plastic clays, like earthenware, are better for handbuilding techniques.
Drying time is how long it takes clay to dry from its wet, workable state to a hardened “greenware” state ready for firing. Thick slabs and forms need clays with slow drying times to prevent cracking, while thin wares need fast-drying clays. Earthenware has a medium drying time, while porcelain dries quickly.
Firing temperature is the heat clay needs to reach maturity and become hard, finished ceramic. Earthenware fires at lower temperatures up to 2,100°F (1,150°C). Porcelain requires the highest firing temperatures, up to 2,450°F (1,345°C). Stoneware fires in between at 2,200-2,400°F (1,204-1,316°C). (1)
The clay body color before firing gives an indication of the final color after firing. White and light colored clays like porcelain and some stoneware will fire white or near-white. Red and brown earthenware clays fire to shades matching their raw color. Terracotta is an iconic reddish earthenware.
Best Clay for Beginners
Earthenware clay is often considered the best type of clay for beginners. Earthenware is fired at lower temperatures, typically between 1750-2100°F, making it very forgiving and easy to work with. It also tends to be inexpensive and readily available at most art supply stores.
Earthenware clays are porous and permeable. They can absorb water easily, which makes them excellent for functional pottery like mugs. However, this absorbency means they must be glazed to make them watertight for holding liquids. Unglazed earthenware is best used for decorative pieces.
Some common examples of earthenware clay bodies suitable for beginners include:
– Terracotta (https://seattlepotterysupply.com/pages/what-is-the-best-pottery-clay-for-beginners)
– Red Earthenware (https://www.keeeps.co.uk/blogs/potters-block/pottery-for-beginners-the-4-main-types-of-clay)
– Buff Stoneware (https://thepotterywheel.com/choosing-clay-for-a-beginner/)
Overall, earthenware clays are very forgiving and easy to use for beginner potters looking to learn handbuilding and wheel throwing techniques. The low firing temperature allows room for experimentation at an affordable price point.
Working with Earthenware Clay
Earthenware is one of the most common types of clay used by beginner potters. It has a smooth texture and fires to a reddish-orange color at lower temperatures around 1,800-2,000°F. Before working with earthenware clay, proper preparation is key.

The clay must first be wedged to remove air pockets and achieve an even consistency. This involves cutting the clay into chunks, slamming it against the wedging table, and compressing it into a ball (Source 1). Wedging blends the clay particles together and removes cracks and bubbles.
Once wedged, earthenware can be shaped using handbuilding techniques or thrown on the potter’s wheel. It’s common to use slip, a liquid clay mixture, to help join pieces of clay together. The slip acts as “glue” between sections of clay.
When complete, earthenware pottery must be bisque fired before applying any glazes. Bisque firing hardens the clay at around 1,800°F. After bisque firing, glazes can be applied and the pottery can be fired again at slightly higher temperatures to melt the glazes.
Clay Tools for Beginners
As a beginner, you only need a few basic tools to get started with pottery. Here are some essential tools for working with clay:
Potter’s wheel – This allows you to center and shape clay into symmetrical forms. For beginners, a basic electric wheel like the Brent C-Electric Pottery Wheel is a good affordable option.
Ribbon tools – These flexible metal tools in different widths help smooth and shape clay. A handled pottery rib set like AMACO’s ribbon tool set is ideal.
Needle tool – This is a thin, sharp tool used to trim and add detail to clay shapes. The Mudtools needle tool is a top choice.
Sponge – A basic cellulose sponge helps smooth clay and remove excess water and slip.
Wire tool – This thin wire can be used to slice through and separate clay. The Duncan Loop Decorating Tool works well.
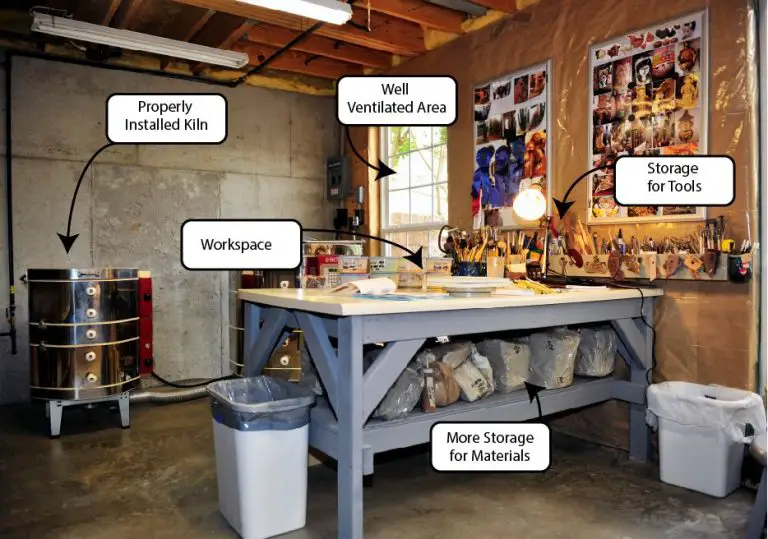
For firing clay, a small tabletop kiln like the Evenheat Kiln is handy for beginners working at home.
Beginner Pottery Techniques
As a beginner, there are four essential techniques to master on the potter’s wheel: centering, opening, raising, and trimming. Learning these core skills will enable you to create basic pottery forms like bowls, vases, cups, and plates.
Centering involves getting your clay centered and secured on the wheel before throwing. To center, start with a ball of clay and press it down firmly in the middle of the wheel head. Use the pressure of your hands and some water to adhere the clay while shaping it into a cone shape. Focus on making adjustments to get the clay perfectly centered.
Opening involves widening the base of your centered clay into a bowl shape. Place both thumbs in the centered clay and press outwards while supporting the outside with your fingers. Open up the clay slowly and steadily. Use your pinky fingers to define the inside curve. The opening sets the foundation for the pottery piece.
Raising builds the walls and height of the clay form. Once opened, gently push from the bottom while pulling the walls upwards slowly. Apply even pressure with your thumbs on the inside and fingers on the outside. Raise the clay up to the desired height for your piece.
Trimming refines the shape, smooths the foot ring, and removes excess clay. Using a trimming tool or butter knife, refine the contour and foot of the piece. Trim excess clay and irregularities for a uniform finish. Avoid over-trimming to prevent thin spots.
Mastering these four techniques will equip beginners with the essential skills to center clay on the wheel and craft simple pottery forms. Check out this tutorial for more tips on beginner pottery wheel techniques.
First Pottery Projects
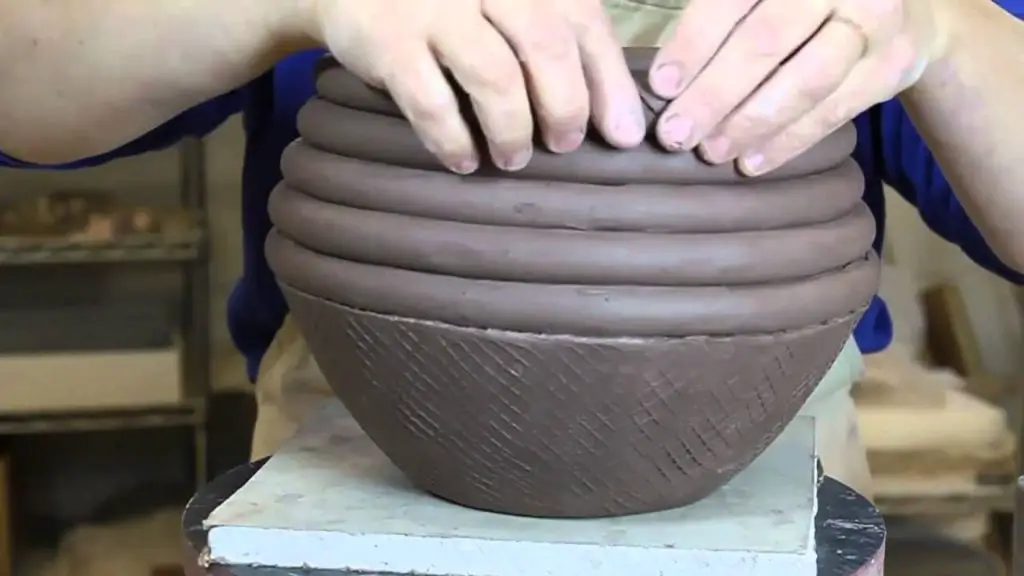
When first starting out with pottery, it’s best to begin with simple functional pieces that utilize basic techniques like coil building. Coil building involves rolling out “snakes” of clay and stacking them to form the walls of a piece. Some good beginner projects using this method include:
- Mugs – Start with a simple straight-sided mug. Focus on getting an even thickness and smooth joins between coils.
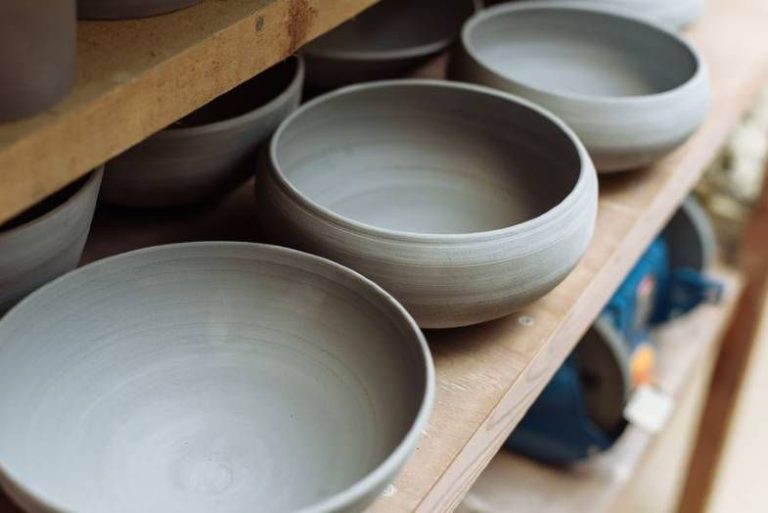
- Bowls – Try making a small bowl. Pay attention to shaping the rounded sides evenly.
- Vases – Craft a basic vase with a wider base tapering to a narrow neck. This helps practice coils shapes.
The key for beginner pottery is not to take on anything too complex at first. Simple cylinder and bowl shapes allow you to grasp coiling and smoothing techniques. Once you’ve mastered the basics, you can move on to more advanced functional pieces like teapots, pitchers, and lidded jars.
Tips for Beginner Potters
Starting pottery can be exciting but also challenging for beginners. Here are some essential tips to help you develop your skills and enjoy the creative process:
Have patience and keep practicing. Rome wasn’t built in a day and becoming skilled at pottery takes time and persistence. Try to set aside regular time to practice and experiment. The more you work with clay, the more comfortable you’ll become. Expect to make mistakes along the way – they are learning opportunities.
Focus on the basics first. Master fundamental techniques like centering, opening, pulling, trimming, attaching handles, etc. Once you have these skills down, you can tackle more advanced projects. Take an introductory class if possible to learn proper techniques from an experienced potter. Refer to online tutorials from sites like The Pottery Wheel for guidance.
Start with simple, functional pieces like basic cups, bowls and vases. Simple forms like cylinders, bowls and plates will help you grasp key techniques. Once you’ve honed your skills, move on to more elaborate decorative pieces.
Be patient with drying and firing. Allow your pieces to dry thoroughly before firing to prevent cracking. First-time firing mishaps are common – focus on learning rather than perfect results. Record firing times and temperatures so you can replicate successes.
Don’t be discouraged by failures. Making pottery involves lots of trial and error. The more you work with clay, the better you’ll get at avoiding potential pitfalls. Let setbacks motivate rather than frustrate you. Stay positive and keep practicing your skills.
Next Steps After Mastering Basics
Once you have mastered the fundamentals of working with clay as a beginner, you can start to explore more advanced techniques and projects. Here are some ideas for next steps after getting the basics down:
Try working with stoneware clay. Stoneware is less porous than earthenware and can result in pieces that are more durable and watertight. Stoneware needs to be fired at higher temperatures than earthenware, so make sure your kiln can reach the proper cone temperatures. Sources like “Guide to pottery techniques: everything you need to know” (https://www.gathered.how/arts-crafts/art/pottery/beginners-guide-to-pottery) provide guidance on working with stoneware.
Start experimenting with glazes. Glazes can add color, texture, and sheen to finished pottery. Learn how to apply, mix, and fire different glazes correctly to get your desired effects. Consider taking a class to learn more about glazing. Reddit users on r/Pottery recommend trying bottled glazes first as you build confidence in glazing techniques.
Try your hand at more complex shapes and forms. Now that you have basic centering, opening, and pulling skills, challenge yourself with pieces like handles, lids, spouts, and unconventional shapes. Use basic techniques like coiling and slabs to add unique flourishes. Let your creativity run wild once you have the fundamentals down pat.
Consider enrolling in an intermediate or advanced pottery class. In-person instruction can help you hone your skills and learn new techniques. Experienced teachers can provide feedback to take your work to the next level.


