What Makes A Successful Pinch Pot?
A pinch pot is a basic form of handmade pottery. It is made by pinching, or pushing inward and upward, on a ball of clay to form the pot shape.
Pinch pots have a long history dating back thousands of years. Some of the earliest known examples of pinch pots were made during the Jōmon period in ancient Japan, from around 14,000 – 300 BCE [1]. Pinch pots were also made by many Native American cultures for utilitarian and ceremonial purposes.
The basic process for making a pinch pot is to start with a ball of clay and use fingers and thumbs to pinch and pull the clay upwards to form the pot shape. The clay walls are thinned and shaped by pushing outward from the inside. A rim can be formed by pinching the top opening of the pot. Pinch pots are an easy, accessible way to make small hand-built pottery without needing a pottery wheel.
Choosing the Right Clay
When making pinch pots, it’s important to choose a clay that has the right properties. The clay should be plastic enough to bend and shape without cracking, but stiff enough to hold its form as you manipulate it. The texture and moisture content also affect how well the clay pinches and pulls.
Clays labeled as “stoneware” or “earthenware” tend to be optimal for handbuilding with the pinch pot technique. According to Reddit users on r/Pottery, these clays provide enough plasticity and stiffness to pinch smoothly without getting too soggy 1. Avoid clays that are very smooth or extremely grogged, as these can be more difficult to pinch effectively.
The moisture content of the clay matters too. You want the clay to feel cool and moist to the touch, but not dripping wet. Letting clay rest wrapped in plastic after wedging helps regulate moisture evenly through the clay. Test a pinch to ensure the clay is not too dry or too wet before you begin building.
Read the clay packaging for suggested uses, as some commercial clays work better for throwing while others excel at handbuilding. Ask knowledgeable ceramic suppliers to point you towards clays with properties ideal for pinching smooth pots.
Shaping the Clay
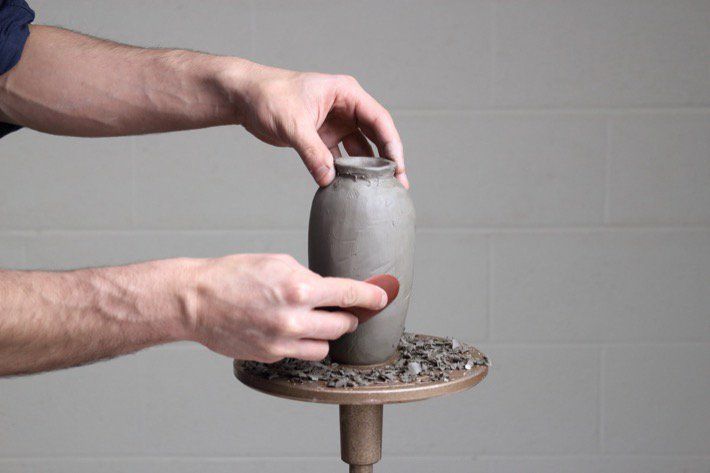
Shaping the clay is the key step in creating a pinch pot. It all starts with a ball of clay. Make sure the clay is soft and pliable. Take the ball of clay in one hand and using the thumb of that hand, press into the center of the ball to create an indentation. Slowly work the thumb around in a circular motion while applying even pressure. This will begin to form the basic interior shape of the pot.
As the indentation deepens, use the fingers and thumb of the other hand on the outside to gently pinch and pull up the clay evenly. Lift up small sections of clay as you work around the pot, pinching and shaping as you go. The goal is to achieve an even thickness and balanced form. Work patiently and deliberately. Pinching too quickly can cause tears or thin spots.
Creating smooth, flawless surfaces takes practice. Try using a rib tool or just the edge of a butter knife to further refine the shape and smooth out imperfections. The more care taken during the shaping process, the higher quality the final pinch pot will be. With practice, shaping clay into a basic pot form will become quick and intuitive.
Texturing the Clay
Adding texture to a pinch pot can give it more visual interest and character. There are a few different techniques for texturing clay:
Pressing objects into the clay can create patterns and textures. Items like leaves, seashells, rubber stamps, or buttons can be pressed gently into the surface of the clay to leave an impression. Just make sure the clay is still soft and pliable when adding textures this way.
Carving designs, lines, or patterns into the clay with tools is another texturing option. Using a dull knife, wooden skewer or specialized clay tools, you can incise designs that remain visible after the pottery has been fired and glazed. Geometric patterns, swirling lines, or ribbed textures can be carved.
Adding slip or liquid clay can also add visual texture. Using a contrasting color of liquid clay, you can paint designs onto the surface or add handprints or bold textures. Liquid slip can be dribbled on or sponged over the surface to create variations in the color and finish.
Experimenting with different texturing techniques allows you to add originality and artistry to your pinch pots. The textures make each piece unique.
Source: https://www.youtube.com/watch?v=n6G8i3BpBfg

Drying the Pinch Pot
Proper drying is crucial to ensure your pinch pot stays intact and does not crack. The key is to dry the clay slowly and evenly. Do not let your pinch pot dry too quickly.
After shaping your pinch pot, wrap it in plastic wrap or place it in a plastic bag. The plastic will help retain moisture and prevent the clay from drying too rapidly. Store the wrapped pinch pot at room temperature out of direct sunlight.
Check on the pinch pot periodically. Look for cracks or sections that are drying faster than others. If needed, re-wrap sections in plastic to further slow drying. The drying process can take 1-3 days.
Test dryness by touching the surface. It should feel cool, smooth, and solid when ready. The clay will lighten in color as it dries. Do not proceed until pinch pot has dried thoroughly and evenly.
Rushing the drying risks cracking, breakage, and poor structural integrity. Be patient and let your pinch pot dry slowly. Proper drying sets up beautifully decorated, sturdy pinch pots.
Source: https://jennylemons.com/blogs/news/pinch-pots
Decorating Pinch Pots
Once the pinch pot has dried and been fired, it is time to decorate it. There are many creative ways to decorate pinch pots to make them unique. Three of the most popular decoration techniques are glazing, painting, and adding embellishments.
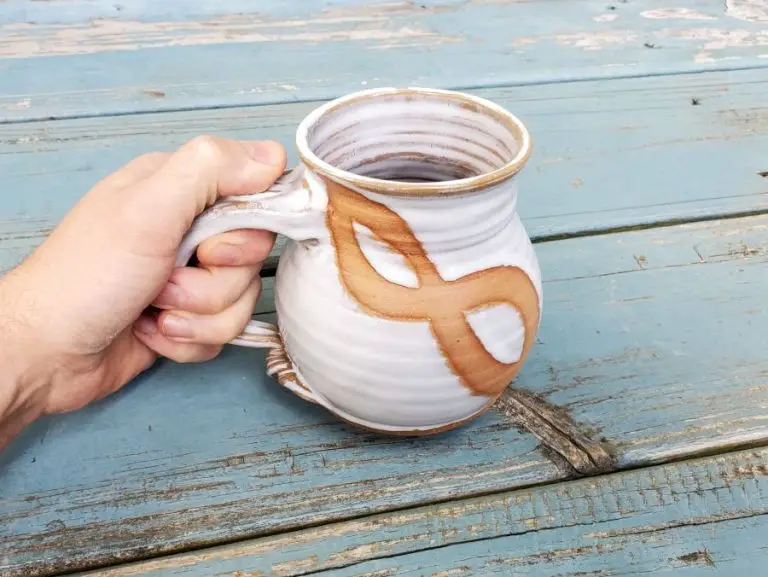
Glazing is a classic way to decorate pinch pots and other ceramic pieces. Using colored ceramic glazes provides a glossy finish and vibrant pop of color. Glazes can be applied overall or in patterns for decorative effects. Clear glazes are also an option to provide a glossy coat without changing the clay’s natural color. Glazes must be fired again after application to seal them to the clay. There are many possibilities for mixing glazes and layering colors.
Acrylic and tempera paints are another decorating option for pinched pots. Paint allows for freehand designs, patterns, illustrations, or text. Paint pens can also be used to add fine details and accents. Paint will give a matte finish unless sealed with a glaze or varnish after drying. Keeping the paint decor simple and minimal can allow the organic pinch pot texture to remain a focus.
Embellishments like beads, buttons, lace, ribbon, and found objects can be affixed to dried pinch pots with strong adhesives. This collage approach works well for irregular shaped pots. Items can be placed in depressions or texture areas for added interest. The embellishments will provide color and visual complexity to complement the simple pottery form.
The possibilities for decorating pinch pots are endless and can be tailored to an artist’s individual style and preferences. How have pinch pots been decorated throughout history? According to this brief history, prehistoric pinch pots were often adorned with cord markings, incisions, or other imprinted patterns.
Firing Pinch Pots
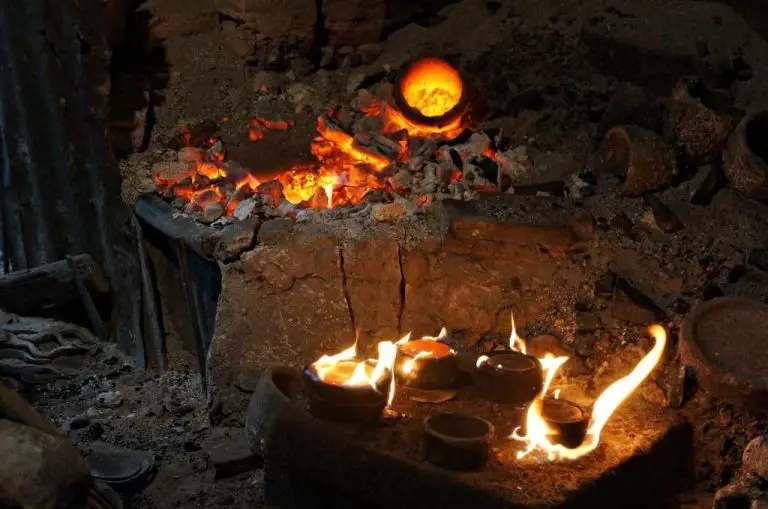
Firing is a critical step in creating a successful pinch pot. Pinch pots must be fired twice – first a bisque firing to harden the clay, then a glaze firing to seal and decorate the pot.
For the bisque firing, the kiln temperature should reach around cone 04-06 which is approximately 1885-1915°F (1028-1046°C). The bisque firing hardens the clay body so it can withstand the application of glazes. Firing too hot or too fast during the bisque can cause cracks or bloating.
During the glaze firing, the temperature reaches higher around cone 6 which is approximately 2232°F (1222°C). This melts the glass in glazes, sealing and decorating the surface. Glazes should be formulated to mature at the correct cone temperature to avoid defects like pinholing, crawling, or burning.
Some potters do a single firing, applying glaze before the bisque stage. However, a two-step firing allows adjusting glazes between firings and gives more control over the final results.
No matter the approach, following the temperature guidelines for bisque and glaze firings is crucial for hardening the clay and properly melting the glazes without defects.
Source: https://quizlet.com/33038072/poop-ceramics-flash-cards/
Troubleshooting Issues
Pinch pots can develop cracks, warping, and glazing problems that need troubleshooting. Here are some common issues and how to fix them:
Cracks often occur when the clay is too wet or dry. To prevent cracks, maintain proper moisture content while working with the clay. Small cracks can be fixed by moistening the area and gently pressing the pieces back together. For large cracks, a clay slip can be used to “glue” the pieces together. Allow repaired cracks to dry fully before continuing to work on the pinch pot.
Warping happens when one side of the clay dries faster than the other. This causes the pinch pot to distort. To prevent warping, ensure even thickness of walls and dry the pot slowly and evenly. If warpage occurs, wet the pot and reform the shape by gently pressing on the warped areas. Allow it to dry fully before firing. Severely warped pots may need to be rewedged and started again.
Glazing issues like cracking, peeling, or poor coverage can be caused by problems with clay porosity, thickness of glaze application, or improper firing. To prevent glazing issues, test glazes on a sample piece first. Apply glazes evenly in the proper thickness. Bisque fire before glazing. When glaze problems occur, evaluate the possible causes and make adjustments for future pieces.
For more tips, see this helpful troubleshooting video.
Using Pinch Pots
Pinch pots have many creative uses beyond basic bowls and cups. Their small, open container design lends itself well to a variety of functions. Here are some fun ideas for using pinch pots:
Pen holders – Pinch pots make for whimsical pen or pencil holders. Decorate them with designs or leave plain for an earthy look. The open top gives easy access while keeping writing utensils corralled in one place.
Succulent planters – The round pinch pot shape mirrors the round rosette shape of many succulents. Plant a few small succulents in a pinch pot to create a unique planter. Make sure the pot has drainage holes to prevent root rot.
Jewelry bowls – Pinch pots can hold rings, earrings, bracelets, and more. Use them on a desk or vanity to organize jewelry. Decorate them with beads or paint for extra flair.
Candle holders – Pinch pots make interesting candle holders. Make sure they are wide enough to be stable. Add candle wax catches inside the rim for safety.
Decorative bowls – Use creatively decorated pinch pots as decorative bowls to hold keys, change, hair ties, potpourri, and other small items. Place them around the home for visual interest.
With some creativity, miniature pinch pots can serve a variety of purposes beyond basic pottery. Their small size and easy shaping makes them suitable for many different uses.
Key Tips for Success
When making a successful pinch pot, there are some key tips to keep in mind:
- Work in a spiral motion from the bottom to the top as you shape the clay. Using the tip of your thumb on the interior and supporting the exterior with your other hand allows you to gradually thin the walls.
- Choose a clay that is soft and pliable. Avoid clay that is too firm or brittle, as it will crack during shaping.
- Make sure to have a workable consistency. Adding water to dry clay makes it more malleable. Letting wet clay sit out helps absorb moisture.
- Use an even pressure and rotate the clay continuously to shape the walls evenly. Pinching too hard can cause cracks and weak spots.
- Keep the base thicker than the walls for stability. Pinch the walls thinner gradually working upwards.
- Smooth the interior surface with a wet finger, wood tool, or sponge for a finished look.
- Allow adequate drying time before firing. Dry pinch pots slowly to prevent cracking.
- Fire at the temperature recommended for the type of clay used. Under-firing can result in weak, cracked pots.
Taking the time to properly choose the clay, shape the walls, decorate, dry, and fire a pinch pot will help ensure a successful finished piece.


