What Stage Is Clay At If It Is Greenware?
What is Greenware?
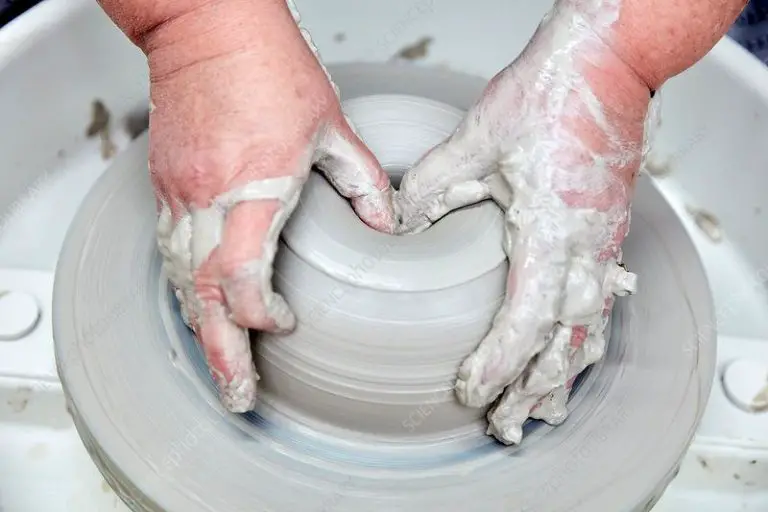
Greenware refers to pottery or ceramic pieces that have been shaped from clay but have not yet been fired in a kiln (Thesprucecrafts.com, 2019). At the greenware stage, the clay is still quite soft and malleable. The term “greenware” comes from the grey-green color of the moist clay before it has been fired and hardened into ceramics.
Greenware has enough strength and firmness to hold its shape after being worked by the potter, but is still quite fragile and porous at this stage. Any major impacts or drops are likely to distort or crack the piece. Greenware contains water within the clay body that needs to be fully dried out before firing. After shaping and drying, greenware undergoes a bisque firing which further hardens the clay before applying any glazes or decoration (Seattlepotterysupply.com).
Greenware Stage in Pottery Making
Greenware is the stage in pottery making after a clay piece has been formed and dried to a point where it is still moist and able to be manipulated, but sturdy enough to hold its shape. This is an intermediate stage between the initial forming of the clay object and firing it in a kiln. The greenware stage comes after the clay has been wedged, kneaded, and shaped, and before the first firing turns it into bisqueware.
Greenware differs from bisqueware in that it is still soft, porous, and fragile at this stage. Bisqueware refers to clay objects that have undergone an initial firing in the kiln at a low temperature to harden and prepare them for glazing and decorating. The bisque firing process makes the clay denser and less permeable. Greenware has not yet been fired or hardened through heat. It contains moisture content that needs to be thoroughly dried before firing to prevent cracking. Pottery Making Secrets by Egyptian Craftsmen provides an overview of the greenware and bisque stages.
So in summary, greenware occurs between clay formation and bisque firing. It describes moist, unfired clay that maintains its shape but requires extensive drying and the first bisque firing to gain hardness and strength. Once fired, it transitions into bisqueware before advancing to glazing and decoration.
Drying Greenware
After a piece of pottery has been shaped and formed, it is considered greenware. At this stage, the clay still contains water and needs to be dried before it can be fired in a kiln. There are a few different methods for drying greenware:
Air Drying – Greenware can be left out to air dry at room temperature. The pieces should be placed on drying racks so air can circulate all around. Air drying can take several days or weeks depending on the size and thickness of the pieces.https://artabys.com/greenware-ceramics-definition/
Using Fans – Fans can be set up and directed at greenware pieces to quicken the air drying process. Moving air helps evaporate moisture from the clay. Industrial drying rooms often use large fans to circulate air.
Low Temperature Oven – Some potters will use a kitchen oven set to a very low temperature (150-200°F) to slowly dry greenware. Pieces are placed in the oven on racks and left for several hours.
Dedicated Dryers – Special electric ceramic dryers can be used which are designed to dry greenware at optimal low temperatures. These dryers allow adjusting the temperature and airflow.
The key is to dry greenware slowly and evenly. If dried too quickly, cracks and breakage can occur. Taking the time to properly air dry greenware results in strong finished pieces.
Preparing Greenware for Firing
Properly preparing greenware before firing is an essential step in creating high quality finished pieces. After the clay has been shaped and allowed to dry to the greenware stage, it must be sanded and cleaned before being fired in a kiln.
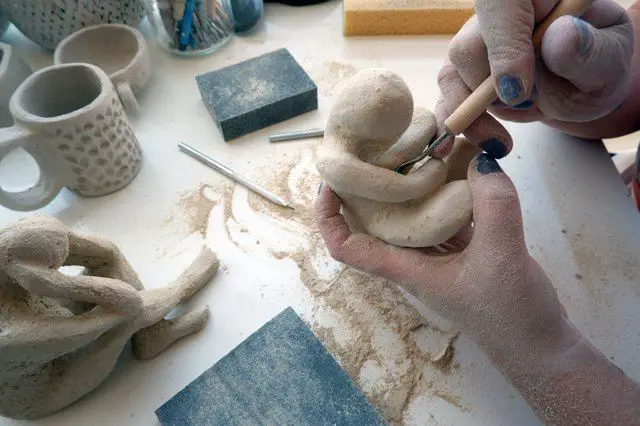
Sanding greenware smooths any rough areas and removes seam lines or imperfections from the shaping process. It’s important to sand pieces thoroughly, using progressively finer grit sandpaper, to achieve an even surface. Any dried clay residue or dust must be washed off after sanding to prevent blemishes on the fired piece. According to research from source, sanding techniques are often taught in greenware preparation classes.
If greenware is not properly sanded and cleaned before firing, any small flaws or clay deposits will become permanently fused to the clay after firing. This can lead to an unattractive finish. As noted in this source, proper greenware preparation allows decorative details to be cleanly added after firing as well. Taking the time to correctly prepare greenware is essential for achieving quality final results.
Firing Greenware
The first firing of greenware transforms it into bisqueware or bisque. Bisque refers to pottery that has been fired at a relatively low temperature in a kiln, around cone 04-06 which is approximately 1652-1832°F (900-1000°C). This initial bisque firing prepares the clay for its final firing by hardening it and making it less porous.

There are several key things to know about properly firing greenware to bisque:
- Slow ramp up and cool down rates are essential to prevent cracking. Ramp up at around 100-150°F per hour, holding at top temperature for 30-60 minutes. Cool down at a similar slow pace.
- Kiln shelves or stilts should be used to allow air circulation and prevent pieces from sticking.
- Once cool, inspect pieces for cracks or glaze melt. Small cracks may be repaired prior to glaze firing.
- Bisqued pieces are ready for decorating with glazes, underglazes, and stains before the final glaze firing.
With proper firing, the greenware has now been transformed into a strong, hardened bisque ready for glazing and use. Firing greenware successfully takes patience and care to prevent cracking, but is very rewarding.
Source: https://thepotterywheel.com/firing-greenware-to-bisque/
Decorating Greenware
There are several popular techniques for decorating greenware before it goes into the kiln for firing. Two of the most common methods are glazing and painting/staining.
Glazing involves applying a glass-like coating over the raw clay body. Glazes melt and fuse to the clay surface during firing, creating a glassy finish. Glazes can be applied overall or just on portions of a piece to create patterns and designs. Underglazing is a technique where colored glazes are applied under a clear overglaze. The underglaze shows through transparent sections of the top glaze after firing.
Another option is to decorate the raw clay surface directly using special ceramic paints, underglazes, or clay stains. These can be brushed or sponged on to create all kinds of designs. Painting and staining are often used to accent or highlight areas that will later be covered with a glaze. Decorated greenware requires extra care in firing to avoid defects caused by paint or stain burning out improperly.
Both glazing and painting/staining allow potters to personalize their pieces with colors, patterns, and imagery before the first firing. Decoration applied at the greenware stage can create vivid, striking effects not easily achieved after bisque firing. Choosing the right methods and materials for decorating greenware is key to achieving the desired final results.
Advantages of Greenware
Greenware offers some key advantages over other stages of clay drying when working on sculpting intricate details and decorations:
Greenware is still moist enough that it is very easy to carve and shape fine details without risk of cracking or damage that can occur in stiffer clay bodies. The clay has firmed up enough that it maintains its shape, but still retains malleability to sculpt delicate patterns, textures, and embellishments (Source).
Compared to bone-dry clay which is extremely fragile, greenware has a lower likelihood of cracking, chipping, or shattering when pressure is applied while carving or smoothing the surface. The moisture content gives greenware flexibility to withstand manipulation without fracturing (Source).
While leather-hard clay can also be carefully sculpted, the additional moisture in greenware makes it the optimal stage for intricate detailing work before the first firing. The greenware stage offers a robustness not found in completely dry clay, with a maneuverability exceeding stiffer leather-hard pieces.
Challenges of Working with Greenware
Greenware requires extra care and attention when handling and working with it. Here are some key challenges and precautions to be aware of:
Greenware is delicate and can easily deform if not handled properly. It maintains the shape given to it but has not yet been strengthened by firing. Avoid applying too much pressure or force when moving greenware or it may bend or warp (Source). Work carefully and support the form fully when moving it.
Cracks and breakages are also common issues with unfired greenware. The clay contains moisture which can expand and cause cracking as it dries. Avoid drastic temperature changes which may shock the clay. Let greenware dry slowly and evenly to prevent cracks from forming (Source). Also be gentle when handling to avoid accidental cracks or chips.
Overall, a light and cautious approach is required when working with unfired greenware. Allow time for proper drying and support the structure fully to avoid deformities. With care, the greenware can be decorated and prepared for firing without issues.
Tips for Working with Greenware
When working with greenware pottery, using the right tools and techniques can make the process much easier. According to The Pottery Wheel, some tips for working with greenware include:
- Use plastic rib tools rather than metal rib tools which can scratch the surface
- Avoid using water which can lead to cracking – use rib tools dry
- Go slowly and avoid pressing too hard when smoothing to prevent distortion
- Use slip trailer bottoms to scrape foot rings
- Use fettling knives for trimming excess clay
- Use a small paintbrush to dust away debris
When joining greenware pieces, proper techniques help ensure a strong bond. As recommended by Ceramic Arts Network, it’s best to:
- Score and slip the surfaces to be joined
- Use guide pins to align pieces and rubber bands or tape to hold together initially
- Avoid excess moisture and let the slip setup 15-30 minutes before rehandling
- Once bonded, reinforce inside joints with wadded up newspaper or foam
- Allow adequate drying time for moisture in attached sections to evaporate
Taking care with greenware and using appropriate tools and methods will lead to successful results when firing finished wares.
Greenware in Summary
Greenware refers to clay that has been shaped into its final form but has not yet been fired. At the greenware stage, the clay still contains water and is soft, flexible, and fragile.
Some key properties of greenware include:
- It can be easily scratched or dented since it is still soft.
- It is cool to the touch and darker in color than dry clay.
- It needs to be handled carefully to avoid damage.
When working with greenware, it’s important to follow these tips:
- Allow proper drying time before firing or decorating.
- Clean up seams, imperfections, or tool marks.
- Support delicate areas to prevent sagging or cracking.
- Decorate gently and allow paint or glazes to dry thoroughly.
In summary, greenware represents an intermediate stage in pottery-making after shaping but before firing. With proper handling, drying, and preparation, greenware can result in high quality finished ceramic pieces.


