How To Make A Clay Diya Lamp?
Clay diya lamps have been an integral part of Indian culture for thousands of years. The word “diya” comes from the Sanskrit word “deepa” which means lamp. Diyas are typically small circular vessels made from clay with a single wick in the center. They are often decorated with pressed patterns and come in a variety of sizes and shapes.
Diyas hold great spiritual and symbolic significance in Hinduism. During Diwali, India’s festival of lights, millions of diyas are lit to signify the triumph of light over darkness and good over evil. Diyas are also lit during other Hindu festivals and special ceremonies like weddings or prayers. Having diya lights in homes is believed to bring luck, peace and prosperity.
Making diyas is an ancient Indian art form that requires skill and patience. While factory-made diyas are common today, many families continue the tradition of handmaking diyas during Diwali. The handmade clay diyas have a unique charm and warm glow that makes them better for ceremonial use. This article provides a step-by-step guide to making your own beautiful and long-lasting clay diya at home.
Materials Needed
The main items you’ll need to make a clay diya lamp are:
-
Clay – Use natural clay or polymer/air-dry clay. For natural clay, choose a type that fires at a low temperature like earthenware or terra cotta clay.
-
Clay tools – You’ll need basic sculpting and shaping tools like a rolling pin, metal rib, sponge, wooden modeling tools, etc.
-
Wicks – Use cotton wicks made specifically for oil lamps. Make sure they are wide and flat for the best burn.
-
Cotton balls – To place under the wick to absorb oil.
-
Oil – Use lamp oil like kerosene. Do not use regular cooking oils.
-
Decorative items – You can decorate diyas with paints, glazes, stamps, or natural items like seeds, spices, flowers, etc.
Preparing the Clay
Before you can begin shaping your diya lamp, you’ll need to properly prepare the clay. Here are the key steps:
Kneading – Take your clay and knead it thoroughly with your hands. Kneading helps warm up and soften the clay while also uniformly mixing it. Knead for 5-10 minutes until the clay is smooth, pliable, and free of lumps or air bubbles.
Wedging – After kneading, form the clay into a ball and cut it in half. Take one half and press it into a square. Take the other half and press it into a cylinder. Place the cylinder on top of the square and press them together. Then fold the clay in half and press again. Repeat this process, alternating between square and cylinder shapes. Wedging removes air bubbles and further mixes the clay.
Preparing Work Surface – Lightly dust your work surface with cornstarch or clay dust to prevent the clay from sticking. Use a wooden board or clean tabletop as your work surface. Avoid surfaces like newspaper that could transfer ink or textures onto the clay.
Shaping the Diya
Once you have prepared the clay, it’s time to shape it into the diya form. There are a few different techniques you can use:
Rolling Out the Clay
If you want to hand shape the diya, start by rolling out the clay into a flat circle or square shape. The clay should be about 1/4 to 1/2 inch thick. Use a rolling pin to flatten the clay evenly. Make sure the surface is smooth and uniform in thickness.
Using Molds
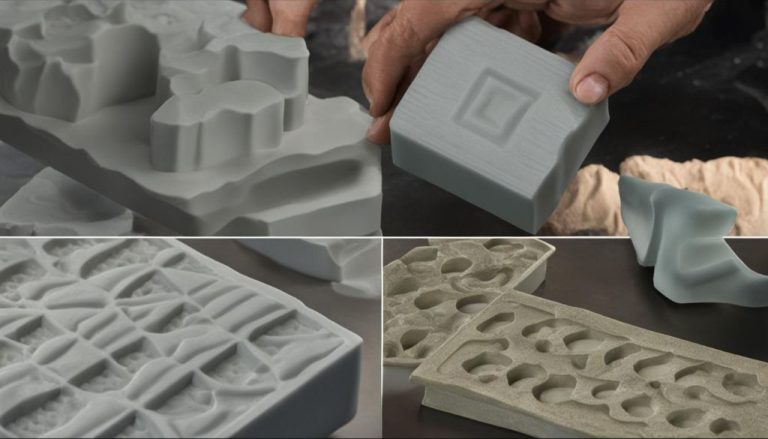
For more uniform shapes, press the clay into diya-shaped molds. Apply even pressure to push the clay into the mold cavities and avoid trapping air bubbles. Smooth the back of the molded clay to create a flat base for the diya to sit on.
Sculpting Techniques
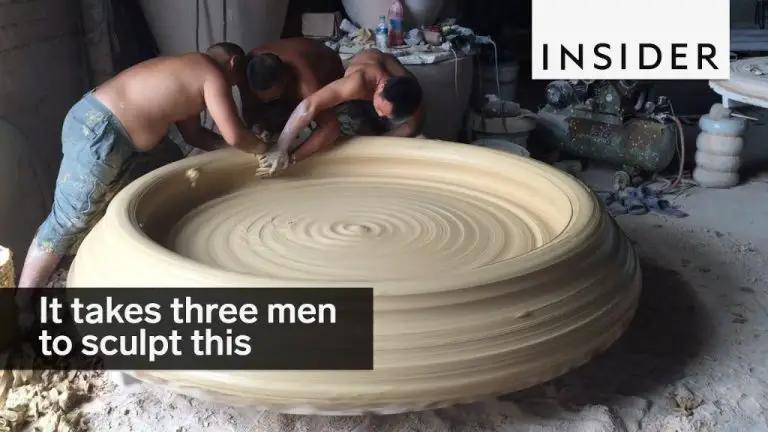
You can also sculpt the diya shape freehand without molds. Use your fingers to pinch and shape the clay, turning it as you work. Create the traditional diya shape with curved sides rising up to an open top. Allow the clay to slowly take form under your hands.
Whichever technique you use, make sure the clay walls are an even thickness throughout. Smooth the clay with your fingers or small tools to create clean shapes and lines. Let the shaped clay firm up slightly before continuing.
Creating the Wick Hole
Once the diya is shaped, it is time to create the wick hole. This hole holds the wick which the diya lamp uses to draw fuel and emit light. There are a few key things to keep in mind when creating the wick hole:
Tools for Piercing Clay
You’ll need a tool that can cleanly pierce through the clay. Some common options include a chopstick, skewer, or specialized clay tools. Avoid anything too large or blunt. The goal is to make a narrow, cylindrical hole through the center of the diya’s chamber.
Depth and Diameter
The wick hole should extend from the base of the diya’s chamber to about 1/2 inch from the rim. Make it as straight and centered as possible. The diameter depends on the thickness of your wick, but 1/8 to 1/4 inch widths are common. The hole walls should be smooth to allow the wick to slide through without obstruction.
Test the fit with your wick and widen the hole if needed. It’s better for the wick to move freely than to pinch. Once you have the right sized wick hole, your diya lamp is ready for the next steps!
Adding Decorations
Once the basic diya shape is formed, there are many ways to decorate it and make it unique. Some popular decoration techniques include:
Incising Patterns: Use a small, sharp tool like a toothpick or skewer to carve lines and geometric shapes into the clay. This creates an indented texture. You can make simple patterns like straight lines, dashes, diamonds, etc. or get creative with more elaborate designs.
Adding Clay Bits: Take small pieces of colored clay and attach them to the diya with slip (liquid clay). This allows you to add dots, shapes and texture. For example, roll tiny balls of white clay and dot them along the borders. Or, roll out a snake of clay and apply along the rim. Let your imagination run wild.
Stamping: Use clay or carved printing blocks to stamp repetitive patterns into the diya clay. Dip the stamp in slip, then press firmly onto the soft clay in different spots to get an all-over design. Geometric shapes, flowers, leaves, birds and other themes work well.
Decorating the diya adds personality and visual appeal. Apply the decorations judiciously so they enhance the lamp design without overcrowming it. Allow all added bits to dry fully before firing.
Drying the Diya
After the diya has been shaped and decorated, it needs to be thoroughly dried before it can be fired. There are a couple options for drying the clay:
Air Drying
The simplest method is to let the clay air dry. Place the unfired diya in a warm, dry location out of direct sunlight. Allow the diya to sit undisturbed as the moisture slowly evaporates. Expect the drying time to take 1-2 weeks depending on the climate and thickness of the clay.
To help speed up the process, place a small fan nearby to circulate the air. But avoid pointing it directly at the diya which could cause cracking or warping. Flip the diya over about halfway through the drying time so both sides have a chance to dry evenly.
Using a Dehydrator
For faster drying, use an electric food dehydrator. The temperature can be set between 95-115°F. Place the unfired diya on the dehydrator trays, leaving space between pieces. Drying time can be reduced to just 1-2 days. Check the diya periodically until no moisture remains.
Once the diya is completely dry it’s ready to be fired in a kiln to permanently harden the clay.
Firing the Diya
After the diya has dried completely and is ready to be fired, there are a few different firing techniques you can use including kiln firing, pit firing, and raku firing. Each method results in a unique look and finish for the diya.
Kiln Firing
Kiln firing is the most common method for firing clay diyas. The diyas are loaded into an electric or gas-fired kiln that steadily heats the pieces to between 1800°F-2200°F. Kiln firing allows you to carefully control the temperature and firing schedule to achieve your desired results. It produces an even finish and is less prone to breakage. The downside is that kilns can be expensive to purchase and operate.
Pit Firing
Pit firing involves placing the dried diyas in a pit dug into the ground and building a fire in the pit using wood as fuel. This primitive firing technique relies on controlling the air supply and fuels to achieve the high temperatures needed. Pit firing results in more irregular, rustic finishes with flashing of colors. It is less expensive but can be more unpredictable.
Raku Firing
Raku is a specialized firing process originating from Japan. The diyas are heated quickly in a kiln to around 1800°F. They are then removed from the kiln while red hot and placed in containers with combustible materials like sawdust or leaves. This smoldering process gives the surface unique crackle glazes and darker coloring. Raku firing requires experience to master but can create beautiful, artistic effects.
Preparing the Wick
An important step in creating your clay diya lamp is preparing the cotton wick. The wick is what allows the lamp to burn brightly and evenly. Here are some tips for making high quality wicks:
Use 100% cotton yarn or thread to make the wick. Cotton burns slowly and evenly. Avoid synthetic materials that may cause the wick to burn too quickly. Choose a cotton yarn or thread that is approximately 1-2 mm thick.
Cut the cotton wick to an appropriate length. The wick should be slightly longer than the depth of the diya’s wick hole. This allows the wick to curl within the lamp as it burns. A good rule of thumb is to cut the wick about 2.5 cm longer than the hole.
Twist or braid the cotton lightly to help maintain the wick’s shape. This allows the wick to burn evenly and prevents excess fraying. Do not twist too tightly or the wick may not curl properly when lit.
Trim the wick to create an even end for lighting. Use sharp scissors to neatly cut off any frayed or irregular edges. The wick end should be flat and uniform.
Prime the wick before first use. Press the wick lightly between paper towels to remove any dirt or excess oils from the cotton. Then hold the wick over a flame briefly to burn away stray fibers and seal the edge.
Store wicks in a dry, sealed container until ready to use. Properly prepared wicks help your diya lamp burn bright and steady!
Using the Finished Diya
Once your diya lamp is complete, dried, and fired, it’s ready to be put into use. Here are some tips for safely using your finished clay diya:
Adding Oil
Fill your diya about half to two-thirds full with a vegetable-based lamp oil. Avoid using other flammable liquids like kerosene or gasoline, as these can be dangerous. Make sure to use an oil that is specifically intended for lamps.
Lighting Safely
Light the wick in the diya using a long fireplace match or utility lighter. Be very careful when lighting the lamp, keeping your hands and face at a safe distance to avoid burns. Do not leave a lit diya lamp unattended.
Place the lit diya on a stable, heat-safe surface. Never put a diya directly on flammable materials like wood or cloth. Make sure the diya is out of reach of children and pets.
Extinguishing
To extinguish the diya when you are done, simply blow out the flame. You can also use a candle snuffer. Allow the lamp to cool completely before handling.
When the wick is completely consumed, replace it with a new cotton wick before relighting. Dispose of old oil and change it frequently to avoid smoke and odor.


