How Do You Model With Modelling Clay?
Modeling clay, also known as plasticine, is a malleable substance used for sculpting and molding. It’s made from different types of oil-based chemicals and compounds that provide a soft, pliable texture that can be shaped into various objects and sculptures.
Modeling clay first became popular as a children’s toy in the 1930s. However, artists and sculptors soon realized its potential for more serious work. Unlike traditional clay that needs to be fired, modeling clay maintains its shape without baking. This makes it an accessible art material for creators of all ages and skill levels.
Today, modeling clay remains a staple material for artists, hobbyists, stop-motion animators, and kids. With practice, it can be used to create detailed sculpts of people, animals, scenes, abstract art, and more. The simple act of shaping it with one’s hands provides a satisfying tactile experience as well.
Types of Modeling Clay
There are several main types of modeling clay that are commonly used for sculpting and modeling projects:
Oil-Based Clay
Oil-based clay is made from minerals, fillers and oils such as linseed oil or mineral oil. It has a smooth, creamy consistency that is easy to work with. Oil-based clay remains soft and pliable until it dries out. It is reusable if kept moist and stored in an airtight container. Oil-based clays are non-toxic and one of the most versatile modeling clays.
Polymer Clay
Polymer clay is a synthetic modeling clay that is based on PVC resin mixed with colorants and plasticizers. It has a soft, doughy texture that makes it easy to shape. Polymer clay hardens when baked in a standard oven at relatively low temperatures. Once hardened, it can no longer be reshaped. Polymer clays are available in many colors and styles.
Homemade Clay
Homemade modeling clay can be created by mixing household ingredients like flour, salt, lemon juice and oil. Homemade clay offers an affordable alternative to manufactured clays. It provides a creative opportunity to customize colors and textures. However, homemade clay’s consistency can vary and it may be less durable than manufactured clays.
Tools and Supplies
When working with modeling clay, having the right tools and supplies on hand can make the sculpting process easier and lead to better results. Here are some of the basic tools and other supplies that are useful to have:
Basic Tools
Basic sculpting tools include:
- Clay shaper – A wooden or silicone tool used to blend and smooth clay.
- Loop tool – A tool with a wire loop on the end used to carve lines and add texture.
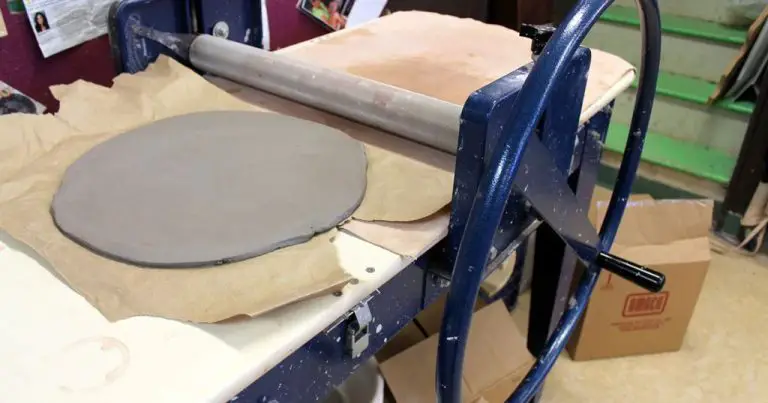
- Rolling pin – For rolling out slabs of clay.
- Cutting tools – Such as tissue blades or clay knives for cutting clay.
- Clay extruder – For making long pieces like ropes, tubes or spikes.
Advanced Tools
More advanced tools include:
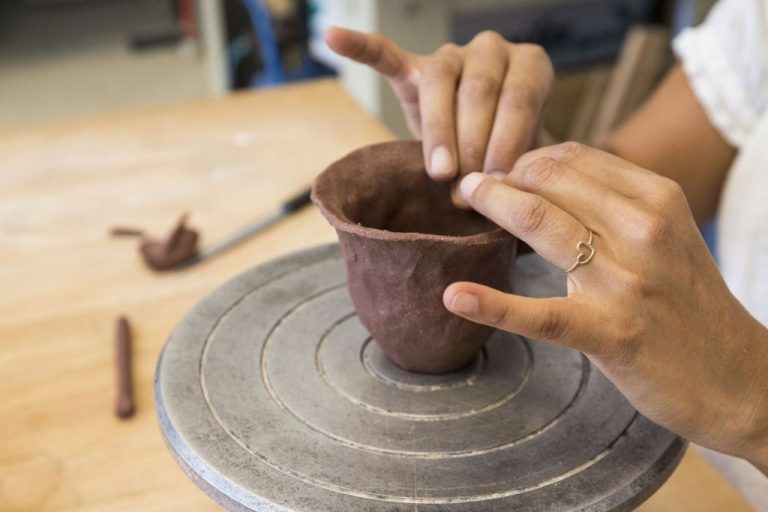
- Sculpting stands – Hold and rotate your work to reach all angles.
- Calipers – Precisely measure the thickness and dimensions.
- Texture sheets – Press into clay to add patterns.
- Stencils – Use to create shapes and effects.
- Stamps – Imprint designs and shapes.
Other Supplies
Other useful supplies include:
- Work surface – Such as wood, glass or acrylic clay boards.
- Polymer clay glaze – Adds shine and seals the finished piece.
- Baby powder/cornstarch – Keeps clay workable and less sticky.
- Acrylic roller – For conditioning and flattening clay.
Shaping and Sculpting Techniques
When working with modeling clay, there are a variety of techniques you can use to shape, sculpt, and texture your creations. Here are some of the most common sculpting techniques:
Rolling: Use a rolling pin or your palms to roll out slabs of clay to a desired thickness. Roll gently and evenly to achieve an even surface. Rolling clay out flat makes it easier to cut shapes or press textures into the surface.
Carving: Use sculpting tools like loop tools, knives, or carving picks to cut into the surface of the clay and remove pieces to shape it. Carve gently to avoid tearing the clay. Carving can be used to define details or hollow out areas.
Smoothing: Use your fingers, a wet paintbrush, wooden tools, or silicone shapers to gently blend and smooth seams and uneven surfaces. Smooth gently to avoid distorting shapes.
Blending: To blend two pieces together, gently press the edges together, smoothing over the seam to meld them into one piece. Add slip or water to help them adhere.
Texturing: Press molds, stamps, or found objects into the clay to transfer patterns and textures. Try pressing in fabric, rope, or lace. Use sculpting tools to scratch or engrave lines and marks. The possibilities for textures are endless!
Making Simple Shapes
Some of the most fundamental shapes to practice when starting with modeling clay are spheres, cubes, cones and cylinders. Mastering these basic forms will provide a strong foundation for sculpting more complex objects and scenes. Here are some tips for sculpting simple shapes with modeling clay:
Spheres
To make a sphere, begin by kneading your clay thoroughly until it is soft and pliable. Roll a ball of clay between your palms while applying even pressure. Alternatively, roll it on a smooth, flat surface. Check the shape regularly and apply slightly more pressure to any uneven areas. The goal is to achieve a perfectly rounded, smooth surface. Make spheres in various sizes from tiny marbles to large, exaggerated orbs.
Cubes
Start with a ball of clay and press down on it firmly to flatten the top and bottom into circles. Then press in the sides, working your way around until all sides are flat and 90 degree angles are formed. Square off the edges and corners neatly. Make cubes in different dimensions from small dice to big blocks.
Cones
Roll a ball of clay into an oval shape, then taper one end to a point. The key is applying gradual pressure from the wide base to the narrow tip. Twist the cone as you work to keep the sides uniform. Make short, fat cones or tall, thin ones. Practice getting smooth, symmetrical sides.
Cylinders
Roll a ball of clay into a thick rope. Smooth the sides by rolling back and forth on a flat surface. Pinch the ends to create flat, circular faces. Check dimensions regularly to keep the cylinder consistent. Make cylinders of varying heights and diameters. Stand them upright, stack together, or cut them to make rings.
Making Objects
One of the most rewarding aspects of modeling with clay is sculpting detailed objects like figures, animals, buildings, vehicles, and food. When making these types of creations, start by visualizing the object in 3D and break it down into simple shapes. For a human figure, make a cylinder for the torso, spheres for the head and joints, and so on.
Use references like photos or sketches while sculpting to capture important details and proportions accurately. Pay attention to textures too – roll clay into logs or balls to recreate the fur of an animal, add lines for scales or feathers, etc. Stamp patterns into the clay with homemade or store-bought tools to emulate the look of bricks, wood grain, fabric, and more on your objects.
As the sculpture takes shape, blend and smooth the clay by rubbing your fingers to eliminate visible seams between shapes. Add smaller details like eyes, tails, accessories, or dishes and food on a dining table. Let the clay firm up slightly before refining details so the sculpture doesn’t get distorted.
Making miniatures? Use thin clay snakes to make railings, ladders, wires and other thin parts. Sculpt multiple items and arrange them into lively scenes. With practice and creativity, you can fashion remarkably realistic and vibrant objects from modeling clay.
Making Scenes
One fun way to use modeling clay is to create miniature scenes and landscapes, also known as dioramas. Here are some tips for making great scenes with modeling clay:
Start with a base – This provides a foundation to build your scene on. Use thick cardboard, wood, tile, or foam as your base. Secure clay to the base using wire, glue, or acrylic gel medium.
Add texture – Roll out clay and use tools to add texture, such as footprints, tire tracks, scales, etc. You can also add natural materials like twigs, rocks, sand, or moss.
Create 3D effects – Use wads of clay to form hills, cliffs, boulders and other elements to create depth and levels. Cut shapes like trees and bushes out of clay.
Add details – Miniatures like people, animals, benches, streetlights, etc bring scenes to life. Make them out of clay or buy ready-made miniatures.
Paint your scene – Acrylic paints work best on modeling clay. Paint details like water, grass, trails, etc. to enhance realism.
Consider scale – Make items proportionate to each other. Use photos for reference.
Tell a story – Create an interesting narrative or focal point to bring your scene together.
Baking and Finishing
Baking is an important final step when working with modeling clay. Baking hardens the clay by drying it out and makes your finished piece more durable and lasting. Here are some tips for baking modeling clay projects:
Set your oven to the temperature recommended on the clay packaging, usually around 130°C or 275°F. Place your item on a baking sheet lined with parchment paper or aluminum foil to prevent sticking. Bake for the time specified on the packaging, checking frequently near the end to prevent overbaking. Clay sculpts should be baked until hard to the touch.
For larger pieces, it may help to bake in stages to prevent cracking from uneven drying. Bake one section at a time, allowing it to cool completely before adding more clay and baking again. You can also use toothpicks, skewers or wire to provide internal support for parts that may droop or slump while baking.
Once cooled, you can sand any rough areas with fine grit sandpaper. You may also choose to paint, glaze or seal the finished piece. Acrylic paints work well on baked polymer clay. For a glossy finish, brush on a liquid polymer clay glaze and rebake according to package directions. Finally, apply a sealant like polyurethane for shine and protection.
Storing Modeling Clay
Proper storage is crucial for keeping modeling clay soft and workable. Here are some tips for storing clay:
Wrap unused clay tightly in plastic wrap or place it in a sealed plastic bag. This prevents the clay from drying out.
Store modeling clay in an airtight container like a plastic bin or jar. Make sure the lid seals tightly.
Consider storing the clay in the refrigerator, but not the freezer. The cool temperature helps keep clay soft.
If the clay starts to dry out, knead in a little vegetable oil or coconut oil to restore moisture and pliability.
Avoid storing clay in places with big temperature fluctuations, direct sunlight, or high humidity. This can cause drying and damage.
When re-kneading previously worked clay, add fresh clay to restore elasticity if needed.
Clean hands, tools and surfaces before and after use to avoid contaminating clay with dust and debris.
With proper storage techniques, quality modeling clay can remain usable for months or even years.
Advanced Techniques
Once you have mastered the basics of modeling with clay, you can move on to more advanced techniques to take your sculptures to the next level.
Mixing Colors
You can mix colors of modeling clay together to create custom shades. Knead two or more colors together thoroughly until the clay is a uniform new color. Start with a small amount of the second color and add more if needed. Darker colors tend to dominate lighter ones. Test mixed colors on a small piece before using on your sculpture.
Making Molds
Molds allow you to reproduce the same shape multiple times. Press your original clay sculpture into an molding putty to create an impression. Brush the inside of the mold with talcum powder or mold release spray. Press new clay into the mold, smoothing it with your fingers. Carefully remove the duplicate and clean the mold for the next use. Store molds in an airtight container.
Mixing Media
Consider combining modeling clay with other art materials for more creative possibilities. Attach clay shapes to a painted canvas as a mixed media work. Use clay as an adhesive to apply glitter, beads, sea shells or other objects onto a base structure. Embed wires into clay then bend into sculpture armatures. The options are endless when merging modeling clay with additional media.

